Search the Community
Showing results for tags 'uefi'.
Found 14 results
-
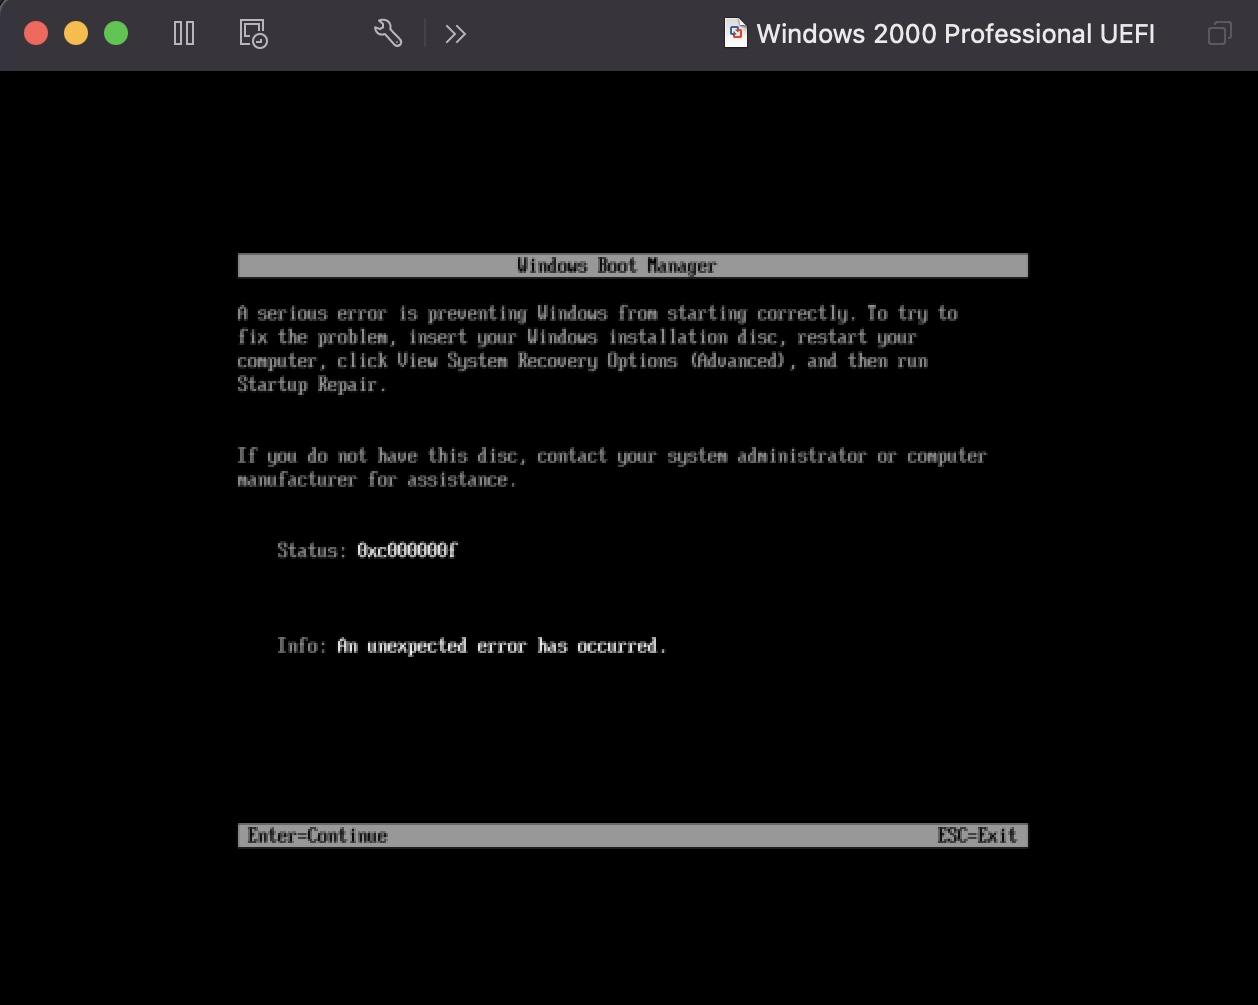
Hi, Is it possible to boot Windows 2000 on UEFI? I know it is possible to boot Windows XP and Whistler Beta 1 on UEFI, but wanted to know if it was possible to boot 2000 on UEFI. One person was able to boot Whistler Beta 1 on UEFI, but struggled with 2296. I tried this on Windows 2000, and followed the same steps shown in NTDEV'S XP UEFI video. When I try to boot it with the Vista 5219 files, I get the 0xc000000f error. What would need to be done to get 2000 running on UEFI? If it isn’t possible, why?

-
JFYI There is a new version of grub4dos for UEFI, made by yaya, this is his third version: http://grub4dos.chenall.net/downloads/grub4dos-0.4.6a_for_UEFI-2020-11-26/ yaya's post on http://bbs.wuyou.net/forum.php?mod=viewthread&tid=422652 Please remember this is a work in progress so it is an experimental version. This new grub4dos for UEFI was developed by yaya, so in no way I'm involved on it's development, but I think this thread deserves to be on this section of the forum just because the relevance of the subject. I made that desition because unfortunately the author hasn't opened a topic on this forum. Hope this desition is fine with forum admins. On this topic we will talk about the experiences with this new version, as not all the usual commands work on this version. So far our fellow wimb was able to sucessfully UEFI boot Win10XPE_x64.ISO, from internal HD and also from a USB device, hope he will share his experiences with all of us. alacran
-
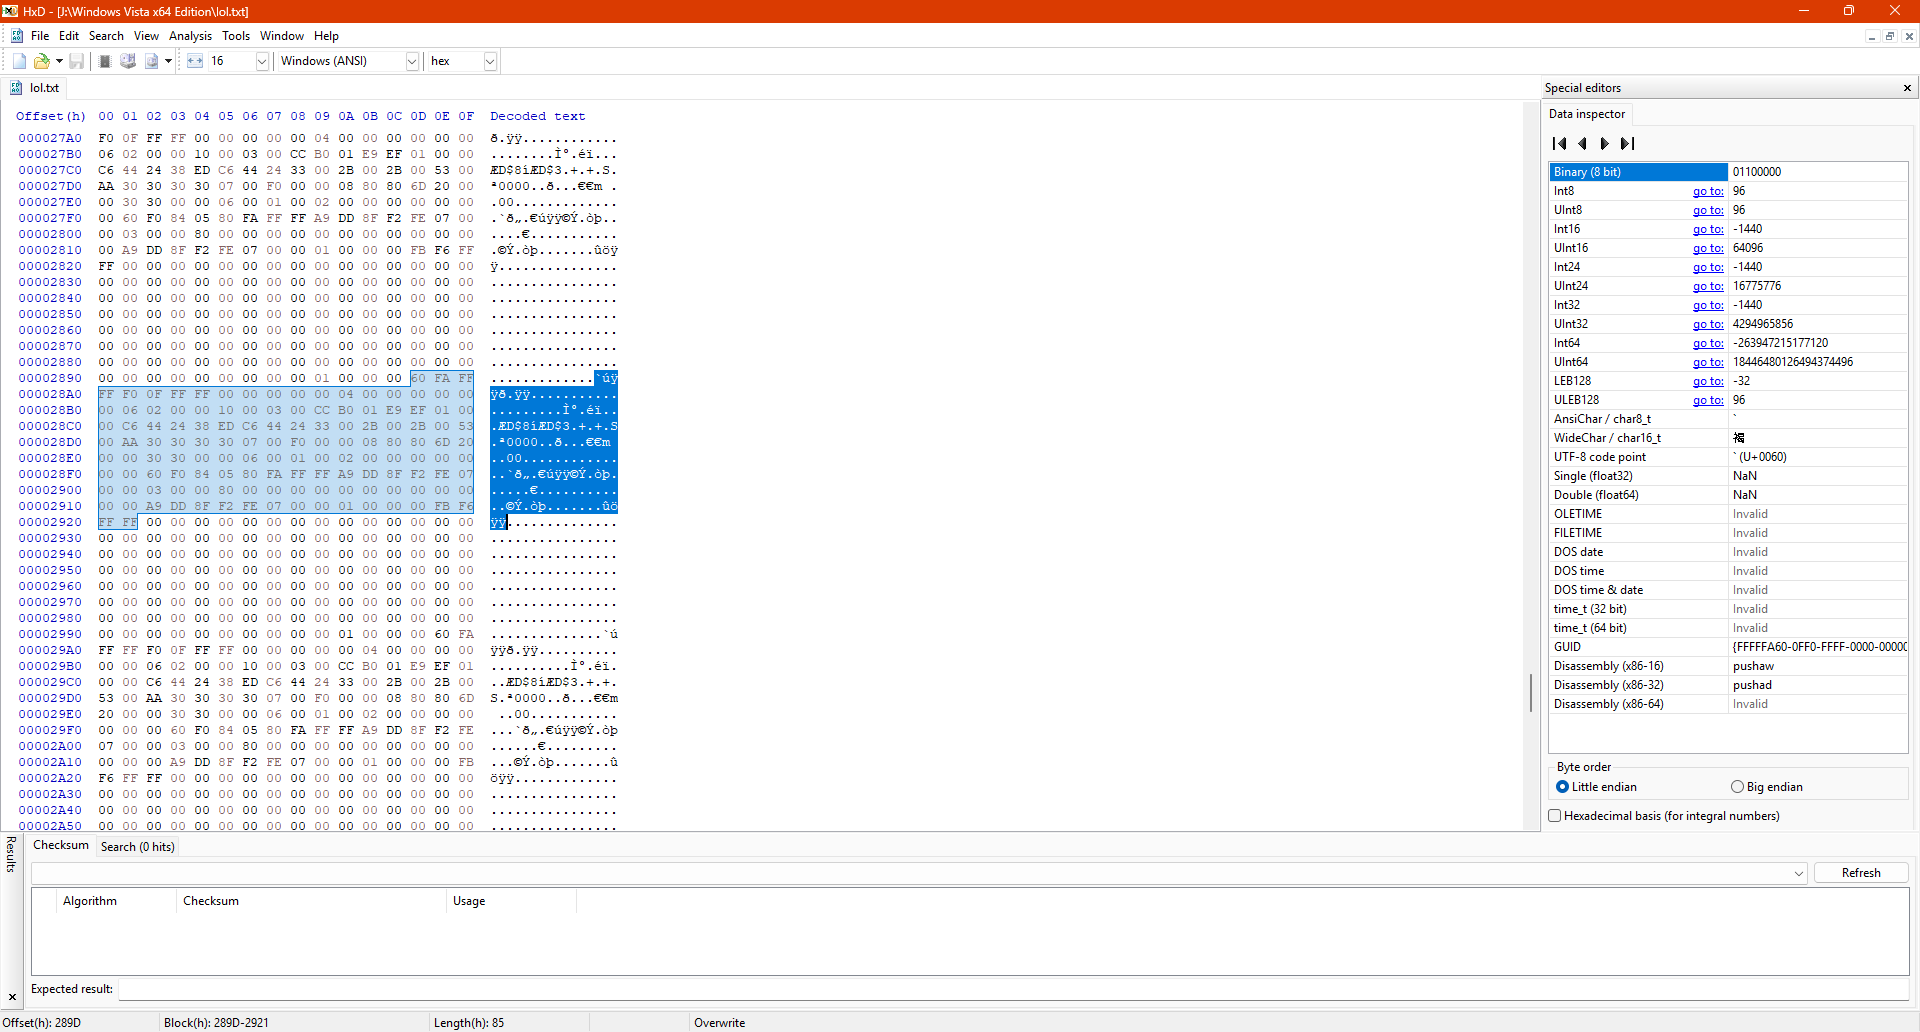
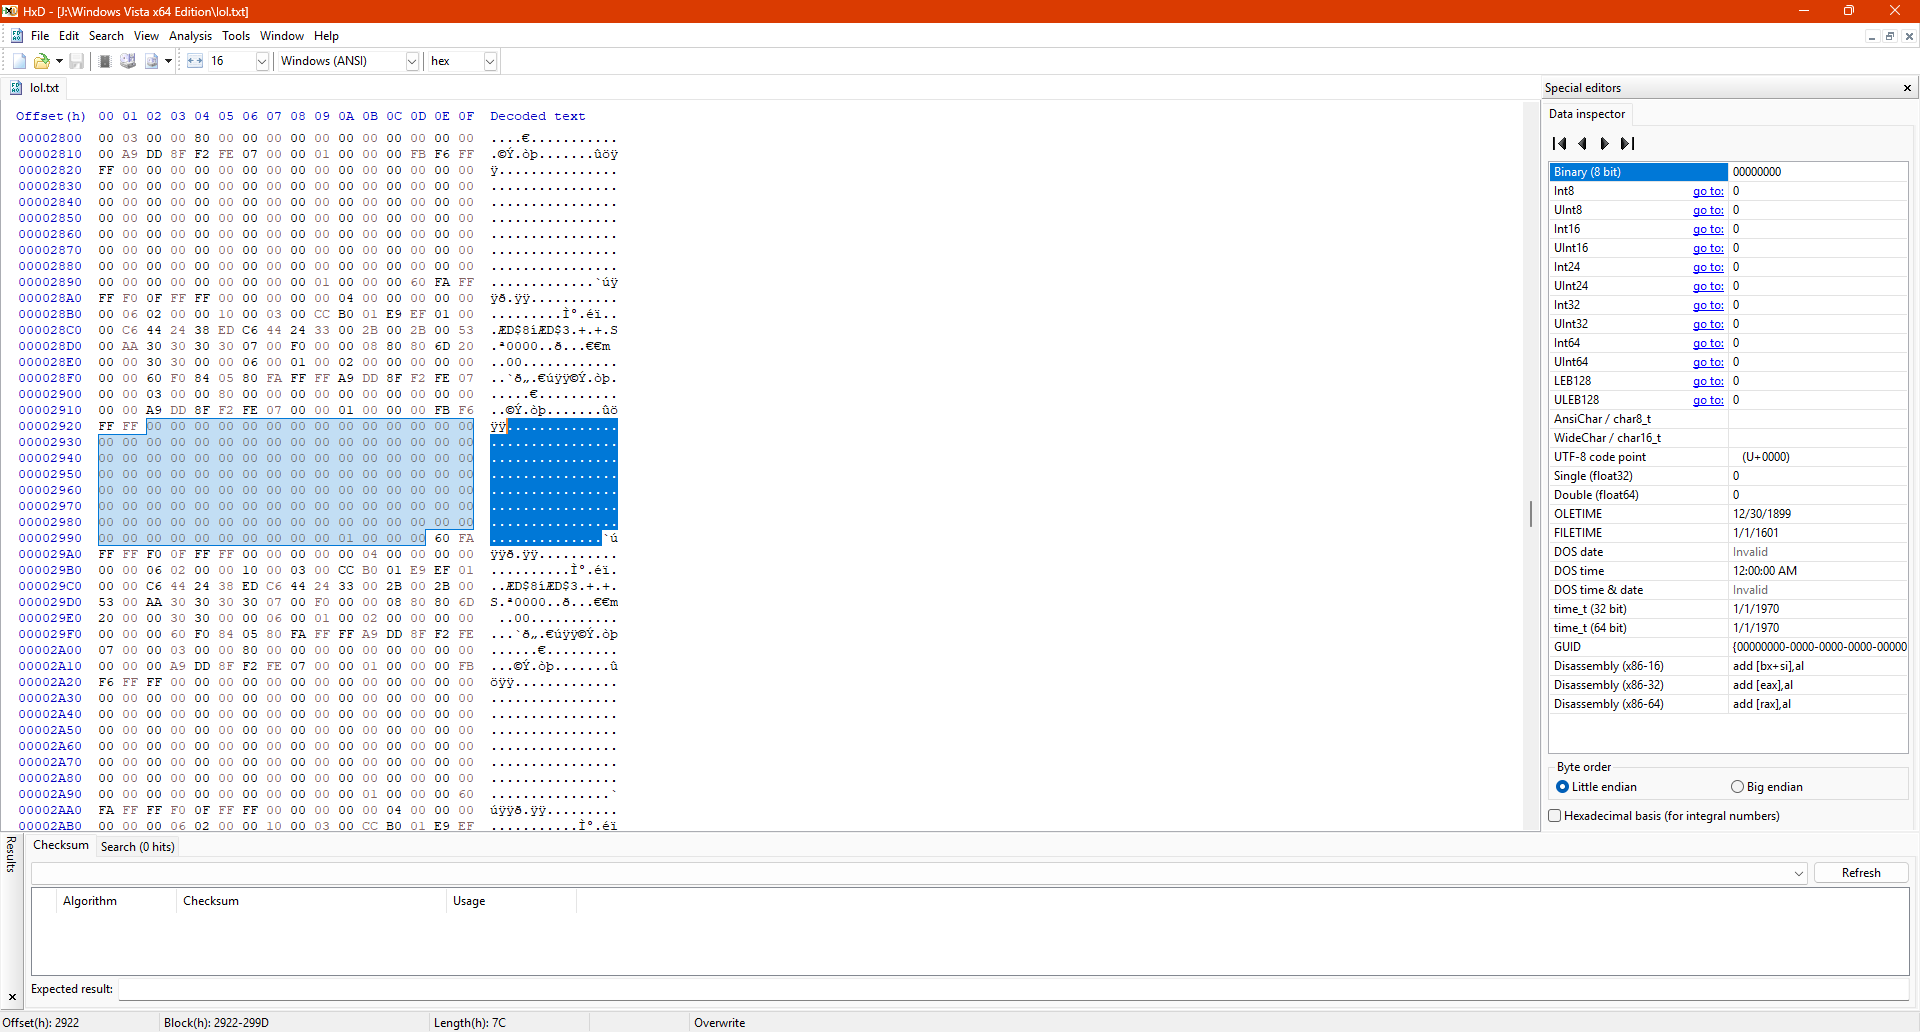
 I experimented with various options to boot Windows Vista from Windows 10's Windows Boot Manager in UEFI mode and I done it today . - On VMware, I created 2 separate partitions (one for 10 and one for Vista) and installed Windows 10 in UEFI mode. - Then, I set Boot policy to Legacy from Standard to show Windows Boot Manager in text mode. - Then I installed Windows Vista on the 2nd partition and it gives 0x0000001E error (obviously .). - When I press F10 while Vista's boot entry is highlighted, I added /DEBUG /DEBUGPORT=COM1 and /BAUDRATE=115200 to boot arguments (or select Debugging Mode from F8 menu,). - When I did the above things and then pressed ENTER to boot system, somehow, Windows Vista BOOTS with Windows 10's Windows Boot Manager in UEFI mode! It finished SysPrep phase and I'm able to reach desktop. - When I remove DEBUGPORT and BAUDRATE, it gives 0x0000001E bugcheck error. - Also removing BAUDRATE and then L changing DEBUGPORT to USB or, L changing DEBUGPORT to 1394 and setting CHANNEL to 1 also causes 0x0000001E bugcheck error. - Without DEBUG option, adding /DEBUGPORT=COM1 /BAUDRATE=115200 also boots system. - Also, without DEBUG and BAUDRATE option, system boots. - So, I think, DEBUGPORT=COM1 to COM4 does all this thing, I guess . - Then, I tried that thing on a real machine (on my spare laptop, Casper CGA-P847, has text-based Phoenix UEFI BIOS.) and also boots with it! I will write updates to inform you about all things about that. UPDATE 1: I don't know if it is caused from debugging parameters or Windows Boot Manager itself, Windows Media Sharing just won't work. It freezes the system instantaneously. UPDATE 1.1: It looks like debugging parameters causing freeze on system while Windows Media Sharing is open . UPDATE 1.2: Yup, debugging options definitely cause issues with this. I even tried with Windows Vista's original Windows Boot Manager in UEFI mode on VMware. When I disable Windows Media Player Network Sharing Service, the system will boot even when a device is shared. But when I reboot the system, re-enable Windows Media Player Network Sharing Service and when I click start Windows Media Player Network Sharing Service, the system will instantly freeze. UPDATE 2: When I debug output in VMware using serial port, I saw repeating output like this: This pattern repeats over and over again and it's 85 hexadecimal long. And these repeated dots are 7C hexadecimal long.
-
 Hi, Is it possible to install Windows XP x64 on a Dell Latitude 5490? The laptop is UEFI-only (it can only boot legacy from external ports), so I would need to install XP on UEFI. I have thought about using XP2ESD but wanted to know if there are other ways of getting XP running on the laptop.
 -
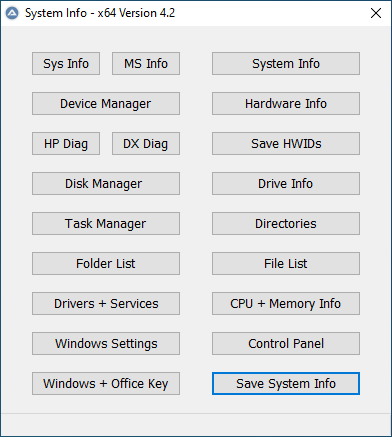
Topic Closed - Instead use PE_Tools and read more in VHD_Compact PDF ================================================================== System_Info Portable App for System Management and to collect System Properties such as Firmware (UEFI Or BIOS) and Partition Style (MBR Or GPT) and Operating System, Architecture and Drives, and Windows + Office Keys The Save System Info button is quite useful and will present the System Properties in a TXT File. Credits and Thanks to: - Uwe Sieber for making ListUsbDrives - http://www.uwe-sieber.de/english.html - Nir Sofer for making produkey - https://www.nirsoft.net/utils/product_cd_key_viewer.html - Nir Sofer for making serviwin - https://www.nirsoft.net/utils/serviwin.html - Franck Delattre for making CPU-Z - https://www.cpuid.com/softwares/cpu-z.html - JFX for making AutoIt Function to determine Windows + Office Key - https://www.autoitscript.com/forum/topic/131797-windows-and-office-key/ - Terenz for making AutoIt Functions to determine Partition Style and Firmware -https://www.autoitscript.com/forum/topic/186012-detect-an-uefi-windows-and-gpt-disk-type/ - Tripredacus for giving AutoIt code to determine Hardware UUID - this topic Download: System_Info at GitHub
-
 Part 1: You do not need to disable UEFI mode, only secure boot. Here's how to get Windows Vista working on Sandy Bridge UEFI or later. You will/may need: Windows Vista ISO, a USB 8GB or larger, a system with UEFI enabled and secure boot disabled, Rufus, another laptop with USB SATA cable or Linux run from USB on the Windows Vista computer (if no USB SATA). 1. Grab a Vista ISO. There are several with updates up to 2017 EOL. Those are highly recommended as any Server 2008 updates from 2017-2020 could break compatibility with the Extended Kernel should you choose to use it. 2. Burn the ISO to USB 8GB or larger with Rufus as GPT. 3. Go here and follow this guide: https://vinaypundith.github.io/windows_7_efi_guide/ 3A. You do not need a third party program to mount the EFI drive from within an existing Windows installation if you have a USB SATA cable. To mount it, search for CMD within the Start Menu, right click it, run as administrator, and then run the following commands. Do not add in the items within the () such as (efi part) and (replace b with your desired drive letter). diskpart sel disk 0 sel part 1 (efi part) assign letter=b (replace b with your desired drive lettter) exit taskkill /im explorer.exe /f explorer.exe Your drive should be now mounted. This is much easier than using Linux or a third party tool to view it. You may run into an issue where this may not work if you run this command on Windows 10. 7 and 8.1 will for sure work! Credit to superuser for this nifty command: https://superuser.com/questions/965751/how-to-access-efi-partition-on-windows-10 4. You have Windows Vista on UEFI mode! Congrats! 5. Now finish the setup with the Vista Extended Kernel, which you can learn more about here: https://board.eclipse.cx/viewtopic.php?f=10&t=333 ______________________________________________________________________________________________________________________________________________________________________________________________________________ Part 2: Hardware capable/not capable of Vista UEFI boot: Now it should be noted that I don't every hardware old and new to test UEFI compatibility. It should be noted that Vista will work with Ivy Bridge and earlier Intel platforms with UEFI enabled. I don't have access to much later versions of Intel platforms, and in fact, what is currently in the Unsure/Needs testing section is stuff that I do own, but either haven't tried it yet, or have but the results are unclear. If you guys have access to Intel/AMD/Nvidia hardware and wants to try out Vista UEFI, be my guess. Please let me know in this thread what your experience was and I will compile it to the appropriate section. Also, just because you see Ivy Bridge and Sandy Bridge does not mean you are not allowed to test it. There could be variations that could work differently from my experiences with the hardware (although Ivy Bridge was the only one I have tested successfully as my sole Sandy Bridge hardware crapped out earlier this year and I never got a chance to try Vista with its UEFI boot) Any hardware that does not work will get added to a does not work section. List of hardware that supports Windows Vista UEFI boot: Ivy Bridge Core i5 and other Ivy Bridge Sandy Bridge (Not sure, and I don't have my Sandy Bridge laptop anymore, but if Ivy Bridge works, then I see no reason this shouldn't too) Unsure/Needs Testing AMD Radeon R4 Graphics and AMD Dual-Core 9220e Processor (Stoney Ridge) (Did not work with K4Sum1's 2020 ISO, produced a black screen after I put the drive back in after modifying the bootmgfw.efi file on the efi partition and booted. The Windows Did Not Shut Down Successfully options showed just fine and trying to boot into Safe Mode also freezes after loading a driver. Maybe someone has a solution to get UEFI working on AMD Acer Aspire A315-21) Intel Celeron n3050 Cherry Trail (Froze after it loaded the files) Intel Haswell (Have not tested this platform yet, but given the issues documented here, I expect UEFI to be finicky at best on Haswell and later)
 -
Laptop: Dell Latitude E6530 Intel Ivy Bridge, Core i5, HD 4000. 16GB of Ram Windows 7 with UEFI mode (No Basic Display Adapter) on 4TB SSD. Installation Media: Windows Vista x64 SP2 Updated to 2017 EOL (for Extended Kernel) formatted in Rufus with UEFI\GPT settings. Hi! I was wondering if anyone knows how to run Windows Vista SP2 with UEFI enabled on Intel Ivy Bridge Core i5? If so, what do I need to do, and how do I dual-boot it with Windows 7 when Windows 7 is installed first. The ISO has all the updates from Vista launch to its 2017 discontinuation. The Windows 7 installation on UEFI was made possible by deleting Basic Display Adapter after installing it through Mini Windows 10's DISM. UEFI is needed if I want to use the full 4TB SSD space. Any help on this is greatly appreciated! EDIT: I solved this issue. You can get Windows Vista working under UEFI (on devices that support Windows 8 and later such as Sandy/Ivy Bridge, Haswell, Broadwell, Skylake, etc) using UEFI7. Just replace the Windows 7 ISO with the Windows Vista updated to 2017 eol ISO (if you are using that ISO). Details on how to do this can be found here: https://vinaypundith.github.io/windows_7_efi_guide/
-
Hey all I have been at this for several months now. I currently own a Intel Computestick model which has an atom processor and 2GB of ram. I understand that when Windows XP was out there was no such thing as a UEFI boot. I have added the needed SATA drivers in order for it to find the SSD inside it. Problem being is that it just wont boot into the windows xp setup at all naturally because its UEFI only. The computestick I am using for this wonderful experiment is the STCK1A32WFC. But there has to be some type of way of doing this! A lot of my very very old programs will only work in XP and I purchased these computesticks for that single purpose - installing windows XP on. The computestick does not have a legacy BIOS option sadly, So simply changing to Legacy BIOS in the BIOS is not an option. I have tried it out (the ISO) in virtualbox and it works just fine - in legacy mode naturally. The bios screen looks like this: It has an option of either Windows 8.1/10 32-bit mode or Ubuntu 64-bit mode. Most of the time if I make a Windows XP boot USB via Rufus it boots fine in Windows 8.1/10 mode using GPT and UEFI selected. When I try running, say Ventoy, it will only boot up the windows xp iso using the Ubuntu 64-bit option (since ventoy is linux based menu). Trying to boot from the USB drive using Rufus doing MBR with BIOS (or UEFI-CSM) something like Windows-XP-Professional-Incl-SATA-Drivers.iso does not bring anything up for either option. I hear its possible to get windows XP to boot in UEFI using some vista beta files which is explained in more detail here But I am unable to follow it. I understand Windows XP can not boot from a GTP partition and UEFI. BUT there has to be something that can do it out there! It would be awesome if a guru could help out with getting this Windows XP onto this stick!!!
-
 MAKE SURE SECURE BOOT IS OFF WHICH IT PROBABLY IS IF YOU ARE READING THIS, ALSO MOST VISTA COMPATIBLE MACHINES LIKELY DONT SUPPORT UEFI This took a while to do here properly but I figured it out in the end. This works on an OptiPlex 390 using Vista SP2 x64 and a HDD in UEFI mode, booted from a UEFI+GPT USB (made from the original MSDN SP2 ISO and Rufus 3.5). For some reason it seems to bug out when trying to install even to a clean HDD. It’ll complain about being unable to boot from the device on your machine and then fail to create the partitions correctly with an error. There is a way around this and it’s fairly strange to me... which likely pinpoints it to being a problem with diskpart’s conversion system to GPT and the Vista SP2 installation environment: on the disk/partition selection, open a command prompt window (Shift+F10) and type the following: diskpart list disk select disk ü clean exit exit DON’T TYPE CONVERT GPT! IT SEEMS TO JUST COME UP THE ERRORS AGAIN, ALSO REPLACE ü WITH WHATEVER YOUR DISK IS OF COURSE Now exit the installation process and reboot the machine (don’t force it off, just let it reboot and then open the computer’s boot manager to boot into the Vista USB. When you get to the disk select screen just press next and it works fine from there. Wait a while and it should eventually get you to the OOBE. Once you’re booted into the desktop tap Windows+R and open diskmgmt.msc, confirm the UAC prompt and right click your C drive’s properties to confirm it is using a GUID partition table If everything worked, enjoy! Some older boards supporting UEFI if they exist may want you to specify an EFI boot file, or if for some reason the entry isn’t made during the installation. Remember this is an EOL OS. Take obvious caution and read up on the subject as necessary, and don’t refrain from asking around/searching the community for help if you’re not entirely versed Note: While I wrote this for Vista it will work on W7 too the same way
 -
Is it possible to set up a Windows virtual machine with 32-bit UEFI in VMware Workstation? I couldn't find an setting to configure UEFI. Please help!
-
 Virtualize Win8.1: BIOS + MBR Physical Partition > to > WIM Image > to > UEFI GPT VHD Virtualizing Win8.1 from BIOS + MBR Physical Partition > to > .WIM Image > to > UEFI GPT .VHD Sometime last year I found out about Native boot VHDs and tried to go that way for good. There were some issues with hardware and OS (Win7 at the time) not working out and lot of new things that I was learning about VHDs. Anyways, that confusion, learning and failure led to a better path So this 2015, I figured out how to get VHDs (with Fresh Win 8.1 Installs via Install.WIM DISM Apply Image) to Native Boot on Surface Pro 3 (Sp3). I am going to attempt doing the following steps using DISM/ ImageX: MBR [Customized Win 8.1] (Physical) > Create Image > [Customized Win 8.1 .WIM] (Virtual - File based so - No sectors or MBR/GPT?? ). [Customized Win 8.1 .WIM] (Virtual) > Apply Image > [Empty New GPT .VHD] (on SP3) My thought is that by going to .WIM I bypass the whole converstion drama between MBR/BIOS & GPT/UEFI as the .WIM is agnostic of both of them? Is this a valid thought or not? Thoughts? NOTE: I can.. try out the above with creating a small FRESH MBR Windows 8.1 partition on X61T/ T61 and then doing the above 2 steps. Convert it to a .WIM and then applying to a GPT .VHD I am guessing a SYSPREP is recommended somewhere in between. Someone somewhere also mentioned doing Sysprep in a VM/ Hyper V instead? Or is it not needed? Thoughts? Where and how would you recommend applying the SYSPREP?
 -
So as I've noted elsewhere before, WinPE for Windows 8 and 8.1 will use a display's native resolution if the hardware supports GOP in UEFI mode. Windows 10 seems to be the same way... and this WILL be a problem. Testing on a notebook with a native 4k display... installation is slightly... difficult: Picture is bad but it gets the point across. When I get hands-on with this specific system, I will get clearer pictures. *NOTE: This will be a problem for Windows 8/8.1 as well.
-
On a BIOS PC, most folks use Grub4DOS to boot ISO images. But how to boot them on UEFI PC, especially without Legacy CSM Mode, since Grub4DOS doesn't support UEFI? Taking a popular Acronis True Image Home (ATIH2014) ISO as an example (either Linux or WinPE 5.0 based, or better BOTH), can someone explain, how to boot an ISO on UEFI Windows 8.1 PC? I found one example of booting seemingly WinPE-based UEFI ATIH2014 (release unknown) by Grub2. That didn't work for me - couldn't find dat8.dat and dat9.dat files in Boot.bif image extracted by UltraISO from the mounted ATIH2014 ISO boot sector. I couldn't also mount any *.img files from Floppy Image written on the ISO's CD track due to unknown *.img filesystem. Its unclear, why boot images extracted by ISOBuster were different from those extracted by UltraISO from the same ISO? As well, how an average user can derive similar grub.cfg menu section - based on what miracle vision? Any background explanation or more generalized logical approach would be handy... Also, how GOP-only HW support plays into this?
-
If you have a computer with Windows 8 that was installed by an OEM on a GPT disk, the Windows 8.1 update from the Store will create a second recovery partition! Alternatively, if your OS is installed on an MBR disk, the 2nd partition is not created. This second partition is seen as a 350MB Recovery partition. For example a standard deployment of Windows 8 on GPT with recovery partition and diskpart: DISKPART> list part Partition ### Type Size Offset ------------- ---------------- ------- ------- Partition 1 Recovery 300 MB 1024 KB Partition 2 System 100 MB 301 MB Partition 3 Reserved 128 MB 401 MB Partition 4 Primary 50 GB 529 MB Partition 5 Primary 5000 MB 50 GB The above is outlined as: Part 1 = WindowsRE (winre.wim) Part 2 = BCD/boot file location Part 3 = MSR Part 4 = OS Part 5 = Recovery Image (install.wim) After the update to Windows 8.1, it will stick a new Recovery partition after the OS. Here is the new layout including details: DISKPART> sel disk 0 Disk 0 is now the selected disk. DISKPART> list part Partition ### Type Size Offset ------------- ---------------- ------- ------- Partition 1 Recovery 300 MB 1024 KB Partition 2 System 100 MB 301 MB Partition 3 Reserved 128 MB 401 MB Partition 4 Primary 50 GB 529 MB Partition 5 Recovery 350 MB 50 GB Partition 6 Primary 5000 MB 51 GB DISKPART> sel part 1 Partition 1 is now the selected partition. DISKPART> detail part Partition 1 Type : de94bba4-06d1-4d40-a16a-bfd50179d6ac Hidden : Yes Required: No Attrib : 0X8000000000000000 Offset in Bytes: 1048576 Volume ### Ltr Label Fs Type Size Status Info ---------- --- ----------- ----- ---------- ------- --------- -------- * Volume 3 Windows RE NTFS Partition 300 MB Healthy Hidden DISKPART> sel part 5 Partition 5 is now the selected partition. DISKPART> detail part Partition 5 Type : de94bba4-06d1-4d40-a16a-bfd50179d6ac Hidden : Yes Required: Yes Attrib : 0X8000000000000001 Offset in Bytes: 54401171456 Volume ### Ltr Label Fs Type Size Status Info ---------- --- ----------- ----- ---------- ------- --------- -------- * Volume 5 NTFS Partition 350 MB Healthy Hidden The update goes through a checklist when updating: 2013-10-25 09:41:16, Info SP F Suspend bitlocker if needed 2013-10-25 09:41:16, Info SP S Boot WinPE 2013-10-25 09:41:16, Info SP S Prepare SafeOS for rollback 2013-10-25 09:41:16, Info SP S Set SafeOS boot entry as the default boot entry 2013-10-25 09:41:16, Info SP S Cleanup safe OS mount directory 2013-10-25 09:41:16, Info SP S Apply WIM file PathForNewOS, index 4 to C:\$WINDOWS.~BT\NewOS 2013-10-25 09:41:16, Info SP S Set boot command %SYSTEMDRIVE%\$WINDOWS.~BT\Sources\SetupPlatform.exe /postoobe for phase 3 2013-10-25 09:41:16, Info SP S Set boot command %SYSTEMDRIVE%\$WINDOWS.~BT\Sources\SetupPlatform.exe /presysprep for phase 0 2013-10-25 09:41:16, Info SP S Set boot command %SYSTEMDRIVE%\$WINDOWS.~BT\Sources\SetupPlatform.exe /postsysprep for phase 1 2013-10-25 09:41:16, Info SP S Set boot command %SYSTEMDRIVE%\$WINDOWS.~BT\Sources\SetupPlatform.exe /preoobe for phase 2 2013-10-25 09:41:16, Info SP S Set entropy for C:\$WINDOWS.~BT\NewOS 2013-10-25 09:41:16, Info SP S Add boot entry for C:\$WINDOWS.~BT\NewOS\WINDOWS. Locale = en-US2013-10-25 09:41:16, Info SP S Set OS Switch rollback checkpoint 2013-10-25 09:41:16, Info SP S Backup the recovery partition to C:\$WINDOWS.~BT\Sources\RecoveryPartitionBackup 2013-10-25 09:41:16, Info SP S Apply EAs for C:\$WINDOWS.~BT\NewOS 2013-10-25 09:41:16, Info SP S Install Dynamic Updates 2013-10-25 09:41:16, Info SP S Install Driver DU Updates 2013-10-25 09:41:16, Info SP S Install OS updates (DU) to keep installation up-to-date 2013-10-25 09:41:16, Info SP S Relocate OS from C:\$WINDOWS.~BT\NewOS to C:\ 2013-10-25 09:41:16, Info SP S Add boot entry for C:\WINDOWS. Locale = en-US 2013-10-25 09:41:16, Info SP S Prepare the new OS for first boot 2013-10-25 09:41:16, Info SP S Setup the recovery partition 2013-10-25 09:41:16, Info SP S Orchestrate OS switch for NewOS with safe OS SafeOS and rollback OS ExternalRollback. DelayedSwitch: 0 2013-10-25 09:41:16, Info SP S Copy log files from C:\$WINDOWS.~BT\Sources\Panther to C:\WINDOWS Attached is selected entries from the setupact.log after the update, which shows some of the things that the update does. Things left out is when the update downloads and install.wim, mounts it with DISM, scans the existing OS for applicable drivers and packages and injects them, unmounts the image and them uses DISM to apply it to the hard drive. Regarding the extra recovery partition, there does not seem to be a way to prevent it from happening. neatstuff.txt