submix8c
Content Type
Profiles
Forums
Events
Everything posted by submix8c
-
=== Instructions = Preparation Steps. 1- Insert Install Media and perform a Hardware Compatibility Check. Note any Drivers or Software that are not compliant or will need upgraded. Pay PARTICULAR attention to Drivers. MINIMUM Drivers that will be needed are - 1a- Mouse and Keyboard. Normally, these are supplied on DVD and shouldn’t cause a problem. 1b- Network (NIC) Driver to allow access to the WWW. A MUST to update any other Drivers (as necessary) and to Activate Online. Note1 - Generic Video Driver MAY be installed if your Driver isn’t supplied on the DVD. This can be dealt with later. Note2 – Obtain and store OFFLINE (e.g. External USB Device) any drivers for your Hardware, in particular the MINIMUM ones listed above. DO NOT attempt to Install at this time. 2- Ensure you have imaged/cloned (NOT COPIED!) your first two partitions to External Media. This can be done with DriveImage XML (Free). http://www.runtime.org/driveimage-xml.htm 2a- Make Partition#1 Visible to allow for Imaging. Start a CMD-Prompt 2a1- Start->All Program->Accessories-Command 2a2- Right-Click and “Run As Administrator” 2a3- Enter the following 2a4- Go to - Control Panel->Administrative Tools->Computer Management Select "Disk Management". Click on the line that lists your Three Partitions (lower right). Right-Click the First One. "Change Drive Letters And Paths" "Add Drive Letter" (any available). 2a5- Clone the Partition. Make note of the Volume Label. I suggest you give that as the Image Name. 2a6- Re-hide the Partition – -Perform Step#2a4 above but THIS time (in last step) REMOVE drive letter (whatever one was assigned). -Perform Step#2a1 through Step#2a3 above but THIS time use "id=DE" instead of "id=06". 2b- Normally the D-Drive (Recovery Parition#2) is not hidden. Create the Image directly. I also suggest using the Volume Label as the Image Name. After the Image is created I HIGHLY recommend hiding it using the “Hide” procedure as follows. Note that ORIGINAL should have been “id=07” (should a Complete Dell Factory Restore be done). -Perform Step#2a4 above but THIS time (in last step) REMOVE drive letter “D” from Partition#2 (NOT Partition#1) which will be the SECOND one. -Perform Step#2a1 through Step#2a3 above but THIS time use "id=DE" instead of "id=06". (Apologies for the messed-up code box. don't know how to fix it. Also THESE are the Commands used above. They're not positioned in the correct place.) diskpart select disk 0 select partition 1 set id=06 override exit exit Logoff/Reboot Additional notes to all of Step#2 above – The two Images can be created on the OS Partition first (preferably a separately created folder) and then burned to DVD’s if you don’t have a large enough USB Device to hold them. BE SURE that all files created by the Imaging Software are retained with the actual Image – INCLUDING whatever Software was used (just insurance). 3- The Running OS will be wiped out and replaced so be SURE 3a- you have ALL Software that you have currently installed placed on External Media 3b- you have ALL Personal Data (Picture, Videos, Music, Playlists, etc.) backed up to External Media ...so that the Personal Data can be copied back to your New OS and the Software can be re-installed. NOTE that you should ensure you have ALL SOFTWARE KEYS saved elsewhere (NOT on the OS) and any other Vendor-Specific Requirements fulfilled before proceeding. The method of backing up your Personal Data is UP TO YOU. It’s possible to use the Built-In Vista “File Settings And Transfer Wizard” to do this. BE AWARE that it’s NOT recommended to retain ANY Registry-oriented settings since there MAY be corrupted entries or some that may NOT be applicable to your New OS Install. 4- Remove ALL externally attached hardware devices (e.g. USB) except Mouse, Keyboard and Monitor. ADDITIONALLY, temporarily DISCONNECT (highly recommended) from your ISP’s Modem, Router (whatever) by unplugging your Network Cable. If necessary, temporarily TURN IT OFF (unplug from the wall) if you have Wireless Connection. If you have any other services (e.g. VOIP, Television) they will undoubtedly be off for a short period of time. Don’t worry, this won’t take long.
-
=== Preamble (Dell Specific Information) Dell has three partitions allocated from the factory. http://www.goodells.net/dellrestore/vista/ There could possibly be a fourth. In either case, the Instructions will (should) still apply. For the purposes of this Topic, only three partitions apply as described in the link. The first two MUST be retained in order to Factory Restore at a later date (see “Instructions” later). 1- The following link explains how to Restore To Factory using your Original Vista DVD or your newly purchased DVD Media. http://www.goodells.net/dellrestore/vista/vistarecovery.shtml Please note that it’s not entirely accurate since Partition#3 must be Formatted at/before performing “Screen#14”. (More on that in next link.) At Screen#14 – 1a- At the initial Command Prompt perform the following Command format c: FS:NTFS /V:OS /Q1b- Proceed with Step#14 and the following instructions given. 2- The following link (second “gooddells” link) is the Dell Approved Method. http://www.dell.com/support/Article/us/en/04/50876/EN Please note that the first link in the “gooddells” instructions will only work if your Original Dell Vista OS is still on Partition#3 and is still bootable to/via “F8” and the “Dell Factory Image Restore” Option still exists on the Recovery Screen. The reason for the Dell Approved method implies that you have not wiped the Recovery Partition (a requirement for this topic) and the Dell Tools Folder (and all other Original OEM folders/files) has not been destroyed. Specifically, the program “PCRestore” (proprietary Dell program) performs the #1 (“gooddells) process described above (as corrected). BE AWARE that after either of the above has been performed that the “F8” option “Dell Factory Image Restore” MAY NOT be present (but should be). This would normally occur if you have Imaged/Cloned your Original Hard Disk (Complete – all Three Partitions) to another to (e.g.) have a larger (smaller) HDD installed in place of the old one. This topic does NOT address (at this time) this scenario (which CAN be repaired). In addition, -IF- this is the situation then the BCD Store WILL be invalidated and further steps would need to be taken (also not addressed ATM).
-
These instructions are intended to provide the reader with a method of “How to Clean Install Windows 7 to a Dell Factory Installed Windows Vista and Retain Recovery To Factory Facility”. The instructions may also apply to HP (Hewlett-Packard) but are intended for Dell only as HP may have a variation not covered herein. HP definitely has a different method of “Factory Restore”. If the reader wishes to proceed directly to the operation, then skip directly to “Instructions” section. === Intent The intent is to allow for Dell Restore To Factory (Vista) if the reader wishes to restore the computer to the condition it was in when purchased 1- for resale 2- to keep and begin as if first unpacked and plugged in thus retaining the License (Product Key) used to install Windows 7. This may involve using “Activate By Phone” Method if the reader uses the Install Media on another computer since Activation is generally tied to a given computer using Purchased Media. Purchased Media in this context means a DVD that is 1- Full Product 2- Upgrade Only 3- or Generic OEM. Note that this Topic is primarily intended for #3 above. Purchasing such media is (apparently) legal for use on any computer but is generally used by Refurbishers to wipe the Hard Disk and begin fresh, thus disabling/invalidating the pre-existing OEM-installed Windows Vista (or any other OS, for that matter) Certificate Of Authenticity (COA). In this case, the Purchased Computer has been logged in the Microsoft Activation Server Database as being no longer valid for further use and a New COA and Refurbisher OEM Media are issued along with the Refurbished Computer with NO SUPPORT beyond what the Refurbisher provides with the Sale Warranty. In the case of this Topic the reader has purchased OEM Media and a Single Key (perhaps a hard-copy COA or Electronic Media COA) along with some form of Hardware (maybe even a USB Flash) to “keep it legal”. Please note that this Topic does NOT include “Upgrade” or “Clean Install To Empty Hard Drive”. That information is elsewhere on the World Wide Web and is outside the scope of this Topic. This Post and the following are attached in full as a Word 97-2003 Document and can be viewed and printed with free Word Viewer from Microsoft. I have broken it up into several posts for clarity. === Thanks to MSFN member Sophy for prompting me to test the scenario for her purposes. All the best wishes to her and her brand spanky new Windows 7 Home Premium. http://www.msfn.org/board/topic/175077-in-place-upgrade-to-windows-7-home-premium/ Instructions.doc
-
You mean the one that increases the connections? nLite does that for you (AFAICR) so just try it out and hex compare the two. Besides, if that's what your asking for, the instructions should be on the WWW somewhere.
-
"Unattended Boot CD" aka "UBCD98SE" (a removed topic) if you can find it somewhere does all that Autopatcher does from a Clean or Upgrade Install from CD. Be aware that it contains a small amount of "warez" so the topic was removed. (Yes, I have it as I participated in the construction as well as AutoPatcher and NO I won't hand it out or search the WWW for it for you and link to it. You're on your own...)
-
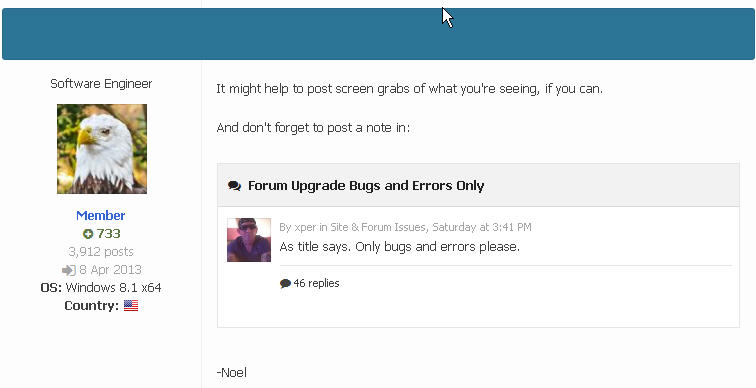
Here's your screen cap. FFv12 on XPSP3 fully (nearly) updated. Nice blue bar, nothing else on it. Where's the UserName and Time Stamp? It's all... gone!

-
Uh... nope! Is it my FF v12 browser? That whole "bar" is empty and a simple shade of blue (?) bar above the post.
-
Methinks I'll follow this one. Just figured out the "streams" thingy that Noel mentioned above. And agree that the "old way" was more conducive to "what's new since last visit".
-
I have only one phrase for this "upgrade"... OH MY FRACKING GOD this is a NIGHTMARE for me! Followup phrase - Looks more like a Twitter/Facebook Upgrade. Can't find anything. Is there an Instruction Manual for us somewhere? edit - Where's the Timestamp for posts at?
-
Well, it seems that the On-Board Video Drivers won't function properly without the Chipset Drivers first. For Add-On's it's irrelevant, true. Been there, done that and it'll drive you crazy. Long shot... Do you have "Enable Legacy USB Support" (paraphrase) in the BIOS? For PS/2 you want that off as it only applies for USB Keyboard/Mouse attached. That same thing will bite you for any OS, especially swicthing from PS/2 to USB in XP (also will drive you nuts) and you have to do some stunts to get it to find the drivers (via SAFE Mode, AFAICR). HTH
-
Your EXE file (I assume the BAT is inside it) is being unpacked to a generated folder name inside your TEMP directory. Better take a closer look at the documentation for how to circumvent that. It'll be an additional parameter that you add in the "Text" window of the SFX. Trust me, the info is there. HTH
-
US Department of Defense is aggressively upgrading to Windows 10
submix8c replied to maxXPsoft's topic in Windows 10
Are you absolutely sure about that? Not even to IPL-boot the Mainframes? -
Twitter & Streamable.com videos play Win 7, but not in XP - why?
submix8c replied to E-66's topic in Windows XP
(Big fat DOH!) Forgot all about that. Nonetheless, Twitter doesn't like FF12 for the 50% I said before. (...checks on the above - later, though.) -
FYI... Monitor is irrelevant. Tied thru the VGA (relevant). Older nVidia work fine (this one is Geforce4). Did you install the Chipset Drivers first? ALWAYS install them the very first thing before any other drivers! http://www.gigabyte.com/products/product-page.aspx?pid=1845#sp
-
Twitter & Streamable.com videos play Win 7, but not in XP - why?
submix8c replied to E-66's topic in Windows XP
It's Twitter. They play fine on this XP (FF v12). Twitter hates anything less than Windows 7. The same thing happens to me 50% of the time (on Twitter). For that matter Twitter hates everybody (almost). Disagree with an opinion, you can get reported. Yes, that's part of their new policy and actaully in the Report Screen (look it up). I suggest live with it or go to another social media platform. Twitter sux... -
Signature of XP invalid / Failed install product catalogs
submix8c replied to HeadHunter2's topic in HFSLIP
That kind of indicates you're trying to slip Non-German fixes into a German XP. https://support.microsoft.com/en-us/kb/177761 -
Dollar Store Specials! Buy one, get two free!
-
As Tripredacus said - Turn it back On Here (that's where you must have turned it off). That's the "button" you must have pressed. If it's disabled on the Server (or any machine) you can't get to the Server (or any machine) via RDP. Right-Click "Computer", click "Properties", open it and there's the "Remote" setting/tab (in Control Panel->System). HTH (Pssst - turn it back on... )
-
No, there's no such thing as an Official Service Pack for either Win98SE or WindowsME. Only Win95RTM had an Official Service Pack (one only) and subsequent version were OEM-Only. That's why we built Unofficial ones and AutoPatchers. You must be really young (?) to have not known that. HTH
-
Um... yeah! Exactly what I was talking about! It can be done manually, but using an Add-On simplifies the exact samer procedure.
-
No, Roffen, bphlpt was just informing you of useful info. Use the recommended SP4 Slipstream method (using nLite) to creat a fully up-to-date DVD (won't fit on a CD), figuring on (since the POS flag will be set) more Updates for MS Update (for POS). You're XP is already at SP3, so you just need Post-SP3 (that would be SP4). HTH
-
Well... Just about the time Server2k3 was being intruduced, along with XP-Prox64? As for Win95 "home use", AFMC used NT4 as Server (AFAIK, maybe Linux?) and Win95 for the "workers" to save their Reports on, also to "connect" to the AMDAHL Mainframe. So, yes, for the general populace, but no when it came to US Gov via (apparently a special price). Pretty sure US Gov employees were "guinea pigs" (aka "testers") for Win95. Indeed, we used (AFAIK) NT3.x/4.x for Servers and Win3.11 (WFW) before that but those obviously weren't conducive to pretty formatted Word Docs. (Kermit was fun!) </chime in>
-
Hmmm... As jaclaz said (re InRAM) a lot gets taken. However, the In-RAM PE1.x (using WinBuilder) can boot and run in 512mb RAM, which is why you've been suggested to go that route. You can create a PE1.x (any way you like), include the NIC drivers (all for each target machine), and use a script (or set-of) to apply to the Target the WIM from a fixed Server Folder (one WIM per unique machine?). Prep the images with 1.x (there is/was an OPK Extender GUI Tool to help), Capture a/the WIM(s), and PXE-apply it/them. Of course I could be totally missing the boat (I'm late to a lot of meetings that way) and am sure I'll be corrected if way off base.
-
I'm not sure but I believe you have to install it via Unattended before you get to the Desktop? You can't directly integrate it, rather you have to install it after-the-fact (ref "$OEM$" folder).
-
The "hidden" one is (AFAICT - As Far As I Can Tell) is simply a Dell-Specific (Volume Label being) "UTILITY" Partition accessible via (again, AFAICT) the F12 Key when you first turn your PC on and will be listed in the "Boot Device" (?) screen. The F12 Pop-Up is a one-time-only Boot Device Selection and that Special Boot Paritition is (I believe) detected directly without altering the MBR or anything on the HDD. It's sole purpose (AFAICR - As Far As I Can Remember) is to test Physical Devices for errors. I'm thinking this is done (usually) by request from Dell Support. Pretty sure exiting simply reboots standard MBR Boot. It's only 55mb (MegaBytes) and has even less than that in the way of actual contents. Probably that's just a "general size guideline" used by Dell for XP/Vista (and maybe Win98/WinME?). It's definitely a FAT16-type Partition (ref Goodells) and (AFAICR) literally runs a version of DOS to run the "Dell Diagnostics" Programs. Therefore, it very well could have backed up in a matter of seconds. According to this - https://www.runtime.org/driveimage-xml.htm you should be able to view the contents to check to see if it has "anything" in it? I use Symantec Ghost so have no direct experience with DriveImage. I do know, however that even Ghost required changing the Partition Type (I gave you the instrusctions to flip to "06" for Imaging then flip back to "DE" after finished, so I hope you did that. :unsure:Then again, maybe DriveImage didn't require the flip/flop? (Look inside it with the DriveImageXML Viewer.) --- Yes, the ISO was a good idea. Be sure to burn it to CD. If you don't know how to burn an ISO, just ask. I'm pretty sure burning an ISO Image is built-in to Vista and up. --- So, if you have a good backup of the D-Drive and (hopefully) a good backup of "Hidden" V-Drive (I'm assuming you un-hid then re-hid it?) the backing up of C-Drive doesn't matter since (hopefully) "Genie Timeline" will take care of all of your important Docs, Pics, Vids, Music, etc. I still hilghly recommend that (if you can run it) that you use the Vista Built-In "File Settings And Transfer Wizard" as well (another USB-Drive folder?). Be PERFECTLY aware that since you probably have a corrupted User Registry that those items NOT be "backed up" since "restoring" them later (to Windows 7) will only corrupt your brand new User Profile. --- I'm probably not going to be able to upload the instructions -or- make a direct post since all the the Pictures will go past my allotted Upload Limit. HOWEVER I can link to two separate instruction sets and provide info (very clearly) which steps get altered. I'll try to do it similarly to (ugh!) Tax Return Instructions. "If you are here - STOP! and go to Step#999.". And yes, they ABSOLUTELY work! You even get 30 days to finish up Hardware (seem in the Device Manager) before you actually Activate. (Side note - there's even a way of backup/restore of your Activation in case some Program Install boogers the Install.) BUT, the procedure DOES work! In addition, the procedure to "Go back to Factory" is so simple a Middle School student could do it. I've already tested this as well (uses files inside the D-Drive). I'll provide the link to that. The link that Goodell has to the Dell method is the best one since there should be a special program (PCRestore) that does all the work. --- On the above note, I would like to request that you get a Directory Listing of your current D-Drive to ensure that you have the same setup (folders/files) my TESTBED computer has. Sadly, KarenWare website is now in "the Cloud". BUT this is the program you want to get (No-nag FREEware!!!) - http://www.majorgeeks.com/files/details/karens_directory_printer.html Note that Karen is deceased, hence the original website's demise as well. Also, it requires (AFAICR) Visual Basic 6 Runtime installed (already in XP and Vista). - Download to (probably) your USB-Drive (somewhere to save - you'll like it!) - Install it and at end select to Run it. - Click the "Save To Disk" Tab (use all defaults) - Select your D-Drive - Click "Save To Disk" button and save the TXT file (somewhere) then Exit - Zip (7-Zip) the TXT file and upload it. The above will probably be a bit difficult since you Vista is messed up BUT it does NOT require Administrator Privileges, so you should be able to use it normally. --- Hope the above didn't confuse you. I'll be back (said The Terminator). I'm going through everything on my TESTBED computer and it takes time - lots of time. So... BE PATIENT! Better safe than sorry.