Search the Community
Showing results for tags 'DISM'.
Found 8 results
-
For my main workstation earlier this month I brought in the latest full set of Windows 8.1 patches (minus a few that were hidden months/years ago that are probably not even applicable/visible any more, such as the GWX update). Note that there were no January updates, per se, for Windows 8.1, just those from December. Yes, I waited a while before allowing them. My system seems to work with these updates in (it's been running solidly for weeks now) but one thing I noticed is that the December update broke System Protection (i.e., the System File Checker - SFC /VERIFYONLY and SFC /SCANNOW - would fail). I got to the bottom of it. There was something wrong with the servicing database entry for, of all things, "Sound Recorder.lnk" - which showed up as "hash doesn't match actual file" messages for several different copies. This was the key blob of messages in C:\Windows\Logs\CBS\CBS.log that revealed the problem: 2017-01-30 16:14:48, Info CSI 00000976 [SR] Verify complete 2017-01-30 16:14:48, Info CSI 00000977 [SR] Repairing 1 components 2017-01-30 16:14:48, Info CSI 00000978 [SR] Beginning Verify and Repair transaction 2017-01-30 16:14:48, Info CSI 00000979 Hashes for file member \SystemRoot\WinSxS\amd64_microsoft-windows-soundrecorder_31bf3856ad364e35_6.3.9600.17415_none_9014408a06a0ccbb\Sound Recorder.lnk do not match actual file [l:36{18}]"Sound Recorder.lnk" : Found: {l:32 b:v0WEU04aXPq6p2n0N0VxZtp8AvDkGMPzXNwgdRtZRx0=} Expected: {l:32 b:lZzTQXwor5OIEqh3ok3qxjkPmzaWxMQ+XuQmVbN7wtk=} 2017-01-30 16:14:48, Info CSI 0000097a [SR] Cannot repair member file [l:36{18}]"Sound Recorder.lnk" of Microsoft-Windows-SoundRecorder, Version = 6.3.9600.17415, pA = PROCESSOR_ARCHITECTURE_AMD64 (9), Culture neutral, VersionScope = 1 nonSxS, PublicKeyToken = {l:8 b:31bf3856ad364e35}, Type neutral, TypeName neutral, PublicKey neutral in the store, hash mismatch 2017-01-30 16:14:48, Info CSI 0000097b Hashes for file member \SystemRoot\WinSxS\amd64_microsoft-windows-soundrecorder_31bf3856ad364e35_6.3.9600.17415_none_9014408a06a0ccbb\Sound Recorder.lnk do not match actual file [l:36{18}]"Sound Recorder.lnk" : Found: {l:32 b:v0WEU04aXPq6p2n0N0VxZtp8AvDkGMPzXNwgdRtZRx0=} Expected: {l:32 b:lZzTQXwor5OIEqh3ok3qxjkPmzaWxMQ+XuQmVbN7wtk=} 2017-01-30 16:14:48, Info CSI 0000097c [SR] Cannot repair member file [l:36{18}]"Sound Recorder.lnk" of Microsoft-Windows-SoundRecorder, Version = 6.3.9600.17415, pA = PROCESSOR_ARCHITECTURE_AMD64 (9), Culture neutral, VersionScope = 1 nonSxS, PublicKeyToken = {l:8 b:31bf3856ad364e35}, Type neutral, TypeName neutral, PublicKey neutral in the store, hash mismatch 2017-01-30 16:14:48, Info CSI 0000097d [SR] This component was referenced by [l:166{83}]"Package_1133_for_KB3000850~31bf3856ad364e35~amd64~~6.3.1.8.3000850-3321_neutral_GDR" 2017-01-30 16:14:48, Info CSI 0000097e Hashes for file member \??\C:\ProgramData\Microsoft\Windows\Start Menu\Programs\Accessories\Sound Recorder.lnk do not match actual file [l:36{18}]"Sound Recorder.lnk" : Found: {l:32 b:v0WEU04aXPq6p2n0N0VxZtp8AvDkGMPzXNwgdRtZRx0=} Expected: {l:32 b:lZzTQXwor5OIEqh3ok3qxjkPmzaWxMQ+XuQmVbN7wtk=} 2017-01-30 16:14:48, Info CSI 0000097f Hashes for file member \SystemRoot\WinSxS\amd64_microsoft-windows-soundrecorder_31bf3856ad364e35_6.3.9600.17415_none_9014408a06a0ccbb\Sound Recorder.lnk do not match actual file [l:36{18}]"Sound Recorder.lnk" : Found: {l:32 b:v0WEU04aXPq6p2n0N0VxZtp8AvDkGMPzXNwgdRtZRx0=} Expected: {l:32 b:lZzTQXwor5OIEqh3ok3qxjkPmzaWxMQ+XuQmVbN7wtk=} 2017-01-30 16:14:48, Info CSI 00000980 [SR] Could not reproject corrupted file [ml:520{260},l:136{68}]"\??\C:\ProgramData\Microsoft\Windows\Start Menu\Programs\Accessories"\[l:36{18}]"Sound Recorder.lnk"; source file in store is also corrupted 2017-01-30 16:14:48, Info CSI 00000981 [SR] Repair complete It's pretty clear it was Microsoft's fault, as implied by the last few words of the "Could not..." message near the end: ...source file in store is also corrupted If this happens to you, or you have uncorrectable errors reported by SFC /SCANNOW, it's often a pretty easy fix. The following commands will generally fix a system right up - they cleared the problem for me: DISM /Online /Cleanup-Image /RestoreHealth SFC /SCANNOW The first command updates the servicing database, the second corrects the detected problems with the newly updated data. Note that these commands take a long while to run. For more info: https://technet.microsoft.com/en-us/library/hh824869.aspx Now I'm back to passing an SFC /VERIFYONLY check with flying colors and all is right with the Windows I choose to continue to use. -Noel
-
 Hi there guys. Im running dism with win6x_registry_tweak to unlock the full list of packages inside my mounted install.wim . The problem is that i can't get in my list windows defender yet,but why ? Is win6x_registry_tweak not working properly for the purpose to unlock the full list of packages also on windows 7 ?
 -
 Here I will outline a situation where you can corrupt a mount point and an image by using a system with multiple versions of DISM. We already know that there is some differences between the DISM that comes with Windows and the one in the WAIK/ADK (hereafter referred to as ADK). This difference is beyond the stock DISM not supporting all command line options. It is important to note this, as we do have the technical ability to have multiple ADK versions installed or by using JFX's Get WAIK Tools to skip the large download. NOTE: This applies to all versions of Windows and WAIK/ADK versions. This problem has 2 parts. One is recoverable, the other one is not 100%. There are 4 problems. Problem #1: Stock DISM is the default. DISM exists in c:\windows\system32. Even if you cd into say c:\adk10\ and that is where your DISM from ADK v10 is kept, if you just type DISM, Windows will execute the one in System32. You need to fully qualify the DISM command in order to execute the one you want. Problem #2: You can mix DISM versions interchangeably and it doesn't care. You have mounted an image with ADK DISM. You can then run commands using any other DISM, even if those versions do something different or do not fully support the mounted image. Problem #3: DISM doesn't know all the mount points. You can mount multiple images, or even nested images, but /CLEANUP-WIM shows that it does not know all the mount points. Problem #4: Windows protects files based on filename. You may have run into this situation before. You have a folder called Windows or Program Files somewhere that is not part of your booted OS, but Windows won't let you delete it. Recoverable Situation - Mount image using ADK DISM to c:\mount - Add-driver using stock DISM. In this scenario, stock DISM can't actually add a driver to the image, but it still tries. The DISM.exe process will start gobbling up memory. It will do this until the process crashes or your computer does. It also will lock the command prompt so that Ctrl+C will not cause the process to stop. You can kill the process and then clean-up the mount point. Unrecoverable/Corruption Situation - Mount image using ADK DISM to c:\mount - Mount nested image using ADK DISM to c:\mount2 - Add-driver using stock DISM. In this scenario, we wanted to add a driver to a nested wim. One example of a nested wim could be winre.wim. Here, the same as the last scenario happens, DISM can't add the driver and starts incrementing RAM usage. DISM process goes away (crash/kill process) then you can run /CLEANUP-WIM, but only mount2 is cleaned up. Here is what happens next: 1. c:\mount still has the mounted image in it. 2. DISM /CLEANUP-WIM doesn't see it as a valid mount point. 3. DISM /UNMOUNT /DISCARD gives you an error. 4. You can't delete everything in the folder because of Windows file protection. 5. You can't remount your image to another folder because DISM says that index is already mounted. You can get past the issue by never using that mount folder again, but you can rename it and probably move it somewhere else. I encountered the corrupt image situation just once (enough for me to make this thread) and played it safe by deleting the .wim file and restoring a backup and THEN rename the file. Even if you delete and restore, DISM will tell you the image is already mounted. If you rename it, then it can be mounted again to a new location. So just a word of caution for anyone using multiple ADK or DISMs on the same system to service images.
 -
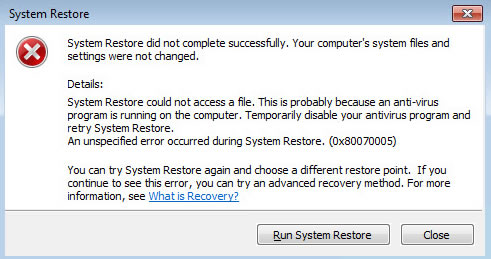
Hi, this morning I discovered that System Restore stopped working correctly, because, after choosing a point, I got the error 0x80070005 (see the image). I'm on Windows 7 Pro x64 (not planning to update to 8\10). No active antivirus at the moment. I've tried various solutions online, but noone worked. Selecting a 20 days old point didn't work either. How can I fix this? --- I've also encountered other problems not related to the first error, but discovered due to that: - SFC /scannow couldn't repair some files like: themeservice.dll, themeui.dll, uxtheme.dll - DISM doesn't have the usual /restorehealth parameter (only /scanhealth).. why?? - the "System Protection" tab is missing in "Safe mode" (bug or feature?). --- Do you have any suggestion? Should I try a repair at this point? (NO refresh)

-
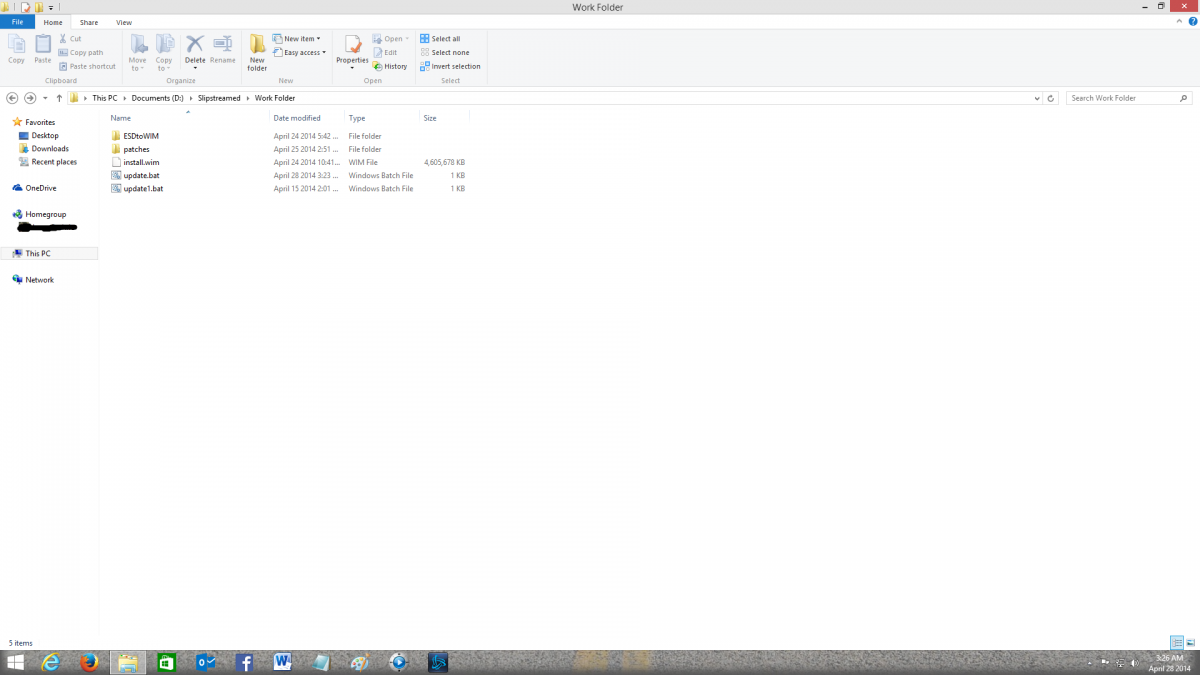
 Easy and detailed instructions. This is better than those Automated Apps like WinReducer and Win Toolkit which usually are buggy. Here you Right click the batch file and choose to run as Admin and then go have coffee. It's that easy. Attached photo is the folder structure to what we will create. This guide will slipstream all updates and clean up the image and convert the image to and from ESD<--->WIM Prepare and Slipstream Updates In to a Windows 8.1 .wim or .esd Image (Including Update 1) What you need: install.wim image file from the Windows installation media. If it is an install.esd image file then you can read the instructions on page 3 of this guide to convert it to an install.wim image file or create a Virtual Machine to do it (See page 4). Your install.wim or install.esd file is in the “Sources” folder which is found in the Windows Installation Media.2 batch files called update.bat and udate1.bat (Batch Commands are on this page)Windows updates downloader: http://www.windowsupdatesdownloader.com/ProgramFiles.aspxYour main computer that you will perform this task on should be Windows 8.1. You will need to Install Windows ADK for Windows 8.1 which is found here: http://technet.microsoft.com/en-us/library/dn247001.aspx. Attached picture is the folder structure. Batch File Commands to inject the 40+ updates for update.bat MD %~dp0WIN8 "c:\program files (x86)\windows kits\8.1\assessment and deployment kit\deployment tools\amd64\dism\Dism.exe" /Mount-Wim /WimFile:%~dp0install.wim /Index:1 /MountDir:%~dp0WIN8 "c:\program files (x86)\windows kits\8.1\assessment and deployment kit\deployment tools\amd64\dism\Dism.exe" /image:%~dp0WIN8 /Add-Package /PackagePath:"%~dp0patches" "c:\program files (x86)\windows kits\8.1\assessment and deployment kit\deployment tools\amd64\dism\Dism.exe" /image:%~dp0WIN8 /Get-Packages | more "c:\program files (x86)\windows kits\8.1\assessment and deployment kit\deployment tools\amd64\dism\Dism.exe" /Image:%~dp0WIN8 /Cleanup-Image /StartComponentCleanup /ResetBase pause "c:\program files (x86)\windows kits\8.1\assessment and deployment kit\deployment tools\amd64\dism\Dism.exe" /Unmount-Wim /MountDir:%~dp0WIN8 /commit Batch File Commands to inject Update 1 for update1.bat MD %~dp0WIN8 "c:\program files (x86)\windows kits\8.1\assessment and deployment kit\deployment tools\amd64\dism\Dism.exe" /Mount-Wim /WimFile:%~dp0install.wim /Index:1 /MountDir:%~dp0WIN8 "c:\program files (x86)\windows kits\8.1\assessment and deployment kit\deployment tools\amd64\dism\Dism.exe" /image:%~dp0WIN8 /Add-Package /PackagePath:"%~dp0patches" "c:\program files (x86)\windows kits\8.1\assessment and deployment kit\deployment tools\amd64\dism\Dism.exe" /image:%~dp0WIN8 /Get-Packages | more pause "c:\program files (x86)\windows kits\8.1\assessment and deployment kit\deployment tools\amd64\dism\Dism.exe" /Unmount-Wim /MountDir:%~dp0WIN8 /commit Instructions (Page 2) We need to Download the zip file named ‘Tools U Need” from my OneDrive and extract it, it will create the folder and files structure for you. Don’t modify the file or folder names with the exception of the main folder, which can be named to whatever you want. Skip to step 4 when completed. The Batch files will already be created. OneDrive address: https://onedrive.live.com/redir?resid=FF876747A444836D%2115004 To manually create the folder structure you need to make a folder and name it to whatever you like. Open that folder and create another folder and name it: patches If you need to convert install.esd to install.wim you will need to unzip the “Tools U Need” zip file and copy and paste the ESDtoWIM folder and its contents to the folder you created. It should also be outside the patches folder. Make 2 blank text files and name each file update.bat and update1.bat. Now copy and paste the text for each batch file command from page 1 into the corresponding file. Update.bat is for the 40+ updates and update1.bat is for update 1. Place these to batch files outside the patches folder. Copy your install.wim file to the folder that was created, which will be outside the patches folder, “NOT” in the patches folder. If the original file was a .esd file then see my instructions to convert the install.esd to install.wim.. Now all you need is the updates that you will download from the “Windows Update Downloader”. Download the update list from this page: http://www.windowsupdatesdownloader.com/UpdateLists.aspx (It’s a small file). Once finished downloading you need to Double Click it to add the list to the Windows Updates Downloader. Start the Windows Update Downloader, choose the operating system update list In the Windows updates Downloader, and then choose the Security Updates, Non-Security Updates and both versions of .Net Framework. Updates in the Optional folder won’t work. Start the download. All updates MUST be in the .msu format. Once the updates are downloaded, you need to copy and paste all the updates in to the “patches” folder. Make sure that you only copy the updates to the patches folder. In other words, there should be NO folders inside the patches folder. Only .msu (update) files can be in the patches folder. You can delete the ESDtoWIM folder if you are not going to use the command line tool to convert install.esd to install.wim. Now, the Structure of the folder you are working in should have only 5 items: An ”ESDtoWIM” folder, a “patches folder”, update.bat file, update1.bat file and an “install.wim” file. All .msu updates should be in the patches folder. Now Right click the update.bat file and choose to run as Administrator. Once it installs all the updates it will ask you to hit any key. Hit any key until is shows all the updates and continues. You will have to hit any key many times until it begins the last phase. Once it is finish, you can repeat step 7 through 9 but use the update1.bat file for the Windows 8.1 update 1 .msu files (There are 6 needed downloading). Once everything is finished then you can replace the old install.wim file in the Windows install media with the new one. Again, if the original was an install.esd file then it needs to be converted first to install.wim file.File Conversion Instructions (Page 3) Convert install.esd to install.wim From the “Tools U Need” folder which can be downloaded here: https://onedrive.live.com/redir?resid=FF876747A444836D%2115004, find and open the ESDtoWIM folder Right click the file named ESD2WIM.cmd and choose “Run As Administrator” Copy and paste (or type) the complete path location of the install.esd file. Example: C:\Work Folder\install.esd Press the enter key and wait for the process to finish. The location of the install.wim file will be in the “C” drive when the process finishes. C:\install.wim Continue with step 4 on the instructions page (Page 2).Convert install.wim to install.esd If the original file was an install.esd file then you will need to convert the install.wim file back to an install.esd file. Before we begin, make sure there is no file in C:\ called install.esd. In other words delete any file in this exact path C:\install.esd Copy the install.wim file to the C:\ directory. Example: C:\install.wim Click “Start” and do a search by typing: cmd Look for a file called cmd.exe in the search results. Right click cmd.exe and choose to “Run as Administrator” A black box will open. In the black box, Copy and paste the command in step 6 below and then hit the enter key. dism /Export-Image /SourceImageFile:"C:\install.wim" /SourceIndex:1 /DestinationImageFile:"C:\install.esd" /Compress:recovery It will take a very long time and a lot of processing during the conversion. So have patients. When it’s finished you will find the file called install.esd at this location C:\install.esd JJJCongratulationsJJJ You have completed the process of slipstreaming Windows updates and update 1 in to Windows 8.1 Install media. J Good luck J Installing Windows 8.1 to a VHD and using imageX to capture back the image as install.wim (Page 4) If you prefer not to use the command to convert the install.esd file to an install.wim file then you can create a virtual machine and install windows 8.1 in to it and then capture the VHD image back to an install.wim file. Here is how you do it. What you need: Windows 8.1 ISO, DVD or USB stick made bootable with Windows 8.1Microsoft Hyper-V (included as an add-on in Windows 8.1 Pro) or Virtual BoxFor Windows 8.0 serial key users: These generic keys will allow the correct version of Windows 8.1 to be installed. You will HAVE TO activate with your purchased Windows 8.0 key once all is installed. It will work 100%.334NH-RXG76-64THK-C7CKG-D3VPT for Non-Pro versionXHQ8N-C3MCJ-RQXB6-WCHYG-C9WKB for Pro versionKnowledge of these Virtual machinesImageX which comes with the Windows ADK for Windows 8.1Knowledge of the CMD command prompt.Knowledge of “SysPrep”Instructions Create a Virtual disk. The disk should be either VHD or VHDX Install Windows 8.1 in the virtual machine Press Ctrl + Shift + F3 when the Installation gets to the screen where you create a computer name. This will log you in automatically as the Administrator and start the SysPrep process. In the SysPrep preparation tool, make sure you choose “Enter system out of box experience”, and then check the box that says “Generalize”. The next drop-down menu: choose “Shutdown”. Click OK and the Virtual machine will shut down when finished. Now locate where the Virtual Disk that has Windows 8.1 installed on it. Mount that drive and give it a drive letter Make sure you installed ImageX which comes with the Windows ADK for Windows 8.1 Click the Start button and type cmd for command prompt. In the search results choose “Deployment and Imaging Tools Environment”. A command black box will open. Type the following: imagex /compress maximum /capture F:\ C:\install.wim "Windows 8.1 Pro" (F is the drive letter you gave the virtual drive when you mounted it, change it to whatever it is) Hit Enter and wait for it to finish. Look in the C drive where you copied the virtual drive and you will also see the install.wim file. This is the file you need to inject all those updates in to. You can now delete the Virtual drive and the ESD file.
-
Background: My company deploys between 500-750 Windows based tablets per year. In the past we have used programs like Acronis TrueImage in create an image of the OS and then reimage all the tablets. When WIndows 8 came around I have been unablet to get it working so I have been looking into WindowsPE. We are working with a new OEM (small company that sources the tablets from China and then images them themselves and adds on a strong ruggedized housig for it). They use WindowsPE to image the tablets at boot. Unfortunately, there are about 55 Windows Updates that need to be done to each tablet as well as 6 programs that need to be installed for our purposes before we can deploy them. They have given me the recovery media that I can put on a USB drive, insert into the tablet, boot, press F7 and boot from the USB drive. It then runs WindowsPE and does a recovery. I press type Exit in the cmd. It reboots and run a cleanup script on the desktop and in the Sysprep windows press OK to boot into Out of Box setup mode. What I am trying to accomplish is include the current Windows Updates as well as prepare for future ones that will be released as well as isntall our 6 programs and do a couple things like change the wallpaper and drop a few files in a couple directories. I belive what I need to do is below: Take the current Install.wim file and create an iso Mount it in Hyper-V Manager Install Updates and software Create an bootable image using ImageXWhat I currently have is a folder that is 3.68 GB and has a directory structure inside if with the following folders: bg-bg, Boot, cs-cz, da-dk, de-de, DiskpartFiles, EFI, el-gr, en-gb, etc. In the images folder there is an Install.wim, Winre.wim as well as Unattended.xml, Capture.txt and Install.txt. I belive I need to create the iso from this Install.wim file. When I use the command: oscdimg.exe -bC:\winpe86\iso\etfsboot.com -u2 -h -m -lWIN_EN_DVD c:\winpe86\ c:\winpe86\winpe86.isoI see that it scanded the source tree, it completed with 379 files in 177 directories. It created a compelte image file of 3.86 GB which would make sense since the files that were given to me is just slightly smaller at 3.68 GB. I have then taken that iso and opened Hyper-V Manager, created a VM with no installation media yet. Started the VM mounted the iso and then reset it. I get the error: CDBOOT: Couldn't find BOOTMGR I was hoping that it would start the install process like I have seen on the tablet running off of the USB drive allowig me to then rund all the updates and then work on the next step of creating a new image (WIM) for it to use in the future. Any thoughts on the process? Do I have the right concept just missing something?
-
Hello! There are many similar topics regarding Windows 8 deployment... I tried to google and check out as many as I could. Wasn able to solve my issue though. I'm writing here, hoping that someone might be able to help me out. I am trying to deploy Windows 8 put problems with starting it. I have new Samsung laptop, where I have installed Windows 8 Pro. Iinstalled programs, created user-accounts etc.Then I bootel laptop from USB WinPE media and captured C:\ drive as a *.WIM file. So far everyting OK. I got second laptop (same model). Booted it also from Winpe USB media and used Diskpart to clean-create partition and format it as NTFS. I created just this one partition. On that partition I applyed the wery-same image that I previously created. Image was applyed and then started problems. --> bcdboot c:\windows is not working. --> Failure when attemting to copy boot files. --> I also tried bcdboot c:\windows /s c: --> Boot files successfully created. But after this OS isnt booting, still. Anyway, this is where I got stuck. Please help me out.
-
 Hi there. Yesterday I used Deployment Image Servicing and Management Tool (DISM) to add drivers to an untouched SP1-U x86 ISO from digital river. After that, Windows failed to start, because of driver corruption. It had nothing to do with the specific drivers I integrated, I checked it with many drivers. In all cases, I was getting the same error message. I am downloading a SP1 ISO (without the -U) to see if problems persist. Have you ever experienced a similar issue?