b0r3d
Content Type
Profiles
Forums
Events
Everything posted by b0r3d
-
I seem to be having the same problem with a client of mine. You dial the internet, it works fine for a few minutes, then it has trouble accessing webpages and such. Its as if something is chewing up all the bandwidth. I checked their settings and found nothing out of place. Unfortunatly i was unable to fix the problem, but the only thing i could conclude, is that there is something wrong with the ISP. Give them a ring, and see what they have to say about the problem.
-

Giving Your Windows Cosmetic Surgery
b0r3d replied to b0r3d's topic in Unattended Windows 2000/XP/2003
Okay. I changed the URL to point to your file link. -
maybe you've been hax0r3d ! Or maybe you just have caps lock on
-
Updated: 10/11/03 Fixed: Typo in the bootlogo.cmd Updated: 03/11/03 Added: msgina.dll Guide Added: SFC Disable Guide If you have any questions, comments or suggestions, please ask UXTheme.dll: To change your boot logo, default theme or to add themes that are able to be seleted by default (like the standard Windows Luna / Silver / Olive themes), then the first thing you need to do is patch your uxtheme.dll file. Microsoft Windows won't allow you to install any themes that arent digitally signed by Microsoft. Its you're uxtheme.dll that does the checking. So to be able to add new themes to windows, we need a hacked version of this file, that will tell Windows that the themes that we are installing are infact digitally signed by windows. (which ofcourse they arent) Before you continue, patch your uxtheme.dll by one of the following two ways. 1. Probably the easiest solution would be to download the uxtheme cab file extract it, and place it in your i386 directory. 2. Aaron XP has a guide to paching your uxtheme.dll on the Unattended XP guide website, and also has a download link for the hacked file. Follow this guide Windows File Protection If you're having problems getting some of these customizations to work, its most probably because of your Windows File Protection or WFP. Whenever windows detects that a system file isnt the one that was packaged with Windows, then it attempts to replace the modified version, with the one off the Windows CD. This means, when you're installing your windows with your modified files in your $$\System32 directory, on the next boot, they will be replaced by the origional windows versions. There are two ways to get around this. 1. Eject your CD when windows has finished copying all the files to the HDD (after the dos portion of the windows install) 2. Disable WFP alltogeather. To disable your WFP, add this to a reg file (put it in notepad, save it as a .reg): [HKEY_LOCAL_MACHINESOFTWAREMicrosoftWindows NTCurrentVersionWinlogonAdd] "SFCDisable"=dword:FFFFFF9D To re-enable your Windows File Protection later on, modify "SFCDisable" to read 0 by navigating to that key using regedit. Wallpaper: To change your default wallpapers, simply place the image file which you wish to have as your wallpaper into into $OEM$\$$\Web\Wallpaper - If this directory does not exist, now would be a good time to create it To actually set your default wallpaper to something different, orther than Microsoft's default grassy hills wallpaper (bliss.bmp), you need to use a little regristry tweak. Add this to your tweaks.reg file: - Thanks to DaveXP for this tweak [HKEY_LOCAL_MACHINE\Software\Microsoft\Internet Explorer\Desktop\General] "BackupWallpaper"="c:\\windows\\web\\wallpaper\\xppaper.jpg" "Wallpaper"="c:\\windows\\web\\wallpaper\\xppaper.jpg" Ofcourse you will need to replace "xppaper.jpg" with the actual file name of the wallpaper you wish to use, including its extention. Note: I am not sure if you can use %systemroot%\\Web\\Wallpaper\\name_of_wallpaper yet, but i will try it out, and update this part of the guide. Note: If you do not have a tweaks.reg file, refer to the Unattended XP Install Guide Themes: First off, you need to have changed your uxtheme.dll file, which is the first oder of buisness in this guide. If you have not done so already, please do as it says, as changing and adding default themes to Windows is not possible without it. Once you've followed that guide, place your themes into $OEM$\$$\Resources\Themes - If you do not have a $$ directory in your $OEM$ folder on your CD, then create it now The next step is to go download some nice themes which you'd like to add to your CD. Once downloaded, extract it, and throw it in your $OEM$\$$\Resources\Themes\ directory. To change the theme you wish to be applied by default, you need to edit a few lines of your winnt.sif file. Thoes lines are as follows. [Shell] CustomDefaultThemeFile="%Systemroot%\Resources\Themes\YOURTHEME.THEME" Also, in your winnt.sif file, you need to have the following options set: OEMPreinstall=Yes OEMSkipEULA=Yes Your themes (.msstyles) need to have a .theme file to acompany them. The .theme file, simply tells Windows where all your theme files are located. For example, the desktop wallpaper, any special icons, and the theme itself. If you download a visual style, and it does not containa .theme file, read on. How to make a .theme To make things tremendiously easy for you, ill post a working .theme here. All you need to do is copy and paste into a word document, change the locations to point to the right place on your CD (marked in red) and save it as a .theme file. In this example, my theme is called CyberField. Okay, after all that, this is what my directory structure looks like. $OEM$\$$\Resources\Themes\cbfield.theme $OEM$\$$\Resources\Themes\cbfield\cbfield.msstyles $OEM$\$$\Web\Wallpaper\XPPaper.JPG That should be it : Boot Screen: The first thing you need to do is patch your uxtheme.dll file. Instructions are located at the top of this post. After that, download a custom boot screen, Or if you prefer to make one yourself, then you can use any BMP you like. Note: If you downloaded a bootscreen, and it contains a file called ntoskrnl.exe, then skip this next parragraph. Next, what you need to do is make a copy of your ntoskrnl.exe from your \Windows\System32 directory and place it somewhere thats easier to get to and work on. Now, grab a copy of Resource Hacker and open up the copy of your ntoskrnl.exe file. In the left hand column you will see a list of resources to edit. Open the first tree called Bitmaps and you will see numbers 1-10. Numbers 1, 8, and 10 are the WinXP Pro bitmaps. 1, 7, and 9 are for Home Edition. In this tutorial we will be using Pro. Select number 1 --> Action/Replace Bitmap. Select Bitmap to replace 1, then click on 'Open file with new Bitmap' and locate your edited boot logo. Then click replace. Save your new ntoskrnl.exe file, and you're done. This will replace the main picture of your boot logo. If you wish to customize it even further and change the litle moving blue dots, or save the origional boot screen for editing, then i suggest you follow this more extensive guide. Still with me? Good. If you downloaded a ntoskrnl.exe file, this is where you should continue reading. For adding your ntoskrnl to your XP CD, i will be using the method used by gosh, which will be outlined here. What we need to do now, is make a directory on your XP CD, under this path: $OEM$\$$\System32 The next thing you need to do, is rename your ntoskrnl.exe file to oemkrnl.exe and place it in the folder you just created above. Now, in your winnt.sif file, add these commands: [Unattended] UnattendedMode=FullUnattended OEMPreinstall=Yes OEMSkipEULA=Yes [GUIRunOnce] bootlogo.cmd Next create a bootlogo.cmd file which contains this: bootcfg /RAW /A /Kernel=OEMKrnl.exe /ID 1 bootcfg /Timeout 0 Here's a brief explanation of the above code: When you install Windows XP, it copes the $OEM$\$$\System32 folder to %windir%\system32, thus, placing your oemkrnl.exe file into your system32 folder. When XP Setup then processes the GUIRunOnce section of your winnt.sife file, it adds the switch /kernel=oemkrnl.exe to your boot.ini file, which forces windows to use your edited file, instead of the one shipped with windows. So why do all this when you can just put your ntoskrnl.exe into the i386 folder? Since this is gosh's method, i'll let him explain. Once you've done all that, go grab yourself a coke. You've earnt it. msgina.dll The msgina.dll contains lots of little windows goodies to change and configure. It contians some windows images, and also some interesting strings of text. This guide will teach you how to change this image, and others like it. The first thing you need to do, is grab a copy of the msgina.dll from \Windows\System32\ and open it with resource hacker. Next, open the key bitmap --> 101 --> 1033. You’ll see the image here that we want to change. You can either save a copy of this image for editing (right click --> save [bitmap : 101 : 1033]), or make your own image, and replace the windows one (right click --> replace resource). For thoes of you who are like me, and like to make your own images, the dimentions of this image are 413 x 72. Windows uses two different images (allthough identical) in your msgina.dll. They are as follows: 101: ctrl + alt + del (win2k style), Applying settings box, Shutdown dialog 107: login box The only difference i can see in the two images, is that the one for your login screen is a little bigger than that for the end task menu. To change your login box pic, replace the key located in 107 --> 1033. Once again, for thoes who like to make their own images, the dimentions for this one are 413 x 88 If you have a little browse through the other keys in your msgina.dll, you'll notice these two images for other operating systems. I think that the reason for this is, windows just packages each operating system with the same msgina.dll, and which picture is used, depends on the version of windows. This file also contains lots of string values to dialogs, that you may want to fiddle with. For example, i changed the text on my End Task.. button to read Kill Programs.. Anyways, back to the task at hand. Once you've changed thoes two images, save your msgina.dll, and throw it in your $$\sytem32\ folder on your windows CD, and that should be it! Below are images of my two edited images in use. Happy cutomizing! Note: Windows XP Home users can apply new images to their version of Windows by editing the 128 and 129 keys respectively, instead of the keys mentioned in the guide.
-
Hello All! I Hope You Can All Help Me Learn Here
b0r3d replied to Ghzsystems's topic in Introduce Yourself!
Greetings and Salutations! What problems are you having with your XP CD ? -
Greetings and Salutations! Good to see another Aussie browsing the boards
-
very pretty
-
Moved to Windows XP
-
How Can I Put Any Drivers In Xp Cd?
b0r3d replied to The Captain's topic in Unattended Windows 2000/XP/2003
Good to see you back Webmedic I was starting to think you were hit by a bus or something -
I can see that in less than a month of being a member of MSFN, you already have a pleathora of fans pleading for you not to go. Your posts have a high standard of quality and usefulness, and they all seem to be a great contribution to the MSFN community. However. These things do not give you any kind of exception from the real world. Whever you go, there will be people that disagree with you and your ideas, or may provide you with a little unwanted critisizm. But this is no reason to assume you're unappreciated by everyone else. I don't mean to sound rude, or show any disrespect, but you need to build a bridge and get over it. The sooner you do that, the better it will be for not only you and your self growth, but the other members of this forum that rely on the high standard of your posts. It seems to me that you are blowing Numinous' posts out of preportion. It appears that in his posts, he simply stated the obvious. Perhaps no in the nicest way concieveable by man, but you cant expect to post a buggy script, and noone to point it out to you. On another note, as a moderator of the Windows XP forum and subforums (ie Unattended XP), i also did not recieve a pm, e-mail or complaint of any kind. If it's such an important issue for you, perhaps if you had persisted, things could have been sorted out more promptly, and hopefully with a better result. Although I will not say that I am sorry to see you go on such childish circumstances, i will however, tell you that your informative posts will be missed.
-
I want to use VMWare My VirtualPC trial has expired.
-
I'm trying to uninstall that WinStyles program, but the uninstaller cant find the INSTALL.LOG, so im stuck. I e-mailed support at stardock, to get them to send it to me or something. When i get rid of it, ill give it another go, and tell you what happens.
-
Nope. I get the same problem with that theme too.
-
This problem is a bastard, and its really giving me the s***s. in VMware 4 Workstation, I load my ISO file (in my case, and Unattended XP install ISO), i install windows, which works fine, but when the PC reboots for the first time, it just hangs on the boot screen. (The one with the windows logo, and the little flying blue staus bar) It just sits there. Taunting me. Also, if that wasnt bad enough, if i leave it tehre for about 10 minutes, it decides that it doesnt want to respond anymore and i have to get it put down by nasty Mr Task Manager. Has anyone heard of this problem, or know how to fix it ? Any suggestions would be greatly appreciated.
-
Ack. I'm attempting to write a guide to customize the windows interface with new themes/logos etc, but how can i write a guide if i cant get them working myself? Has anyone else out there encountered my problems? Or am i suffering from some sort of mental disability that disallows me to do simple tasks ...
-
@gosh I seem to have nothing but problems when using your method listed above. Perhaps im just retarted or possibly slightly mentally handicapped, but i tried it, and it simply doesnt work. When i add these lines to the GUIRunOnce section of my winnt.sif file: bootcfg /RAW /A /Kernel=OEMKrnl.exe /ID 1 bootcfg /Timeout 0 The CD wont boot, telling me there is an error on these two lines. If i rem these two lines out, it boots fine. Your suggestions on the matter would be appreciated.
-
Thats for a stardock program (i forget the name) that lets you download theme suites or WinStyles. Each WinStyle includes wallpaper, themes, icons, cursors .. the whole shebang. So no need for different programs, the one programs does everything. Oh by the way, could you give me a link to your .theme and .msstyles please? If i can get any theme working thats different than Windows' Luna, i'll be happy
-
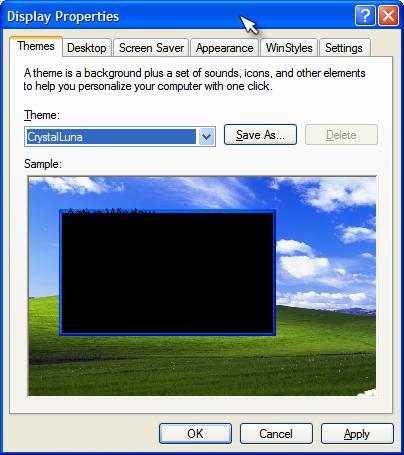
Nope. For some reason i'm still having problems. After directly copying and pasting your .theme file, and changing the paths to relate to my .msstyle, it still doesnt work. Below is an image of what the display properties dialog shows. And as i said in a previous post, when i apply the theme, it just loads Windows Classic.

-
I've actually tried quite a few and am getting the same problem with all of them. Could you please paste the contents of one of you working .theme files? I'll try to diagnose the difference.
-
If they programmed them properly in the first place, there'd be no need for updates :\
-
No, i didnt get a .theme file with the msstyles file i'd like to apply. Just the .msstyle file itself. Nothing else. That seems to be all you can download from http://www.themexp.org these days.
-
I'm not responsible for the site, but i'll welcome you anyway
-
For some reason, when i use that method, it doesnt import the .msstyles properly. In the preview window, everything is out of preportion, and arent the right colours, yet when i apply the actual theme, it changes it to the classic theme (win2k) Any suggestions why it might not be working properly?
-
How would one go about chaning a .msstyles file to a .theme ? Is it as simple as just renmaing the file with the new extention, or does somethign more difficult need to be done?
-
Greetings and Salutations!