GD 2W10
Content Type
Profiles
Forums
Events
Everything posted by GD 2W10
-
 I have decided to switch over to installing XP x86 with XP2ESD. I thought it was impossible to boot legacy internally from that laptop, but I found out by letting "Press any key to boot from USB" time out, I was able to boot to the hard drive, or by booting from the hard drive with WinSetupfromUSB.
 -
My SSD is actually not an Intel SSD, it's actually a Micron SSD, which was probably why Fernando's drivers didn't work. I found some hardware IDs for my SSD. I found SCSI\DISK&VEN_MICRON&PROD_1100_SATA_512GB\4&1F3FCE9C&0&020000 and SCSI\DiskMicron__1100_____________M0D. However, for the first one, I am only able to find drivers for XP x86 on drp.su, but I could find drivers for 7, 8, 8.1, 10, 11 both x86 and x64, and for the second I only found one for x86 (I think it might be Vista). Where can I find XP x64 drivers for this SSD?
-
I tried integrating the ACPI driver found here, and I don't get the 0x000000A5 error, but now I am getting the 0x0000007B error, and I have AHCI drivers integrated into the ISO. I used Fernando's universal AHCI drivers.
-
I can boot the XP x64 installer and complete the first stage, as it can boot Legacy from USB drives, but not internal drives, so I would have to add the Server 2008 UEFI files after the first stage, and I shouldn’t have to integrate graphics drivers as I can install Vista and 7 on the laptop with zero problems (Vista has a few bugs as with all post-Ivy Bridge installs, but it’s still functions). However, I get the 0x0A5 BSOD when booting from the USB. When I press “F7”, it just gives me an option between ACPI Uniprocessor x64, ACPI Multiprocessor x64, and Other, but selecting either of those gives me a BSOD. I am using WinSetupfromUSB btw.
-
Hi, Is it possible to install Windows XP x64 on a Dell Latitude 5490? The laptop is UEFI-only (it can only boot legacy from external ports), so I would need to install XP on UEFI. I have thought about using XP2ESD but wanted to know if there are other ways of getting XP running on the laptop.
-
This worked. Thank you.
-
No, I haven't. I will try that.
-
Are there any USB 3.0/xHCI drivers for Windows XP x64?
GD 2W10 replied to GD 2W10's topic in Windows XP 64 Bit Edition
I just checked the drivers folder and found the said driver. Thank you for your help -
No that's not the problem, I already fixed that. But it just hangs at "Starting Windows Vista".
-
Are there any USB 3.0/xHCI drivers for Windows XP x64?
GD 2W10 replied to GD 2W10's topic in Windows XP 64 Bit Edition
I know that. I have thought of a few methods to get it working on the Surface Pro 1 (with either the 2008 Beta 3 boot files, or Quibble, also some SATA drivers). But my question is are there are any USB 3.0/xHCI drivers for XP x64, like there are for Windows Vista and 7? -
Hi, Are there any USB 3.0/xHCI drivers for Windows XP x64? If anyone is wondering, I need to know this because I plan to attempt to install Windows XP on the Surface Pro 1.
-
I have the efi files and the BCD on one 100MB FAT32 partition, and another with Windows XP x64 on it. Also I am not using boot.ini as I am using files from 2008 Beta 3, not Vista Beta 2.
-
Hi, I am trying to boot Windows XP x64 on UEFI in a VMware Fusion virtual machine, I used the boot files from Windows Server 2008 Beta 3 (I downloaded them from the YT video below), and but them on a separate boot partition. I try to boot it with Driver Signature Enforcement disabled, and it just hangs at "Starting Windows Vista". How can I fix this?
-
Is it possible to install Windows XP on an HP Elitebook 840 G3?
GD 2W10 replied to GD 2W10's topic in Windows XP
Yeah. My charger had some issues and I didn't want to spend money on a new one. -
Is it possible to install Windows XP on an HP Elitebook 840 G3?
GD 2W10 replied to GD 2W10's topic in Windows XP
Ah ok. I will look into this one at some point, however it won’t be on the same laptop as I destroyed (don’t ask why) that one. -
Is it possible to install Windows XP on an HP Elitebook 840 G3?
GD 2W10 replied to GD 2W10's topic in Windows XP
I didn't use the new release. -
Is it possible to install Windows XP on an HP Elitebook 840 G3?
GD 2W10 replied to GD 2W10's topic in Windows XP
I already tried that (I downloaded one), and XP did boot, but I had no access to keyboard and mouse, and after it did Sysprep, it wouldn't boot because "hal.dll" was corrupted. But I ended up getting rid of the laptop, because it had other issues. -
Is it possible to install Windows XP on an HP Elitebook 840 G3?
GD 2W10 replied to GD 2W10's topic in Windows XP
I will try that. -
How to install Windows 11 on "unsupported" hardware.
GD 2W10 replied to GD 2W10's topic in Windows 11
Added the Rufus method. -
How to install Windows 11 on "unsupported" hardware.
GD 2W10 replied to GD 2W10's topic in Windows 11
Yes this is also another method. I will add it soon. -
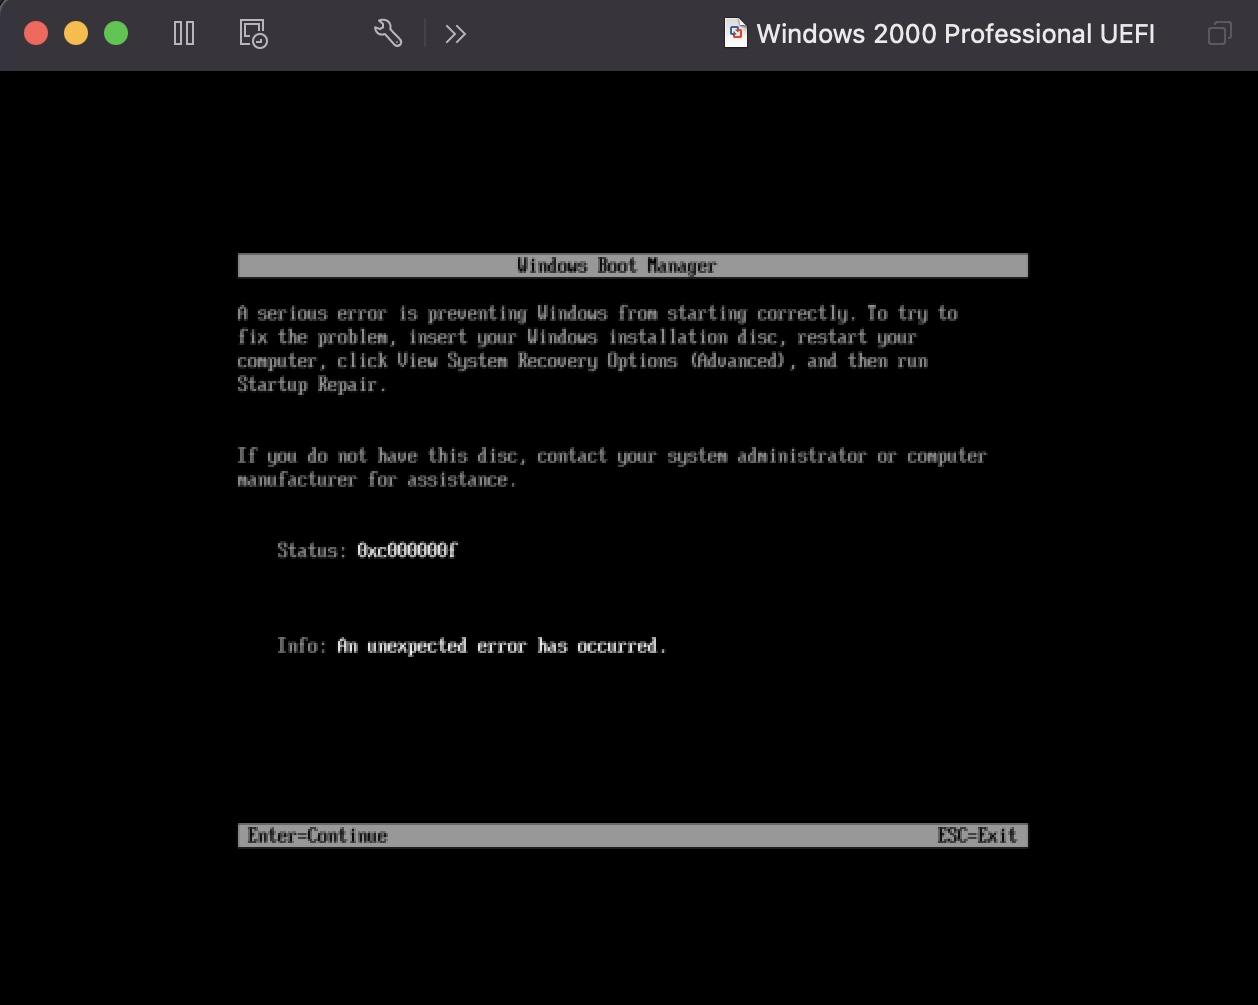
Hi, Is it possible to boot Windows 2000 on UEFI? I know it is possible to boot Windows XP and Whistler Beta 1 on UEFI, but wanted to know if it was possible to boot 2000 on UEFI. One person was able to boot Whistler Beta 1 on UEFI, but struggled with 2296. I tried this on Windows 2000, and followed the same steps shown in NTDEV'S XP UEFI video. When I try to boot it with the Vista 5219 files, I get the 0xc000000f error. What would need to be done to get 2000 running on UEFI? If it isn’t possible, why?

-
This helped. Thank you
-
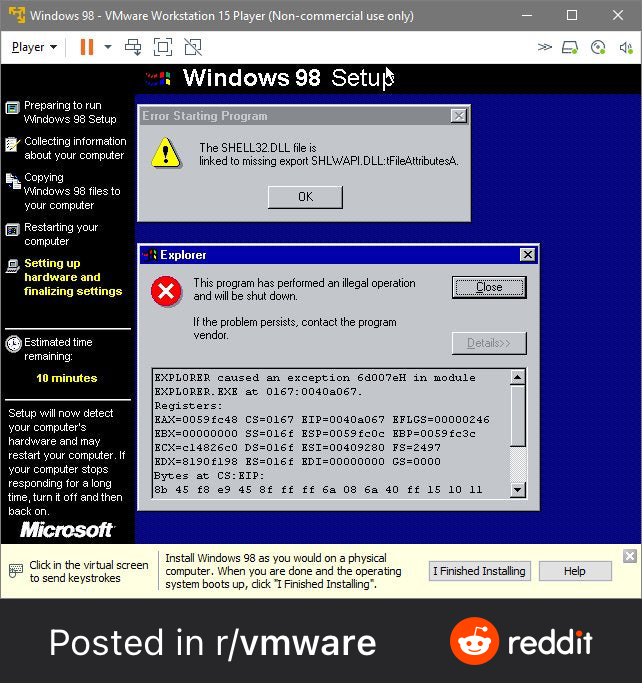
Hi, Whenever I try to upgrade Windows 95 to Windows 98 on a virtual machine on my MBP (I use macOS 12 on that), after the second reboot explorer.exe and crashes and I get the shell32.dll error. I’ve tried using VMWare and VirtualBox, but get the same error. How can I fix this? Attached is a screenshot below of my problem (not mine, but the same error).
-
How to install Windows 11 on "unsupported" hardware.
GD 2W10 replied to GD 2W10's topic in Windows 11
Here is that said method (it's the scrapped 3rd method from a few months ago): 1. Get and extract a Windows 10 1507 or 1511 ISO. Any Windows 10 ISOs that were made later will NOT work. (note: steps 2-5 only need to be completed on Windows 10 or higher, if you are on Windows 7 or 8 or 8.1 you can move on to step 6) 2. Right click "setup.exe", then click "Troubleshoot compatibility" 3. Click on "Use recommended settings". This will set the compatibility to Windows 8. 4. Click on "Test program". It will give you a UAC prompt, but click No. 5. Click on "Yes, save these settings". Then close the troubleshooter. 6. In a Run prompt, type in "setup.exe /noreboot" 7. Go through the setup normally as if you were upgrading, after it closes get the Windows 11 ISO. 8. Go to (insert drive letter):\sources and copy install.wim. Go to C:\$WINDOWS.~BT\Sources and replace the file already there with the one from the Windows 11 ISO. 9. Reboot, then setup will continue. 10. Everything should continue normally until you get into a boot loop. 11. When that happens, boot into setup, load the SYSTEM registry hive, change the Cmdline to "cmd.exe or oobe\msoobe.exe" and set all values (except for Upgrade) to 0. 12. After that, either you will be brought to the login screen, or you will be on the OOBE screen. 13. Once you are at the desktop, your files will probably not migrate, so you will have to manually migrate by copying the files. -
How to install Windows 11 on "unsupported" hardware.
GD 2W10 replied to GD 2W10's topic in Windows 11
There are workarounds to allow the update, however, I haven't added them yet. You could try using the second method to upgrade, but you would have to upgrade with a downloaded Windows 11 ISO, as I am unsure if doing the second method with Windows Update works.