Major
Content Type
Profiles
Forums
Events
Everything posted by Major
-
Silent .NET Maker synthesized 20100118 - W2K/XP/2K3 x86
Major replied to strel's topic in Application Installs
@Zilver, Thank you for update the tool, it is very apreciated. would you like please tell me what are the updates i must download or where are they posted? -
Hi, i have usually installed my unattended windows 7 well, but now in the last 4 pc of my friends, it asks for a driver and tells me: it does not find any device driver for cd /dvd... i will explain how i have made my unattended windows 7 (drives). I slipstream 3 drivers (chipset, massstorage, lan) in the image install.wim and the other drivers during setupcomplete.cmd (Runonceex) I want, instead to add the controller (which i think is AHCI SATA RAID) manually, i would like to siplstream it and in which image, in order to do it unatended? Thanks
-
Hi i have made an unattended windows 7, but i select manually the drive where the operating system will be installed because i am afraid of deleting some data. this is why i have commented the diskconfiguration in my autounattended <!-- <DiskConfiguration> <Disk wcm:action="add"> <CreatePartitions> <CreatePartition wcm:action="add"> <Extend>true</Extend> <Order>1</Order> <Type>Primary</Type> </CreatePartition> </CreatePartitions> <ModifyPartitions> <ModifyPartition wcm:action="add"> <Active>true</Active> <Extend>false</Extend> <Format>NTFS</Format> <Letter>C</Letter> <Order>1</Order> <PartitionID>1</PartitionID> </ModifyPartition> </ModifyPartitions> <DiskID>0</DiskID> <WillWipeDisk>true</WillWipeDisk> </Disk> <WillShowUI>OnError</WillShowUI> </DiskConfiguration> --> for a long time i am wondering if there is a batch or something to do in order that the unattended detects the drive of the older system operating and then install the unattended automatically over that drive. for example we assume a disc with 2 logical discs C: and D: C:\ is the drive where is installed the older operating system D:\ there are data. I would like that my unattended detects that the older system is installed on C:\ and then format it automatically in order to in install the unattnded in C:\ also automatically. and leave intact D:
-
Thanks i will try it in a a bigger disk in a VM.
-
I Have made an unattended windows with setting to set manually the disk configurations, it worked fine But yesterday i wanted to create a partition in the options of the disk, the boton [New and extend] were grey (inactive). How can i do to set them active.Thanks. Here is the part of my autounattended.xml regarding the disk <component name="Microsoft-Windows-Setup" processorArchitecture="x86" publicKeyToken="31bf3856ad364e35" language="neutral" versionScope="nonSxS" xmlns:wcm="http://schemas.microsoft.com/WMIConfig/2002/State" xmlns:xsi="http://www.w3.org/2001/XMLSchema-instance"> <ImageInstall> <OSImage> <InstallToAvailablePartition>false</InstallToAvailablePartition> <WillShowUI>OnError</WillShowUI> </OSImage> </ImageInstall>

-
Hi, i have been tried several ways to save position of icons desktop, but i did not find the suitable registry tweaks in order to apply it during the unattended windows. I will explain it, i want to sort icon and shortcut desktop in my own way and then apply the suitable registry tweaks during unattended to apply that positions. any suggest please?
-
I would like to use sysprep, would you please tell me if it correct in order to apply copyprofile <?xml version="1.0" encoding="utf-8"?> <unattend xmlns="urn:schemas-microsoft-com:unattend"> <settings pass="windowsPE"> <component name="Microsoft-Windows-International-Core-WinPE" processorArchitecture="x86" publicKeyToken="31bf3856ad364e35" language="neutral" versionScope="nonSxS" xmlns:wcm="http://schemas.microsoft.com/WMIConfig/2002/State" xmlns:xsi="http://www.w3.org/2001/XMLSchema-instance"> <SetupUILanguage> <UILanguage>es-ES</UILanguage> </SetupUILanguage> <InputLocale>0c0a:0000040a</InputLocale> <SystemLocale>es-ES</SystemLocale> <UILanguage>es-ES</UILanguage> <UserLocale>es-ES</UserLocale> </component> <component name="Microsoft-Windows-Setup" processorArchitecture="x86" publicKeyToken="31bf3856ad364e35" language="neutral" versionScope="nonSxS" xmlns:wcm="http://schemas.microsoft.com/WMIConfig/2002/State" xmlns:xsi="http://www.w3.org/2001/XMLSchema-instance"> <UserData> <ProductKey> <WillShowUI>OnError</WillShowUI> <Key>xxxxxxxxxxxxxxxxxx</Key> </ProductKey> <AcceptEula>true</AcceptEula> <FullName>xxxxxxxxxx</FullName> <Organization>xxxxxxxxxxxxx</Organization> </UserData> <ImageInstall> <OSImage> <InstallTo> <DiskID>0</DiskID> <PartitionID>1</PartitionID> </InstallTo> <InstallToAvailablePartition>false</InstallToAvailablePartition> <WillShowUI>OnError</WillShowUI> <InstallFrom> <MetaData wcm:action="add"> <Key>/IMAGE/NAME</Key> <Value> Windows 7 ULTIMATE</Value> </MetaData> </InstallFrom> </OSImage> </ImageInstall> <DiskConfiguration> <Disk wcm:action="add"> <CreatePartitions> <CreatePartition wcm:action="add"> <Extend>true</Extend> <Order>1</Order> <Type>Primary</Type> </CreatePartition> </CreatePartitions> <ModifyPartitions> <ModifyPartition wcm:action="add"> <Active>true</Active> <Extend>false</Extend> <Format>NTFS</Format> <Letter>C</Letter> <Order>1</Order> <PartitionID>1</PartitionID> </ModifyPartition> </ModifyPartitions> <DiskID>0</DiskID> <WillWipeDisk>true</WillWipeDisk> </Disk> <WillShowUI>OnError</WillShowUI> </DiskConfiguration> <Display> <ColorDepth>32</ColorDepth> <HorizontalResolution>1024</HorizontalResolution> <VerticalResolution>768</VerticalResolution> </Display> </component> </settings> <settings pass="specialize"> <component name="Microsoft-Windows-IE-InternetExplorer" processorArchitecture="x86" publicKeyToken="31bf3856ad364e35" language="neutral" versionScope="nonSxS" xmlns:wcm="http://schemas.microsoft.com/WMIConfig/2002/State" xmlns:xsi="http://www.w3.org/2001/XMLSchema-instance"> <SearchScopes> <Scope wcm:action="add"> <ScopeDefault>true</ScopeDefault> <ScopeDisplayName>Google</ScopeDisplayName> <ShowSearchSuggestions>false</ShowSearchSuggestions> <ScopeUrl>http://www.google.com/search?sourceid=ie7&rls=com.microsoft:en-US&ie=utf8&oe=utf8&q={searchTerms}</ScopeUrl> <ScopeKey>SearchProvider1</ScopeKey> </Scope> </SearchScopes> <DisableOOBAccelerators>true</DisableOOBAccelerators> <DisableFirstRunWizard>true</DisableFirstRunWizard> <EnableLinksBar>false</EnableLinksBar> <FilterLevel>High</FilterLevel> <Home_Page>www.google.es</Home_Page> <BlockPopups>yes</BlockPopups> <SuggestedSitesEnabled>false</SuggestedSitesEnabled> <PlaySound>false</PlaySound> <ShowInformationBar>true</ShowInformationBar> <UserAgent>UATEST</UserAgent> <ShowMenuBar>true</ShowMenuBar> <FavoritesDelete>true</FavoritesDelete> </component> <component name="Microsoft-Windows-Deployment" processorArchitecture="x86" publicKeyToken="31bf3856ad364e35" language="neutral" versionScope="nonSxS" xmlns:wcm="http://schemas.microsoft.com/WMIConfig/2002/State" xmlns:xsi="http://www.w3.org/2001/XMLSchema-instance"> <RunSynchronous> <RunSynchronousCommand wcm:action="add"> <Order>1</Order> <Path>cmd /c "FOR %i IN (C D E F G H I J K L N M O P Q R S T U V W X Y Z) DO IF EXIST %i:\AppsRoot.txt SETX AppsRoot %i: -m"</Path> <Description>SET %AppsRoot%</Description> </RunSynchronousCommand> </RunSynchronous> </component> </settings> <settings pass="oobeSystem"> <component name="Microsoft-Windows-Deployment" processorArchitecture="x86" publicKeyToken="31bf3856ad364e35" language="neutral" versionScope="nonSxS" xmlns:wcm="http://schemas.microsoft.com/WMIConfig/2002/State" xmlns:xsi="http://www.w3.org/2001/XMLSchema-instance"> <Reseal> <Mode>Audit</Mode> <ForceShutdownNow>false</ForceShutdownNow> </Reseal> </component> </settings> <settings pass="generalize"> <component name="Microsoft-Windows-PnpSysprep" processorArchitecture="x86" publicKeyToken="31bf3856ad364e35" language="neutral" versionScope="nonSxS" xmlns:wcm="http://schemas.microsoft.com/WMIConfig/2002/State" xmlns:xsi="http://www.w3.org/2001/XMLSchema-instance"> <PersistAllDeviceInstalls>true</PersistAllDeviceInstalls> </component> </settings> <settings pass="auditSystem"> <component name="Microsoft-Windows-Shell-Setup" processorArchitecture="x86" publicKeyToken="31bf3856ad364e35" language="neutral" versionScope="nonSxS" xmlns:wcm="http://schemas.microsoft.com/WMIConfig/2002/State" xmlns:xsi="http://www.w3.org/2001/XMLSchema-instance"> <AutoLogon> <Username>Administrator</Username> <Enabled>true</Enabled> <LogonCount>5</LogonCount> </AutoLogon> <TimeZone>Romance Standard Time</TimeZone> <ShowWindowsLive>false</ShowWindowsLive> <DisableAutoDaylightTimeSet>false</DisableAutoDaylightTimeSet> </component> </settings> <settings pass="auditUser"> <component name="Microsoft-Windows-Deployment" processorArchitecture="x86" publicKeyToken="31bf3856ad364e35" language="neutral" versionScope="nonSxS" xmlns:wcm="http://schemas.microsoft.com/WMIConfig/2002/State" xmlns:xsi="http://www.w3.org/2001/XMLSchema-instance"> <RunSynchronous> <RunSynchronousCommand wcm:action="add"> <Order>4</Order> <Path>CMD /C msiexec.exe /i "%AppsRoot%\Install\Adobe.Reader.10.0.1\AdobeReader.msi" TRANSFORMS="%AppsRoot%\Install\Adobe.Reader.10.0.1\AdobeReader.mst" /qr /norestart</Path> <Description>Adobe Reader X 10.0.1</Description> </RunSynchronousCommand> <RunSynchronousCommand wcm:action="add"> <Order>8</Order> <Path>CMD /C msiexec.exe /i "%AppsRoot%\Install\Flash.Player.10.2.153.1\Flash.Player.msi" /qr</Path> <Description>Adobe Flash Player 10.2.153.1</Description> </RunSynchronousCommand> <RunSynchronousCommand wcm:action="add"> <Order>12</Order> <Path>CMD /C REGEDIT /S %AppsRoot%\Install\HKCU.reg</Path> <Description>RegTweaks Current User</Description> </RunSynchronousCommand> <RunSynchronousCommand wcm:action="add"> <Order>16</Order> <Path>CMD /C REGEDIT /S %AppsRoot%\Install\HKLM.reg</Path> <Description>RegTweaks Local Machine</Description> </RunSynchronousCommand> <RunSynchronousCommand wcm:action="add"> <Order>20</Order> <Path>CMD /C %WINDIR%\system32\sysprep\sysprep.exe /generalize /oobe /reboot /Unattend:%AppsRoot%\Oobe.xml</Path> <Description>Reboot to Oobe</Description> <WillReboot>OnRequest</WillReboot> </RunSynchronousCommand> </RunSynchronous> </component> </settings> <cpi:offlineImage cpi:source="wim:d:/windows%207/windows.sysprep/sources/install.wim#Windows 7 ULTIMATE" xmlns:cpi="urn:schemas-microsoft-com:cpi" /> </unattend> Here is my oobe.xml: <?xml version="1.0" encoding="utf-8"?> <unattend xmlns="urn:schemas-microsoft-com:unattend"> <settings pass="specialize"> <component name="Microsoft-Windows-Security-SPP-UX" processorArchitecture="x86" publicKeyToken="31bf3856ad364e35" language="neutral" versionScope="nonSxS" xmlns:wcm="http://schemas.microsoft.com/WMIConfig/2002/State" xmlns:xsi="http://www.w3.org/2001/XMLSchema-instance"> <SkipAutoActivation>true</SkipAutoActivation> </component> <component name="Microsoft-Windows-Shell-Setup" processorArchitecture="x86" publicKeyToken="31bf3856ad364e35" language="neutral" versionScope="nonSxS" xmlns:wcm="http://schemas.microsoft.com/WMIConfig/2002/State" xmlns:xsi="http://www.w3.org/2001/XMLSchema-instance"> <ComputerName>MiEQUIPO</ComputerName> <CopyProfile>true</CopyProfile> <TimeZone>Romance Standard Time</TimeZone> <DisableAutoDaylightTimeSet>false</DisableAutoDaylightTimeSet> <ShowWindowsLive>false</ShowWindowsLive> </component> </settings> <settings pass="oobeSystem"> <component name="Microsoft-Windows-International-Core" processorArchitecture="x86" publicKeyToken="31bf3856ad364e35" language="neutral" versionScope="nonSxS" xmlns:wcm="http://schemas.microsoft.com/WMIConfig/2002/State" xmlns:xsi="http://www.w3.org/2001/XMLSchema-instance"> <InputLocale>0c0a:0000040a</InputLocale> <SystemLocale>es-ES</SystemLocale> <UserLocale>es-ES</UserLocale> <UILanguage>es-ES</UILanguage> </component> <component name="Microsoft-Windows-Shell-Setup" processorArchitecture="x86" publicKeyToken="31bf3856ad364e35" language="neutral" versionScope="nonSxS" xmlns:wcm="http://schemas.microsoft.com/WMIConfig/2002/State" xmlns:xsi="http://www.w3.org/2001/XMLSchema-instance"> <TimeZone>Romance Standard Time</TimeZone> <ShowWindowsLive>false</ShowWindowsLive> <DisableAutoDaylightTimeSet>false</DisableAutoDaylightTimeSet> <Display> <ColorDepth>32</ColorDepth> <DPI>96</DPI> <HorizontalResolution>1024</HorizontalResolution> <VerticalResolution>768</VerticalResolution> </Display> <OOBE> <HideEULAPage>true</HideEULAPage> <HideWirelessSetupInOOBE>true</HideWirelessSetupInOOBE> <NetworkLocation>Home</NetworkLocation> <ProtectYourPC>3</ProtectYourPC> </OOBE> <UserAccounts> <LocalAccounts> <LocalAccount wcm:action="add"> <Password> <Value>xxxxxxxxxxxxxxxxxxxxxxxxxxxx</Value> <PlainText>false</PlainText> </Password> <DisplayName>xxxxxxxxxxx</DisplayName> <Name>xxxxxxxxxxxxxx</Name> <Group>Administrators</Group> </LocalAccount> </LocalAccounts> </UserAccounts> <VisualEffects> <FontSmoothing>ClearType</FontSmoothing> </VisualEffects> </component> </settings> <cpi:offlineImage cpi:source="wim:d:/windows%207/windows.sysprep/sources/install.wim#Windows 7 ULTIMATE" xmlns:cpi="urn:schemas-microsoft-com:cpi" /> </unattend>
-
So the command have you told, you must write in the file UnattendedOOBE.xml or Autonunattend.xml? because i have tried the sysprep at the first of my unattended but i had never got that HKCU are been applied to all the user and the future users also, then i have used the other method setupcomplete.cmd which it works perfectly. Neverthless i will try the method sysprep as i want to learn how it works. <settings pass="specialize"> <component name="Microsoft-Windows-Shell-Setup"> <CopyProfile>true</CopyProfile> </component> </settings>
-
HKCU not applied when RunOnceEx is broken
Major replied to Major's topic in Unattended Windows 7/Server 2008R2
I have found the solution writing this lines in the autounattended in the pass oobesystem, So the system logon in the account of administrator if it is broken the RunOnceEx, then when i logon on the account of the user, the HKCU will be applied. <AutoLogon> <Enabled>true</Enabled> <LogonCount>2</LogonCount> <Username>Administrator</Username> </AutoLogon>Is there any way that the account administrator does not appear in the screen of logon of the users? Thanks -
HKCU not applied when RunOnceEx is broken
Major replied to Major's topic in Unattended Windows 7/Server 2008R2
I have not explained well, the script setupcomplete.cmd usually works well and the HKCU are applied perfectly. Except that one time i have noticed RunOnceEx has been stopped and after i reinitiate the computer the script has continued installing all the programs well, the problem when i log on, the HKCU have not been applied. So it caught my attention to know why the HKCU have not been applied. I think i have found the problem. If i stop the RunOnceEx myself for example reinitiating the computer in the middle of the script, i means before running the batch which loads the HKCU, after the computer startup it loads the user. i write the password and then log on, before it shows the desktop, RunOncex continues installing all the programs correctly, but only the HKCU are not been applied because it has already loaded the user before executing the script (HKCU) which means for that user the HKCU will not be applied but for any new user i create, HKCU will be applied . (I will create a new user when i come back at home to see if HKCU will be applied) My question: how can i fix that neverthless the RunOnceEx is broken, after it continues installing i want to achieve the HKCU are applied also to that user EDIT: Effectively, what i have tought is correct, i have created a new user and the registry tweaks HKCU have been applied to the new user correctly. So please how can i fix that HKCU are applied to the user where it has broken RunOnceEx? Thanks -
HKCU not applied when RunOnceEx is broken
Major posted a topic in Unattended Windows 7/Server 2008R2
Hi, i was trying my unattended windows 7 and i have noticed that RunOnceEx has been stooped (i don´t know why but this is not the problem), then i reinitiate the computer, the installation has continued. But when i log on i have not seen my registry Tweaks HKCU. So I did not know what is happended. I decided to try the unattended again and breaking the runonceex myself (to see if HKCU will not be applied), then reinitiate the computer to see it it will happen the same. Effectively the registry tweaks HKCU have not been applied. Here is a sample of my SetupComplete.cmd @echo off SET KEY=HKLM\SOFTWARE\Microsoft\Windows\CurrentVersion\RunOnceEx REG ADD %KEY% /V TITLE /D "Instalando Aplicaciones" /f REG ADD %KEY%\000 /VE /D "VMWAre Tools" /f IF EXIST %SystemRoot%\SysWOW64 REG ADD %KEY%\000 /V 1 /D "msiexec.exe /i "%AppsRoot%\Install\VMware.Tools\VMware.Tools_x64.msi" /qr /norestart" /f IF NOT EXIST %SystemRoot%\SysWOW64 REG ADD %KEY%\000 /V 1 /D "msiexec.exe /i "%AppsRoot%\Install\VMware.Tools\VMware.Tools.msi" /qr /norestart" /f REG ADD %KEY%\009 /VE /D "Adobe Flash Player 10.2.153.1" /f REG ADD %KEY%\009 /V 1 /D "msiexec.exe /i "%AppsRoot%\Install\Flash.Player.10.2.153.1\Flash.Player.msi" /qr" /f REG ADD %KEY%\020 /VE /D "WinRAR 4.00" /f IF EXIST %SystemRoot%\SysWOW64 REG ADD %KEY%\020 /V 1 /D "%AppsRoot%\Install\WinRaR.4.00\SetupWinRAR_x64.exe /S" /f IF NOT EXIST %SystemRoot%\SysWOW64 REG ADD %KEY%\020 /V 1 /D "%AppsRoot%\Install\WinRaR.4.00\SetupWinRAR.exe /S" /f REG ADD %KEY%\020 /V 2 /D "%AppsRoot%\Install\WinRaR.4.00\CopyFile.vbs" /f REG ADD %KEY%\020 /V 3 /D "%AppsRoot%\Install\WinRaR.4.00\CopyFolder.vbs" /f REG ADD %KEY%\054 /VE /D "Windows Automated Kit" /f IF EXIST %SystemRoot%\SysWOW64 REG ADD %KEY%\054 /V 1 /D "msiexec.exe /i "%SystemDrive%\Install\Waik.EN\wAiKAMD64.msi" TRANSFORMS="%SystemDrive%\Install\Waik.EN\wAiKAMD64.mst" /qr /norestart" /f IF NOT EXIST %SystemRoot%\SysWOW64 REG ADD %KEY%\054 /V 1 /D "msiexec.exe /i "%SystemDrive%\Install\Waik.EN\wAiKx86.msi" TRANSFORMS="%SystemDrive%\Install\Waik.EN\wAiKx86.mst" /qr /norestart" /f REG ADD %KEY%\054 /V 3 /D "%SystemDrive%\Install\Waik.EN\CopyStartMenu.vbs" /f REG ADD %KEY%\054 /V 4 /D "REGEDIT /S %SystemDrive%\Install\Waik.EN\WAiK.HKLM.reg" /f REG ADD %KEY%\080 /VE /D "Apply RegTweaks" /f REG ADD %KEY%\080 /V 1 /D "%AppsRoot%\Install\PermissionFile.cmd" /f REG ADD %KEY%\080 /V 2 /D "REGEDIT /S %AppsRoot%\Install\RegTweaks.HKLM.reg" /f REG ADD %KEY%\080 /V 3 /D "%AppsRoot%\Install\TaskSchedule.cmd" /f REG ADD %KEY%\080 /V 4 /D "%AppsRoot%\Install\RegTweaks.cmd" /f REG ADD %KEY%\080 /V 5 /D "%AppsRoot%\Install\CleanUp.cmd" /f REG ADD %KEY%\080 /V 6 /D "CMD /C DEL /F /Q \"%SystemRoot%\Setup\Scripts\SetupComplete.cmd\"" /f Rundll32.exe iernonce.dll,RunOnceExProcess Exit Here is my RegTweaks.cmd where i import the registry tweaks HKCU. @echo off REG LOAD "HKU\zzz" "%SystemDrive%\Users\Default\NTUSER.DAT" Start /wait Regedit /S "%AppsRoot%\Install\RegTweaks.HKCU.reg" Start /wait Regedit /S "%AppsRoot%\Install\WinRAR.4.00\Settings.HKCU.reg" Start /wait Regedit /S "%AppsRoot%\Install\Messenger.14.0.8117.416\Messenger.HKCU.reg" Start /wait Regedit /S "%AppsRoot%\install\Codecs\DivX.HKCU.reg" Start /wait Regedit /S "%AppsRoot%\install\Codecs\ReClock.HKCU.reg" Start /wait Regedit /S "%AppsRoot%\Install\KMPlayer.3.0.0.1439\KMPlayer.HKCU.reg" REG UNLOAD "HKU\zzz" Exit -
As pressing F8 windows shows the console recovery. For example if i press repair computer, windows prompts me for language and the password for initiate the console. For example If i press Startup repair, it needs DVD Windows 7, and my question if the unattended windows 7 serves for that function? Or i have to do some changes?
-
Hi, as usually i have tried my unattended windows in the virtual machine, the screen network never prompted me. But when i wanted to install it to a friend, a screen network prompts me to choose the network. Nevertheless i kave set it in the autounattended.xml. I have read several posts and i have found 2 registry tweaks which it can be applied one of them during the specialize phase, i want to know please which is the best trick. Here are both tweaks: reg add "HKLM\SOFTWARE\Policies\Microsoft\Windows NT\CurrentVersion\NetworkList\Signatures\FirstNetwork" /v Category /t REG_DWORD /d 00000000 /f Value of 0 means Private (Home/Work), 1 means Public HKLM\System\CurrentControlSet\Control\Network\NetworkLocationWizard\ Name: HideWizard Value (DWORD): 1 Thanks.
-
IE9 to integrate the Windows 7 DVD?
Major replied to TrendMark's topic in Unattended Windows 7/Server 2008R2
I have integrated IE9 to windows 7 unattended and it worked well, but at the moment i have observed when i want to download for example from microsoft a file KB*.exe, he passes to another page without prompt me for saving the file and where, then i have to press click here to download in the other page. While in IE8 he prompted me for saving the file and where before he passes to other page. Any suggest please how to fix it? -
Is there anyone please who has written a script to check the partition which is installed windows ? If i am wrong and it can be done via autounattended.xml, i don´t know how? thanks
-
@maxXPsoft the Firstlogoncommands is for all the users and the future users or only for the current user who you have done the unattended installation.
-
I don´t know how to use unattended.xml to check the partition where the windows is installed, may be the first or the second .... I don´t want to wipe the whole disk nor to create partitions, only i want to install the unattended on the partition where an old system is installed. I think it needs a script to check the partition during the pass PE? Thanks
-
I had the same problem with spanish version, i fixed it downloading the internet explorer 9 .exe from the microsoft web and then extract it, you will find three files, then you copy the language .cab to your work directory. Then you have to work with your neutral .msu and the language .cab. this method has worked for me well.
-
Thanks, the file ei.cfg was deleted. i have tried to delete InstallFrom and it has worked well, thanks again. I have 2 questions please to understand it. as in the autounattend.xml they exist both versions x86 & x64, i am wondering if windows setup reads the whole file autounattend and then gets the version which the user has selected in the screen choice? Before i fixed deleting InstallFrom, I have observed that as both versions exist in the same autounattend, windows setup execute the first architecture which has been read, in my case was x86. It is correct?
-
I am sorry, i was out. Here is my single autounattend.xml <?xml version="1.0" encoding="utf-8"?> <unattend xmlns="urn:schemas-microsoft-com:unattend"> <settings pass="windowsPE"> <component name="Microsoft-Windows-International-Core-WinPE" processorArchitecture="x86" publicKeyToken="31bf3856ad364e35" language="neutral" versionScope="nonSxS" xmlns:wcm="http://schemas.microsoft.com/WMIConfig/2002/State" xmlns:xsi="http://www.w3.org/2001/XMLSchema-instance"> <SetupUILanguage> <UILanguage>es-ES</UILanguage> </SetupUILanguage> <InputLocale>0c0a:0000040a</InputLocale> <SystemLocale>es-ES</SystemLocale> <UILanguage>es-ES</UILanguage> <UserLocale>es-ES</UserLocale> </component> <component name="Microsoft-Windows-International-Core-WinPE" processorArchitecture="amd64" publicKeyToken="31bf3856ad364e35" language="neutral" versionScope="nonSxS" xmlns:wcm="http://schemas.microsoft.com/WMIConfig/2002/State" xmlns:xsi="http://www.w3.org/2001/XMLSchema-instance"> <SetupUILanguage> <UILanguage>es-ES</UILanguage> </SetupUILanguage> <InputLocale>0c0a:0000040a</InputLocale> <SystemLocale>es-ES</SystemLocale> <UILanguage>es-ES</UILanguage> <UserLocale>es-ES</UserLocale> </component> <component name="Microsoft-Windows-Setup" processorArchitecture="x86" publicKeyToken="31bf3856ad364e35" language="neutral" versionScope="nonSxS" xmlns:wcm="http://schemas.microsoft.com/WMIConfig/2002/State" xmlns:xsi="http://www.w3.org/2001/XMLSchema-instance"> <UserData> <ProductKey> <WillShowUI>OnError</WillShowUI> <Key>xxxx-xxxx-xxxx-xxxx-</Key> </ProductKey> <AcceptEula>true</AcceptEula> <FullName>xxxx</FullName> <Organization>xxxx</Organization> </UserData> <ImageInstall> <OSImage> <!-- <InstallTo> <DiskID>0</DiskID> <PartitionID>1</PartitionID> </InstallTo> --> <InstallToAvailablePartition>false</InstallToAvailablePartition> <WillShowUI>OnError</WillShowUI> <InstallFrom> <MetaData wcm:action="add"> <Key>/IMAGE/INDEX</Key> <Value>1</Value> </MetaData> </InstallFrom> </OSImage> </ImageInstall> <!-- <DiskConfiguration> <Disk wcm:action="add"> <CreatePartitions> <CreatePartition wcm:action="add"> <Extend>true</Extend> <Order>1</Order> <Type>Primary</Type> </CreatePartition> </CreatePartitions> <ModifyPartitions> <ModifyPartition wcm:action="add"> <Active>true</Active> <Extend>false</Extend> <Format>NTFS</Format> <Letter>C</Letter> <Order>1</Order> <PartitionID>1</PartitionID> </ModifyPartition> </ModifyPartitions> <DiskID>0</DiskID> <WillWipeDisk>true</WillWipeDisk> </Disk> <WillShowUI>OnError</WillShowUI> </DiskConfiguration> --> <Display> <ColorDepth>32</ColorDepth> <HorizontalResolution>1024</HorizontalResolution> <VerticalResolution>768</VerticalResolution> </Display> </component> <component name="Microsoft-Windows-Setup" processorArchitecture="amd64" publicKeyToken="31bf3856ad364e35" language="neutral" versionScope="nonSxS" xmlns:wcm="http://schemas.microsoft.com/WMIConfig/2002/State" xmlns:xsi="http://www.w3.org/2001/XMLSchema-instance"> <UserData> <ProductKey> <WillShowUI>OnError</WillShowUI> <Key>xxxx-xxxx-xxxx-xxxx-</Key> </ProductKey> <AcceptEula>true</AcceptEula> <FullName>xxxx</FullName> <Organization>xxxx</Organization> </UserData> <ImageInstall> <OSImage> <!-- <InstallTo> <DiskID>0</DiskID> <PartitionID>1</PartitionID> </InstallTo> --> <InstallToAvailablePartition>false</InstallToAvailablePartition> <WillShowUI>OnError</WillShowUI> <InstallFrom> <MetaData wcm:action="add"> <Key>/IMAGE/INDEX</Key> <Value>2</Value> </MetaData> </InstallFrom> </OSImage> </ImageInstall> <!-- <DiskConfiguration> <Disk wcm:action="add"> <CreatePartitions> <CreatePartition wcm:action="add"> <Extend>true</Extend> <Order>1</Order> <Type>Primary</Type> </CreatePartition> </CreatePartitions> <ModifyPartitions> <ModifyPartition wcm:action="add"> <Active>true</Active> <Extend>false</Extend> <Format>NTFS</Format> <Letter>C</Letter> <Order>1</Order> <PartitionID>1</PartitionID> </ModifyPartition> </ModifyPartitions> <DiskID>0</DiskID> <WillWipeDisk>true</WillWipeDisk> </Disk> <WillShowUI>OnError</WillShowUI> </DiskConfiguration> --> <Display> <ColorDepth>32</ColorDepth> <HorizontalResolution>1024</HorizontalResolution> <VerticalResolution>768</VerticalResolution> </Display> </component> </settings> <settings pass="specialize"> <component name="Microsoft-Windows-Security-SPP-UX" processorArchitecture="x86" publicKeyToken="31bf3856ad364e35" language="neutral" versionScope="nonSxS" xmlns:wcm="http://schemas.microsoft.com/WMIConfig/2002/State" xmlns:xsi="http://www.w3.org/2001/XMLSchema-instance"> <SkipAutoActivation>true</SkipAutoActivation> </component> <component name="Microsoft-Windows-Security-SPP-UX" processorArchitecture="amd64" publicKeyToken="31bf3856ad364e35" language="neutral" versionScope="nonSxS" xmlns:wcm="http://schemas.microsoft.com/WMIConfig/2002/State" xmlns:xsi="http://www.w3.org/2001/XMLSchema-instance"> <SkipAutoActivation>true</SkipAutoActivation> </component> <component name="Microsoft-Windows-Shell-Setup" processorArchitecture="x86" publicKeyToken="31bf3856ad364e35" language="neutral" versionScope="nonSxS" xmlns:wcm="http://schemas.microsoft.com/WMIConfig/2002/State" xmlns:xsi="http://www.w3.org/2001/XMLSchema-instance"> <ComputerName>MiEQUIPO</ComputerName> <DisableAutoDaylightTimeSet>true</DisableAutoDaylightTimeSet> <TimeZone>Romance Standard Time</TimeZone> <ShowWindowsLive>false</ShowWindowsLive> <CopyProfile>true</CopyProfile> </component> <component name="Microsoft-Windows-Shell-Setup" processorArchitecture="amd64" publicKeyToken="31bf3856ad364e35" language="neutral" versionScope="nonSxS" xmlns:wcm="http://schemas.microsoft.com/WMIConfig/2002/State" xmlns:xsi="http://www.w3.org/2001/XMLSchema-instance"> <ComputerName>MiEQUIPO</ComputerName> <DisableAutoDaylightTimeSet>true</DisableAutoDaylightTimeSet> <TimeZone>Romance Standard Time</TimeZone> <ShowWindowsLive>false</ShowWindowsLive> <CopyProfile>true</CopyProfile> </component> <component name="Microsoft-Windows-IE-InternetExplorer" processorArchitecture="x86" publicKeyToken="31bf3856ad364e35" language="neutral" versionScope="nonSxS" xmlns:wcm="http://schemas.microsoft.com/WMIConfig/2002/State" xmlns:xsi="http://www.w3.org/2001/XMLSchema-instance"> <SearchScopes> <Scope wcm:action="add"> <ScopeDefault>true</ScopeDefault> <ScopeDisplayName>Google</ScopeDisplayName> <ShowSearchSuggestions>false</ShowSearchSuggestions> <ScopeUrl>http://www.google.com/search?sourceid=ie7&rls=com.microsoft:en-US&ie=utf8&oe=utf8&q={searchTerms}</ScopeUrl> <ScopeKey>SearchProvider1</ScopeKey> </Scope> </SearchScopes> <DisableOOBAccelerators>true</DisableOOBAccelerators> <DisableFirstRunWizard>true</DisableFirstRunWizard> <EnableLinksBar>false</EnableLinksBar> <FilterLevel>High</FilterLevel> <Home_Page>www.google.es</Home_Page> <BlockPopups>yes</BlockPopups> <SuggestedSitesEnabled>false</SuggestedSitesEnabled> <PlaySound>false</PlaySound> <ShowInformationBar>true</ShowInformationBar> <UserAgent>UATEST</UserAgent> <ShowMenuBar>true</ShowMenuBar> <FavoritesDelete>true</FavoritesDelete> </component> <component name="Microsoft-Windows-IE-InternetExplorer" processorArchitecture="amd64" publicKeyToken="31bf3856ad364e35" language="neutral" versionScope="nonSxS" xmlns:wcm="http://schemas.microsoft.com/WMIConfig/2002/State" xmlns:xsi="http://www.w3.org/2001/XMLSchema-instance"> <SearchScopes> <Scope wcm:action="add"> <ScopeDefault>true</ScopeDefault> <ScopeDisplayName>Google</ScopeDisplayName> <ShowSearchSuggestions>false</ShowSearchSuggestions> <ScopeUrl>http://www.google.com/search?sourceid=ie7&rls=com.microsoft:en-US&ie=utf8&oe=utf8&q={searchTerms}</ScopeUrl> <ScopeKey>SearchProvider1</ScopeKey> </Scope> </SearchScopes> <DisableOOBAccelerators>true</DisableOOBAccelerators> <DisableFirstRunWizard>true</DisableFirstRunWizard> <EnableLinksBar>false</EnableLinksBar> <FilterLevel>High</FilterLevel> <Home_Page>www.google.es</Home_Page> <BlockPopups>yes</BlockPopups> <SuggestedSitesEnabled>false</SuggestedSitesEnabled> <PlaySound>false</PlaySound> <ShowInformationBar>true</ShowInformationBar> <UserAgent>UATEST</UserAgent> <ShowMenuBar>true</ShowMenuBar> <FavoritesDelete>true</FavoritesDelete> </component> <component name="Microsoft-Windows-Deployment" processorArchitecture="x86" publicKeyToken="31bf3856ad364e35" language="neutral" versionScope="nonSxS" xmlns:wcm="http://schemas.microsoft.com/WMIConfig/2002/State" xmlns:xsi="http://www.w3.org/2001/XMLSchema-instance"> <RunSynchronous> <RunSynchronousCommand wcm:action="add"> <Order>1</Order> <Path>cmd /c "FOR %i IN (C D E F G H I J K L N M O P Q R S T U V W X Y Z) DO IF EXIST %i:\AppsRoot.txt SETX AppsRoot %i: -m"</Path> <Description>SET %AppsRoot%</Description> </RunSynchronousCommand> </RunSynchronous> </component> <component name="Microsoft-Windows-Deployment" processorArchitecture="amd64" publicKeyToken="31bf3856ad364e35" language="neutral" versionScope="nonSxS" xmlns:wcm="http://schemas.microsoft.com/WMIConfig/2002/State" xmlns:xsi="http://www.w3.org/2001/XMLSchema-instance"> <RunSynchronous> <RunSynchronousCommand wcm:action="add"> <Order>1</Order> <Path>cmd /c "FOR %i IN (C D E F G H I J K L N M O P Q R S T U V W X Y Z) DO IF EXIST %i:\AppsRoot.txt SETX AppsRoot %i: -m"</Path> <Description>SET %AppsRoot</Description> </RunSynchronousCommand> </RunSynchronous> </component> </settings> <settings pass="oobeSystem"> <component name="Microsoft-Windows-International-Core" processorArchitecture="x86" publicKeyToken="31bf3856ad364e35" language="neutral" versionScope="nonSxS" xmlns:wcm="http://schemas.microsoft.com/WMIConfig/2002/State" xmlns:xsi="http://www.w3.org/2001/XMLSchema-instance"> <InputLocale>0c0a:0000040a</InputLocale> <SystemLocale>es-ES</SystemLocale> <UserLocale>es-ES</UserLocale> <UILanguage>es-ES</UILanguage> </component> <component name="Microsoft-Windows-International-Core" processorArchitecture="amd64" publicKeyToken="31bf3856ad364e35" language="neutral" versionScope="nonSxS" xmlns:wcm="http://schemas.microsoft.com/WMIConfig/2002/State" xmlns:xsi="http://www.w3.org/2001/XMLSchema-instance"> <InputLocale>0c0a:0000040a</InputLocale> <SystemLocale>es-ES</SystemLocale> <UserLocale>es-ES</UserLocale> <UILanguage>es-ES</UILanguage> </component> <component name="Microsoft-Windows-Shell-Setup" processorArchitecture="x86" publicKeyToken="31bf3856ad364e35" language="neutral" versionScope="nonSxS" xmlns:wcm="http://schemas.microsoft.com/WMIConfig/2002/State" xmlns:xsi="http://www.w3.org/2001/XMLSchema-instance"> <TimeZone>Romance Standard Time</TimeZone> <ShowWindowsLive>false</ShowWindowsLive> <DisableAutoDaylightTimeSet>true</DisableAutoDaylightTimeSet> <Display> <ColorDepth>32</ColorDepth> <DPI>96</DPI> <HorizontalResolution>1024</HorizontalResolution> <VerticalResolution>768</VerticalResolution> </Display> <OOBE> <HideEULAPage>true</HideEULAPage> <HideWirelessSetupInOOBE>true</HideWirelessSetupInOOBE> <NetworkLocation>Home</NetworkLocation> <ProtectYourPC>3</ProtectYourPC> </OOBE> <UserAccounts> <LocalAccounts> <LocalAccount wcm:action="add"> <Password> <Value>GQAZQBuAGEAZABvAHIAUABhAHMAcwB3AG8AcgBkAA==</Value> <PlainText>false</PlainText> </Password> <DisplayName>User</DisplayName> <Name>User</Name> <Group>Administrators</Group> </LocalAccount> </LocalAccounts> </UserAccounts> </component> <component name="Microsoft-Windows-Shell-Setup" processorArchitecture="amd64" publicKeyToken="31bf3856ad364e35" language="neutral" versionScope="nonSxS" xmlns:wcm="http://schemas.microsoft.com/WMIConfig/2002/State" xmlns:xsi="http://www.w3.org/2001/XMLSchema-instance"> <TimeZone>Romance Standard Time</TimeZone> <ShowWindowsLive>false</ShowWindowsLive> <DisableAutoDaylightTimeSet>true</DisableAutoDaylightTimeSet> <Display> <ColorDepth>32</ColorDepth> <DPI>96</DPI> <HorizontalResolution>1024</HorizontalResolution> <VerticalResolution>768</VerticalResolution> </Display> <OOBE> <HideEULAPage>true</HideEULAPage> <HideWirelessSetupInOOBE>true</HideWirelessSetupInOOBE> <NetworkLocation>Home</NetworkLocation> <ProtectYourPC>3</ProtectYourPC> </OOBE> <UserAccounts> <LocalAccounts> <LocalAccount wcm:action="add"> <Password> <Value>bwByAGQAZQBuAGEAZABvAHIAUABhAHMAcwB3AG8AcgBkAA==</Value> <PlainText>false</PlainText> </Password> <DisplayName>User</DisplayName> <Name>User</Name> <Group>Administrators</Group> </LocalAccount> </LocalAccounts> </UserAccounts> </component> </settings> <cpi:offlineImage cpi:source="wim:d:/windows%207/win.7.x86.x64.sp1/sources/install.wim#Windows 7 ULTIMATE" xmlns:cpi="urn:schemas-microsoft-com:cpi" /> </unattend> Thanks.
-
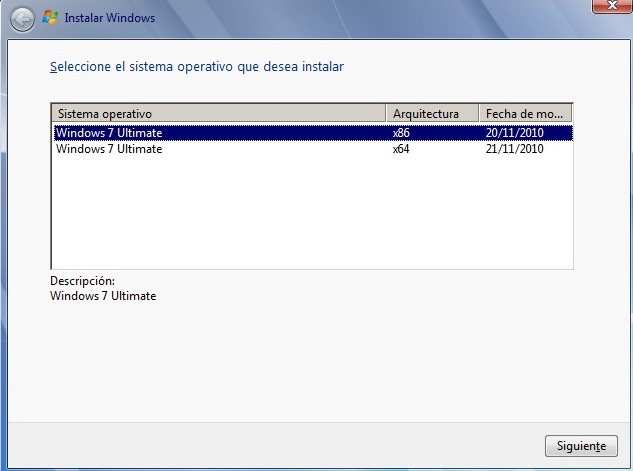
I have combined x86 and x64 in one install.wim i have injected the drivers in the install.wim. Finally i have combined the two autounattend.xml x86 & x64 in only one file. But when i wanted to try it, the screen of selecting which version i want to install has not prompted, while if i remove the file autounattend.xml, that screen appears. How can i fix it please, i want to use the file autounattend.xml and also that screen prompt to me to select the version? Thanks
-
Thanks very much to all. So i will work only on the boot.wim (x86) and also i will not inject the drivers in the boot.wim as there is no need to inject them in boot.wim as they have said the experts above.
-
you can answer me please respect to the question posted above if there is no mucn trouble. When the screen prompts me to select which version x86 or x64 i want to install, after i select the version, the installation calls the boot.wim or the boot.wim is loaded before that screen? the link of the screen is attached above Thanks very much P.S. I ask this question because if the boot.wim is loaded before the screen selection of the windows, i think i have read we can edit the bcd of the boot.wim (x86) and the include the boot.wim x64 renamed to boot64.wim, so we will have two boots: boot.wim and boot64.wim
-
Thank you, respect to inject the drivers in install.wim, i have made it well. I also want the boot.wim in order to inject some crirtical drivers. If it have understood what you have said above, first i have to merge the two boot.wim x86 & x64 in one boot.wim and then inject the critical drivers x86 & x64 in the one boot.wim created., my question how the installation knows which index of boot.wim must select?
-
Hi i will explain what i want to do. Basically i want to have the versions windows 7 x86 and x64 with the drivers included ine the same iso file or dvd. First I have merged the two install.wim (x86,x64) in one install.wim and it seems to work well. The problem lies in wanting to inject some drivers (x86,x64) in the boot.wim (x86,x64), but only one boot.wim x86 is present. I have some questions please if there is any suggest. 1) I must have two boot.wim (x86,x64) separately or i must merge them in one boot.wim? 2) Or i can inject the drivers (x86,x64) in the only boot.wim x86 present. I have an other question please in order to learn how it works the begin of the installation: When the screen prompts me to select which version x86 or x64 i want to install, after i select the version, the installation calls the boot.wim or the boot.wim is loaded before that screen? Thanks very much