Content Type
Profiles
Forums
Events
Everything posted by harunaksoy
-
thanks , does anyone knows the system requirements???
-
Thanks
-
I would like to know if you can use MCE 2005 in place of XP Pro P.S. Sorry for my bad English
-
my email is LAZYILMAZATGMAILDOTCOM
-
3.35 MB compressed
-
Does anyone knows were I can host the files??
-
I made a new custom setup file wtih AMS 5. if you're interested I can send you the resource folder
-
You're welcome
-
here is my ini file for CDSHELL, hope it explains it self CDSHELL.INI
-
Anyone?
-
Voor opstarten gebruik ik CDSHELL, Ik heb deze guide gebruikt http://flyakite.msfnhosting.com/
-
Thanks man, and it does works with 3.11
-

List of Programs used for Unattended Installation
harunaksoy replied to MachManX's topic in Unattended Windows 2000/XP/2003
Use Symantec Ghost -
Why don't you use cdshell and burn it on DVD read this http://flyakite.msfnhosting.com/
-

Ultra small custom autorun menu
harunaksoy replied to scp's topic in Unattended Windows 2000/XP/2003
http://www.msfn.org/board/index.php?showtopic=24510 -
I believe i didn't gave the right adress My real email adress is lzfy@hotmail.com and my MSN adress is fyilmaz@zernike.nl
-
I made the tutorial as a .htm file but i couldn't post it because it was too large Does anyone knowns how I can send it. The resource folder is 442KB compressed and the tutorial is 277KB.
-

Ultra small custom autorun menu
harunaksoy replied to scp's topic in Unattended Windows 2000/XP/2003
-
Thanks man I was looking for this all the time. and does this work with ME and 3.11 too?
-
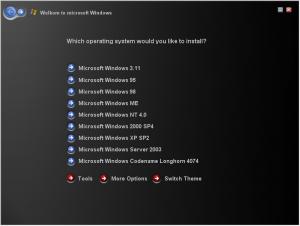
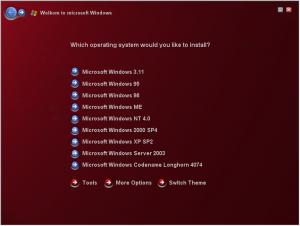
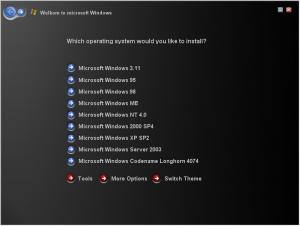
THIS TUTORIAL IS WRITTEN FOR AUTOPLAY MEDIA STUDIO 4 AND SINCE THERE IS A NEWER VERSION OF AUTOPLAY YOU CANNOT DOWNLOAD VERSION 4 FROM INDIGO ROSE ANYMORE. YOU MUST SEARCH ON GOOGLE FOR A FILE CALLED ams40ev1.exe TO DOWNLOAD VERSION 4. THIS IS AN EVALUATION VERSION AND IT WORKS FOR 30 DAYS, AFTER THAT YOU MUST BUY IT. PS: I found this tutorial on the web and changed it a little bit, I don't known who wrote it. :: Custom "setup.exe" Autorun File :: Creating a custom autorun file. This is my current "setup.exe" (I used images from slate.msstyles) located in "AIODVD" This is the “setup.exe” you can build with this guide Okay, first off let me say that I am not a programmer. I have absolutely NO idea how to design Visual C++ or C# applications, so I used AutoPlay Media Studio 4.0 to design this. I also used the images from the Longhorn Build 4051 "setup.exe" file. That file can be found in the "Downloads" section. Preparation IF you plan on using the Longhorn images for your file, you will need to extract them from the setup file. You will need a resource editor. I recommend ResHacker 3.4.0. Open the Longhorn "setup.exe" in ResHacker. Create a folder on your desktop called "resources". In ResHacker right-click on "Bitmap" and click "Save [bitmap] Resources". Name the file anything you want and make sure to save it in your "resources" folder. Now, exit ResHacker and open up your "resources" folder and you should see all of the bitmaps from the setup file in there. Configure Settings Now, open AutoPlay Media Studio 4.0 and choose "Blank Project". Name it whatever you want. FIRST, go to "Project" -> "Settings". In the "General" tab look for "Distribution Folder". We want that to point to our "AIODVD" folder. This step is absolutely vital. If not done correctly then all of our links won't point to the proper files. Under "Page Size" I chose a custom size of 800x600 because that is the size of the Longhorn setup. Under the "Build" tab you can choose to name your excutable file whatever you want. I chose "setup.exe". Still in the "Build" page you can choose whether or not to make an "autorun.inf" file. I also recommend to use an external icon as your source, or else you will get an ugly yellow "AutoPlay" icon. I chose to use the icon from the Windows XP Pro setup.exe file. You have to browse to your "SETUP\WINXPPRO\" directory and then make sure "Files of type:" is set to "All files". Creating our screen I am using my current setup file as reference for this. The easiest way for me to do this is to have my "resources" folder with all my bitmaps open, and just drag the images I need into Media Studio. If using the Longhorn resources drag "Bitmap_38" into AutoPlay and position it so it's in the upper-left corner. Great! Now we have our background! This area is where all of our images and text will be shown. Double-click on "Image 1" and you will see all sorts of options. Under the "Attributes" tab it is helpful to give your image a logical name under "Properties". This is the name that will show in the picture below. It makes keeping track of all your setup elements easier. Browse through all the tabs to get a sense of what is available. Also, I recommend locking the background by double-clicking the lock. This way when you are moving buttons around, the background will never move. Now let's make a button. Drag "Bitmap_14" into Media Studio. Place it whereever you would like. Now either double-click the actual button or the name that is in the resource window. Name it something logical again. If you want a mouseover image, click the magnifying glass and find "Bitmap_15". Mousedown would be "Bitmap_16". Now let's set up an action for this button. Under the "Actions" tab you will notice there are all sorts of actions we can choose from, as well as which event that action takes place on. More than likely we will just want it to be "OnClick" so leave that as is. If we want the button to run the Windows XP Pro setup then in the "Available Actions" window we need expand "File" and then double-click "Execute". Click the magnifying glass and find your "setup.exe" file in "\SETUP\WINXPPRO\" Click "OK" when done.. If you don't want the XP Pro setup screen to appear and you just want to run setup, then you would choose the "winnt32.exe" file in the "i386" directory. If you know how to use command line arguments you can do so if you wish. For example, you could have a button that installs Microsoft Office 2003 and the command line argument would be the special TRANSFORM created with the Office Toolkit. (For more info about this, see the Unattended CD site) Now let's create some text for our button. In the toolbar at the top (also can be seen in the above screenshot), you will see a white button with the letter "A" on it. That creates a text object. Again, you can set up all sorts of features for your text. I chose not to have any actions associated with mine, and I change the normal, mouse over, and mouse down colors all to white. Aligning Objects If you want your buttons and text to line up properly, it is very easy to do. Select the images you want to align either by dragging a box around them like with Desktop icons, or by using Shift-click At the bottom left in Media Studio you should see various buttons. These all do different things. Some align images horizontally in the middle, top, or bottom while some evenly space out 6 buttons vertically (very handy). Just play around with the buttons until you get the look you want. Multiple screens If you want to have more than one page, like a page for "Additional Tasks" or anything else, then click the "Pages" tab at the bottom of the resource window. This tab can be seen in the above screenshot. If you don't want to mess with setting up the backgrounds and buttons again, you can right-click the page listed there and choose "Copy". Then, right-click the page again and choose "Paste After". Now you have a duplicate page that you can just re-edit the text and actions. If you want a new blank page, just right-click in the middle of the "Pages" window and choose "Add". It also helps to rename your pages to something that makes sense. Now we need to setup our first page to jump to the second. Either double-click your first page in the "Pages" window or click the first page tab at the bottom of the work area. Create a button on your first page that you want to access the new page. Double-click the button and under "Actions" expand "Page" and double-click "Jump". In the drop-down box choose the page you want to jump to when the button is clicked. Click "OK". Make sure there are not multiple actions listed in the window (like an execute and jump). If there are delete the ones you don't want. Previewing our new setup dialog In the menu choose "Project" -> "Preview". This will run a simulation of how your actual autorun file will work. Make sure to check that all of your buttons execute the right files or jump to the right pages. Building our file Once satisfied with your new setup screen, in the menu choose "Project" -> "Build". It will ask if you are sure. If you choose yes, it will create all of the necessary files in your "AIODVD" folder. You need ALL of them. That's about all there is to it. There are many more things you can do with Media Studio but I just covered what features I've used. Once you create your ISO with CDIMAGE and burn a DVD, you should be able to insert the DVD into your drive and the setup screen should pop-up . HERE ARE SOME USEFUL IMAGES WITCH I MADE WITH PAINT SHOP PRO 7
-
-


