behdadsoft
Content Type
Profiles
Forums
Events
Everything posted by behdadsoft
-
Hi. I tried to install office 2021 silently using configuration.xml file that worked very well. Now, the problem is when I try install office with unattended windows 10, office won't install and give me this error: Error Image This is my office configuration.xml: <Configuration> <Add OfficeClientEdition="64" Channel="PerpetualVL2021"> <Product ID="ProPlus2021Volume"> <Language ID="en-US" /> </Product> </Add> <Display Level="None" AcceptEULA="TRUE" /> <Updates Enabled="TRUE" Channel="PerpetualVL2021" /> </Configuration> Note : I used this command in SetupComplete.cmd. call %~dp0Office\setup.exe /configure Office\configuration.xml
-
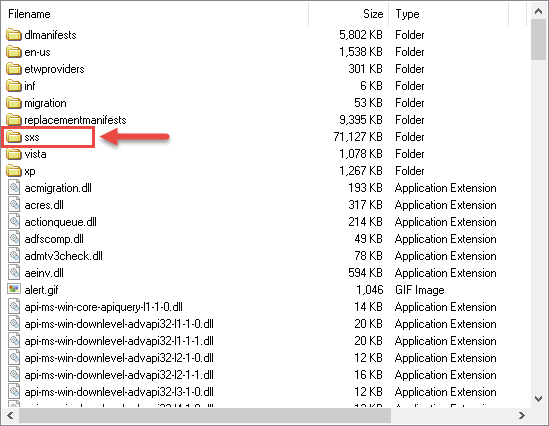
Hi. I need more space in Windows ISO file. so i want to remove SXS folder under sources in ISO file, but i need know remove it is safe? Note: Already i enabled .Net Framework 3.5.

-
Thanks.
-
while do this happen, how can access to ramdisk (x drive)?
-
if this problem is an access denied message, why after show error message, if i try to install windows again it don't give me any error and install correctly?
-
I put .ESD file onto a DVD. 1- what is your mean about the ESD itself that is getting locked? 2- so if it was locked how can fix it?
-
Hi. I converted my install.wim to .esd format. but when I try to install windows, at installation time give me Error code: 0xC0000005. but before convert to .esd, windows installed without any error. I need convert .wim to .esd for decrease size. anyone know how can fix this problem?
-
Skip Cortana in unattended file
behdadsoft replied to behdadsoft's topic in Unattended Windows 10/11 Installation
No, I used WinToolkit fo do this. Thanks it work very well. -
Hi. I used this unattended file for install windows 10 build 1607. but in new version (build 1703) microsoft added cortana during installation and this unattended file can't skip select language and add layout. anyone know how can skip this part in unattended file?? <?xml version="1.0" encoding="utf-8"?> <unattend xmlns="urn:schemas-microsoft-com:unattend"> <settings pass="windowsPE"> <component name="Microsoft-Windows-International-Core-WinPE" processorArchitecture="x86" publicKeyToken="31bf3856ad364e35" language="neutral" versionScope="NonSxS" xmlns:wcm="http://schemas.microsoft.com/WMIConfig/2002/State" xmlns:xsi="http://www.w3.org/2001/XMLSchema-instance"> <SetupUILanguage> <UILanguage>en-US</UILanguage> </SetupUILanguage> <InputLocale>0409:00000409;1036:00001036</InputLocale> <UserLocale>en-US</UserLocale> <UILanguage>en-US</UILanguage> <SystemLocale>fr-FR</SystemLocale> </component> <component name="Microsoft-Windows-Setup" processorArchitecture="x86" publicKeyToken="31bf3856ad364e35" language="neutral" versionScope="nonSxS" xmlns:wcm="http://schemas.microsoft.com/WMIConfig/2002/State" xmlns:xsi="http://www.w3.org/2001/XMLSchema-instance"> <UserData> <AcceptEula>true</AcceptEula> </UserData> </component> </settings> <settings pass="specialize"> <component name="Microsoft-Windows-Shell-Setup" processorArchitecture="x86" publicKeyToken="31bf3856ad364e35" language="neutral" versionScope="nonSxS" xmlns:wcm="http://schemas.microsoft.com/WMIConfig/2002/State" xmlns:xsi="http://www.w3.org/2001/XMLSchema-instance"> <ComputerName>MyComputerName</ComputerName> </component> </settings> <settings pass="oobeSystem"> <component name="Microsoft-Windows-Shell-Setup" processorArchitecture="x86" publicKeyToken="31bf3856ad364e35" language="neutral" versionScope="nonSxS" xmlns:wcm="http://schemas.microsoft.com/WMIConfig/2002/State" xmlns:xsi="http://www.w3.org/2001/XMLSchema-instance"> <OOBE> <HideEULAPage>true</HideEULAPage> <HideWirelessSetupInOOBE>true</HideWirelessSetupInOOBE> <NetworkLocation>Home</NetworkLocation> <ProtectYourPC>1</ProtectYourPC> </OOBE> <RegisteredOwner>my name</RegisteredOwner> <RegisteredOrganization>my name</RegisteredOrganization> <UserAccounts> <LocalAccounts> <LocalAccount wcm:action="add"> <Password> <Value /> </Password> <Description>Administrator Account</Description> <DisplayName>admin</DisplayName> <Group>Administrators</Group> <Name>admin</Name> </LocalAccount> </LocalAccounts> </UserAccounts> <AutoLogon> <Password> <Value /> </Password> <Enabled>true</Enabled> <LogonCount>9999999</LogonCount> <Username>admin</Username> </AutoLogon> </component> </settings> </unattend>
-
Hi. I made widows 7 & 10 together in one .wim file, and i should use windows 10 source file for install this windows. now i want use windows 7 installation interface instead windows 10 interface, but i don't know what to do. anyone know how can do it?
-
Change Windows CREATIONTIME
behdadsoft replied to behdadsoft's topic in Unattended Windows 7/Server 2008R2
yes, Of course. you can open install.wim with hex editor and access to [1].xml file and easily change CREATIONTIME. -
Change Windows CREATIONTIME
behdadsoft replied to behdadsoft's topic in Unattended Windows 7/Server 2008R2
I find it. -
Hi. I added custom update to image file (install.wim) and now I want change windows CREATIONTIME to new time. I searched in google for find a way for do this work but i only understood i should modify [1].xml file inside install.wim but I don't know how can find this file. anyone know how can find this file? Thanks.
-
Hi. I can use install.esd file instead of install.wim in windows 8 and windows 10, but seen windows 7 can't support this format for install windows. Know I need know is there any way to use .esd file in windows 7 image ? Thanks.
-
Thanks for Reply. Is your mean that All 32Bit Windows(7,8.1,10) can't boot in EFI mode? mean EFI mode is only for 64Bit Operating system? After merged two Image 32Bit and 64Bit in to one Install.wim, I put it to 32Bit Iso. in DVD Image there is a efi folder that there is two folder in it: http://uupload.ir/files/rzdl_1.png Boot :in this folder there is bootia32.efi. microsoft ==> Boot : there is 8 file. http://uupload.ir/files/ufwd_2.png I think for support EFI, I should add bootx64.efi inside efi ==> Boot folder in beside bootia32.efi. but I don't know this way is correct or not. http://uupload.ir/files/mqax_3.png
-
Hi. I Merged two Image 32Bit and 64Bit in to one Install.wim. now I want know for support both 32bit and 64bit UEFI, what should I do? can I merge bootia32.efi and boox64 together for support dual UEFI(32 & 64Bit)? Thanks.
-
AIO windows don't show all edition
behdadsoft replied to behdadsoft's topic in Unattended Windows 10/11 Installation
I find it. Thanks -
Hi. I merged all edition of windows 10 (v1511 build 10586) and used Windows 10 enterprise x86 iso for them. but only show Enterprise edition in list of windows. anyone know how can fix this problem? Thanks.
-
for clean work I want hide main window. I find solution for run installer. Thanks for guides.
-
also I changed it o zero in Option Wizard at general tab. but i need hide this page and only show Installer. do you have any idea? also I read manual but can't find any thing for this problem. Installer is Installer.hta in Common folder but I think need a switch command for run it.
-
I set Seconds=0; but still show list of software then begin Install them. there is any way to hide this page?
-
Hi. I want after run WPI.exe, then show installer page (mean begin install softwares) and don't show List of softwares and timer. but I don't know how can do it. please guide me. Thanks.
-
Hi. I need a way for integrated Softwares like Windows update before Installing Windows. Note: I know how can install softwares during insatlling windows, I only a way for Integrated them. also i don't want add package because my softwares aren't portable. Please Guide me. Thanks.
-
Is your mean reboot system after first logon? This is a part of my autoattended.xml file that don't work. <OOBE> <HideEULAPage>true</HideEULAPage> <HideLocalAccountScreen>true</HideLocalAccountScreen> <HideOnlineAccountScreens>true</HideOnlineAccountScreens> <HideWirelessSetupInOOBE>true</HideWirelessSetupInOOBE> <NetworkLocation>Home</NetworkLocation> <ProtectYourPC>1</ProtectYourPC> </OOBE> <UserAccounts> <AdministratorPassword> <PlainText>true</PlainText> <Value></Value> </AdministratorPassword> <LocalAccounts> <LocalAccount wcm:action="add"> <Group>Administrators</Group> <Name>Administrator</Name> <Password> <PlainText>true</PlainText> <Value></Value> </Password> </LocalAccount> </LocalAccounts> </UserAccounts> <FirstLogonCommands> <SynchronousCommand wcm:action="add"> <CommandLine>C:\Windows\System32\cmd.exe /c shutdown -r -t 0</CommandLine> <Description>Reboot_System</Description> <Order>1</Order> </SynchronousCommand> <SynchronousCommand wcm:action="add"> <CommandLine>c:\Windows\Setup\Scripts\Run.exe</CommandLine> <Description>Install_Softwares</Description> <Order>2</Order> </SynchronousCommand> </FirstLogonCommands>
-
I Used FirstLogonCommands but problem is after come to desktop, my command is execute. while i want run command before come to desktop.