

nice_guy75
Content Type
Profiles
Forums
Events
Posts posted by nice_guy75
-
-
It has lot of bugs, new version 1.03 is in the pipe line, I guess we should wait for the new version.
I have already tried the v1.02 but not working properly. This version is only working for multiboot DVDs not for single boot DVD. I have already tried on 3 different single boot DVD.
0 -
It did brother, I have already tried. I have Acer laptop and my sis has HCL with different configurations. But I did restore my backup on my sister's laptop without any problem. As I was only experimenting so I don't know how it works in the long run. But I have used that laptop for few hrs after restoring my backup on my sister's laptop it was working perfectly.
0 -
-
The system backup image made by the backup program isn't meant for this - you want to do what some of the other posters have said and either make (and sysprep) a Windows 7 image and capture it using imagex, or use a 3rd party tool to capture it. Do not install a system and make an image with the backup program to accomplish this, as it's likely not to work.
This method would consume more time than acronis true Image method. As the method you are suggesting is actually creating an installation DVD with all the applications, and in my experience installation would take atleast half an hour to install an OS but acronis would take only 7 mins. I have already tried both the methods.
0 -
I guess you must be knowing that but just reminding you, there shouldn't be any spaces in the entire path of the soruce folder.
0 -
This link can also help you:
0 -
Use restorer and edit imageres.dll you would get most of the icons in this dll.
0 -
How bad ? Still no one knows the answer?
Try to edit basebrd.dll.mui located @ "C:\Windows\Branding\Basebrd\en-US"
0 -
Read all the posts of this thread: http://www.msfn.org/board/index.php?showtopic=140340
0 -
i think the image in %windir%\System32\Shell32.dll -> Bitmap -> 632 & 633

Thanks brother, you are bang on target. I have already changed the background.
Please help in this also:
0 -
Just got your PM, here is my reply.
Since you already sysprepped your machine and cannot go back and re-sysprep without some additional effort. The easiest method will be to mount your Install.wim with DISM (or DISM Tool™) and copy/paste your links to Mount\Users\Default\Desktop.
I have also replied to your PM.
There is no problem at all I have a copy of pre-syspreped version of my OS, so I can also start my work before sysprep.
And one more thing I have noticed that I am unable to sysprep my OS once again when I tried to install my syspreped version of my OS. Well that is not so improtant as I have a copy of pre syspreped version of my OS as well.
Edit: Please see this link is it worth considering?????????????????
0 -
Don't we have any alternate method??????????/
I know there is a alternate method but I don't know which. I can't talk about where I have seen other method it is not allowed here.
0 -
Not at all I don't mind if my system reboot one more time after restoring .mig file. I have already created .mig file when I tried to run that file on the same computer (only for testing purpose) it is opening a window does this mean when I integrate this file in my install.wim the user had to click some buttons in order to get the settings restored or it will be restored silently like silent installers of applications???????????? I don't wish to use OEM folder so is there any alternate method to restore this mig file, like intall folder and cmd file or something like that?????????????
0 -
I have removed these components:
[Components Removed]
[Accessories]
Accessibility
Character Map
Mobility Center
Speech Support
Welcome Center
[Languages]
Arabic
Brazillian
Bulgarian
Croatian
Czech
Danish
Dutch
Estonian
Finnish
French
German
Greek
Hebrew
Hungarian
Italian
Japanese
Korean
Latvian
Lithuanian
Norwegian
Polish
Portuguese
Romanian
Russian
Serbian
Simplified Chinese
Slovak
Slovenian
Spanish
Swedish
Table Driven Text Input Processor
Thai
Traditional Chinese
Turkish
Ukrainian
Welcome Center
[Multimedia]
Media Center
[services]
Error Reporting
Quality Windows Audio Video Experience
[system]
Natural Language
Reliability and Performance Monitor
Tablet PC
And regarding VM yes on VM as well the sysprep was failing, but now sysprep is not the problem. I have successfully syspreped my OS the only issue left is of icons and some customization (like applying iconpackager theme and OS theme) which I do before sysprep.
0 -
I have a new problem with sysprep.
I have created a install.wim of my customized OS, I have customized my OS then I syspreped my OS then capture install.wim (ofcourse booting from winPE)
During customization, I have set all the icons on the desktop (incuding my computer, network, control panel and all and icons of some installed applications as well) but when I capture image after sysprep all the icons from desktop are gone. Theme is also set to the default.
How can I capture image with all the icons on the desktop??????????
0 -
Sorry brother I made a mistake, I have changed the name but I don't remember which dll I have edited.
0 -
You have to edit string in W32UIRes.dll,
Location: C:\Windows\System32\OOBE
0 -
which icon the yellow folder?
I delete all those and add my own I copy in
Yes the yellow one.................. I guess your reply is incomplete "I delete all those and add my own I copy in........?????????"
I am facing very strange problem. I have edited explorer.exe to change start button and folder icons. After that when I update my OS both the icons again changed to default icons. Now after updating I am unable to take ownership of explorer.exe. The registry of ownership doesn't show "Take Ownership" option when I right click on exlporer.exe. This is not only with explorer.exe but some other files as well. Though the option is visible with some files but not with others including exlporer.exe
Is there any other way to take ownership of explorer.exe????????????????????????
0 -
@nice_guy75
Maybe you can find some help here:
http://support.microsoft.com/kb/929828
---------------------------------------------------------------------------------
"Run the Slmgr.vbs script in an elevated Command Prompt window. For example,
run cscript
c:\windows\system32\slmgr.vbs –rearm.
Note Administrative credentials are required to run the Rearm process.
The Rearm process can be run a maximum of three times in a Windows Vista image.
---------------------------------------------------------------------------------
I think it is available for Windows 7.
You can try also, in an elevated Command Prompt window:
slmgr
And you can see all the options.
J have a french version, but you can see the options in yellow color.
See attachments.
J hope that will help you!
Hey brother I guess you posted in the wrong thread, my sysprep problem is already solved. This thread is for Answer file. I would try to edit my answer file manually and would post the results.
yes the xml is nothing but a text file and can open with notepadthats all you need what Mrjinje said if you want to go trial for 30 days
Thanks brother you guys are really great for newbies like me. I would try Mrjinje's method and would post the result soon.
0 -
This is the error <Key><Product Key></Key> should look like this if you were trying to integrate a real key <Key>XXXXX-XXXXX-XXXXX-XXXXX-XXXXX</Key>
Either way you don't need that line, delete it and change this.
<ProductKey>
<Key><Product Key></Key>
<WillShowUI>OnError</WillShowUI>
</ProductKey>
To this.
<ProductKey>
<WillShowUI>Never</WillShowUI>
</ProductKey>
and report back.
So can I edit it manually, and save it?????????????????????
0 -
Hi guys,
I have prepared my Autounattend.xml following this link: http://technet.microsoft.com/en-us/library...317(WS.10).aspx, but when I tried to install my customized OS it is giving some error saying product key is not right. I am getting it just after booting the system, it has also refering to xml file. I wish to install my OS without product key and as trial for 30 days. I am attaching my Autounattend.xml file here please go through it and suggest the neccessary changes.
0 -
Thanks guys, I have managed to solve this problem by myself. I only kept the IpsMigrationPlugin.dll in this folder: C:\Program Files\Common Files\Microsoft Shared\Ink\ and my problem is solved.
Thanks to all of you.
0 -
Hi guys,
I am trying to create a customized windows 7 Ultimate installation DVD, after customizing and installing softwares when I tried to sysprep my OS I am getting an error
"A Fatal Error Occurred while trying to sysprep the machine."
Here is log:
2010-02-02 19:07:53, Error [0x0f0085] SYSPRP LaunchDll:Could not load DLL C:\Program Files\Common Files\Microsoft Shared\Ink\IpsMigrationPlugin.dll[gle=0x0000007e]2010-02-02 19:07:53, Error [0x0f0070] SYSPRP RunExternalDlls:An error occurred while running registry sysprep DLLs, halting sysprep execution. dwRet = 126[gle=0x0000007e]
2010-02-02 19:07:53, Error [0x0f00a8] SYSPRP WinMain:Hit failure while processing sysprep cleanup providers; hr = 0x8007007e[gle=0x0000007e]
Please help me guys.
0 -
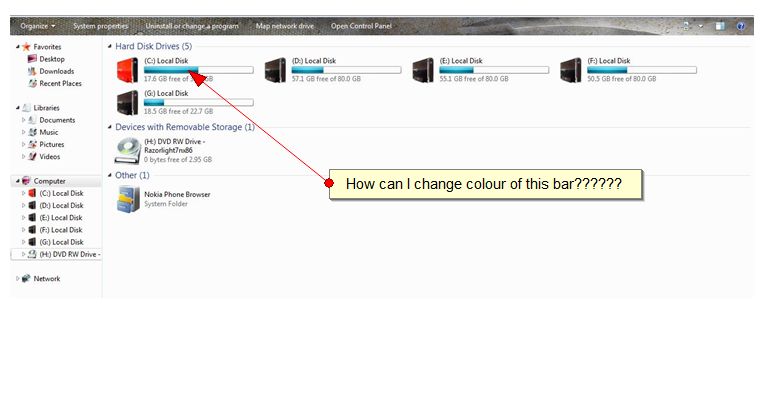
Hi guys,
I wish to change folder icon in the task bar, I have alredy changed the folder icon in "explorer.exe" but task bar icon has not changed. All the icons have already changed. I am also using iconpackager, but I am unable to change folder icon in the task bar.
See this screenshot.
0


Best way to capture windows 7 image from reference comp
in Unattended Windows 7/Server 2008R2
Posted
You need to create a catalog file with Windows System image manager.
Secondly did you sysprep your machine before capturing the image. If not then you need to install your OS and applications once again and then sysperp your system and then capture install.wim.
Remember if you wish to have all the icons on the desktop then copy all your icons in C:\Users\public\public Desktop.
Now regarding making ISO if vlite is unable to make ISO, you can try this
Make new folder on let say D:\ called myWin7 open it and make two new folders called DVD and ISO. now copy content of your bootable Win7 DVD in to D:\myWin7\DVD. Open it and find original install.wim file, take ownership of him and replace with your instal.wim.
Now run as administrator Win7 AIK and type
cd..
cd PETools
If you make x86 iso then type: oscdimg -n -m -b"%Programfiles%\Windows AIK\Tools\PETools\x86\boot\etfsboot.com" D:\myWin7\DVD D:\myWin7\ISO\"what ever you like".iso
This is a comprehensive tutorial: