About scuzzy47

- Birthday 06/30/1986
Contact Methods
-
MSN
scuzzy47@hotmail.com
-
Website URL
http://
Recent Profile Visitors
942 profile views
scuzzy47's Achievements
0
Reputation
-
That's like literally translating "You're welcome...", in Belgium we translate it to "Graag gedaan...". Cheerz
-
Thanks, what you suggested didn't work, cause I could only remove the partition and wasn't able to import it, but you pushed me in the right direction. I made the disk dynamic and than was able to give it a disk character, so now i can explore and see all my files again... Thank you for the quick reply!!! Grtz...
-
Hello, a few days ago I formatted my drive with windows XP on it, I do this frequently and no errors occured, but when I came in windows, I couldn't find my second hard disk.. After searching and looking everywhere, I have found it in the hardware manager an it's also in computermanagement. The only problem is that it doesn't have a disk character like C:\ or D:\ and I'm not able to change it...or rename it or format it, just remove the partition... It has all my personal documents, I have them backed up, but I would rather not format it, anyone here who can help me out?
-
Yeah I've got the Universal Serial Bus Controllers but no enhanced ones, so it's probably the hardware... I'll have to buy a few new usb ports then... Thx for replying, anyways... Grtz
-
Hi, I got this problem, for the moment I'm using windows xp with SP2 installed, but when I connect my singplayer to my usb, it tells me the faster device is connected to the slower USB-hub.... I was using a regular windows xp without SP2, then someonge told me to install SP2, and it would get fixed... My guess is, the usb port's drivers still aren't updated, my computer is about two years old, so I think these are usb 2.0 ports, they just don't get the speeds they should... What to do???
-

Office Shrinker [reduce source of o2k3/xp/2k]
scuzzy47 replied to buckeyeXP's topic in Microsoft Office
Hi guys, I did everything, made an installation setup folder, slipstreamed it with sp1 and then created a .mst with ork, so all was done, then I've set up a virtual machine, with a clean install, I shared the folder containing me installation setup and executed shrink_lang2.exe, this program works about 10 minutes, then when it's done, in my target folder there's only 7.20mb, then when I try to open my original installation setup folder, to install, it tells me to do some system changes in the config, when I try the shrunk office it tells me the same thing... Anyone got an answer to this, maybe it's my virtual machine that doesn't work correct, I didn't install any additions cause I don't know where to download, thx in advance... Grtz, scuzzy -
Hi guys, love this topic, the only two problems I get, is that I can't use my batch file on the virtual machine (see included picture) it's saying I have to go to config screen to configure the systemparts. And when the shrink is done, I only get 7.20 MB, and I think this isn't right, since there are not enough files in it... Maybe both of my problems are related to not having the VMware additions, where can I download these? Would love this if it worked, maybe you guys can help me out, thx anyway, grtz...
-
Well, I mostly play movies on it (to watch on tv) and I do a lot of editing, html, photos, movies and stuff, but I've never had any problems with my current setup, till a few months ago, when I put more ram in it, without putting an extra (or bigger) fan in it, so I guess, that's the problem that causes my pc to shut down.. I'll prolly go for amd, just because of the good experience, I heard that price/quality, amd beats intel by far.... But you can share your opinion on this, so I learn stuff
-
I'm not planning to overclock no, so I'll keep it cheap, my current setup costed me 385 euro but every once in a while he hangs or shuts down, due to the heat I guess, and he's not able to run photoshop smoothly, so I'm in the need for an update, just asked here, to make sure... Thanx for your quick replies!!! Grtz
-
Well, for the moment I'm running a system with 1.8ghz (amd athlon 2200+ xp), so I was taking a amd athlon 3500 because of the difference, I read that a 3200 gives 2ghz and a 3500 gives 2.2ghz... So buying a 3200 would give me a plus of 0.2ghz, is that worth upgrading?? Or is it actually more than 0.2ghz? And the memory is pretty expensive, does it really matter if I buy that, or something cheaper? Don't think I don't like your help, I really do, I just wanting to know more about the differences...
-
The problem is, I buy everything from someone who gets it pretty cheap, he puts it together, so my choice is limited, I'll give you his site, it's the following:EBizzpc It's dutch, but all the terms needed are english, so maybe you can check this and give me my options, and it should be around 685 euro (the hdd, cd-rom and graphic card I already have, included) ... Owh and I don't know what PSU he'll be putting in, he only told me that for that config, I needed a 500Watt...
-
MSI K8N Neo2 Platinum € 140,97 ($ 176,99 ) AMD Athlon64 3500+ Boxed S939 € 241,00 ($ 302,58 ) DDR-2 module 512MB PC3200 (400) CL3 Infineon Original € 50,62 ($ 63,55 ) DDR-2 module 512MB PC3200 (400) CL3 Infineon Original € 50,62 ($ 63,55 ) 500W Power supply € 39,00 ($ 48,97 ) Antec SLK3000B Black No Power Supply € 47,35 ($ 59,45 ) Maxtor 40gb 2mb Cache 7200rpm € 49,69 ($ 62,39 ) MSI FX5200-TD128 € 50,00 ($ 62,78 ) CDRom LG 52X OEM WHITE € 16,04 ($ 20,14 ) Total € 685 ($ 860,40 ) I've put this config together myself, I'm not sure if it's good, but I guess you guys will be able to tell me that... the hdd, the cd-rom and the graphic card, I already have, so I'm sure putting those in, but you might give your comment on the rest... I chose AMD 'cause I heard it's the best, but I'm not a gamer, so maybe Intel is a better option? I don't know... Thx in advance guys...
-
The print screen button actually serves as a copy button, it allows you to copy the entire screen at once, so you can later paste the image into paint or something like that, I guess it used to immediately print the entire screen. But they must have changed it cause of the inefficiency, who wants to print the whole screen at once anyway... Hope this helps...
-
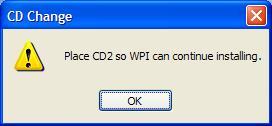
This is an old post, but I'm going through the posts beginning at the end, and I've found a solution for this: an AutoHotKey script: IfExist, %A_ScriptDir%\CD1.txt { Drive, Eject, %A_ScriptDir% MsgBox,, CD Change, Place CD2 so WPI can continue installing., } Sleep, 500 IfExist, %A_ScriptDir%\CD2.txt MsgBox,, CD Continue, CD2 is in place and WPI will continue.,2 This script checks if there's a CD1.txt in the same directory (cd-rom), if there is one, it will eject CD1 and wait 'till you place CD2 with the CD2.txt file on it. You put your entire WPI on one cd, then, on the next, you put just other programs. It works like a charm, you only have to make sure this script is ran after all the programs of the first cd have been installed...and you can adapt this script to work with the second and every other cd...
-
I did this for the Glossy theme, so be sure to change Glossy to whatever name your theme's called. First of all you start changing the WPI.htm, you look for this: <!-- The user manual. --> <div id="ManButton"> <a href="./UserManual/manual.html" target="_blank" onMouseDown="document.ManualButton.src='./themes/Glossy/manual.gif';" onMouseOver="document.ManualButton.src='./themes/Glossy/manualOver.gif'; stm(getText(ttmanual),Style[0]);" onMouseOut="document.ManualButton.src='./themes/Glossy/manual.gif'; htm()"> </b></font> <img src="./themes/Glossy/manual.gif" align="absbottom" class="mainbtn" border="0" name="ManualButton"> <font class="side" ><b><script>document.write(getText(lblmanual));</script> </div> And you change that to this: <!-- The Manual button --> <div id="manualButton"> <a href; onMouseDown="document.optionsbutton.src='./themes/Glossy/continuedown.gif';" onMouseOver="document.optionsbutton.src='./themes/Glossy/continueover.gif'; stm(getText(ttmanual),Style[0]);" onMouseOut="document.optionsbutton.src='./themes/Glossy/continue.gif'; htm();" onClick="ToggleManual();"> <img src="./themes/Glossy/manual.gif" align="absbottom" class="mainbtn" border="0" name="ManualButton"> </img><font class="side"><b><script>document.write(getText(lblmanual));</script></b></font></a><br /> </div> Then you add a layer for the manual you just add the following code (mine is directly under the audio layer): <div id="layermanual" style="position:absolute; display:none; z-index:100; overflow: auto; width: 100%; height: 100%;"> </div> Then you take the next code and save it under manualwizard.js, in the wpiscripts folder. function ToggleManual() { position="manualwizard.js"; if (document.all.layermanual.style.display == 'none') ShowManual(); else HideManual(); } function WPIPath() { var p = new String(); p=""; p = unescape(document.location); p = p.substring(0,p.lastIndexOf("/")) + "/"; p = p.replace("file:///","").replace(/\//g,"\\"); return p; } function ShowManual() { position=".\\wpiscripts\\optionswizard.js"; HideLayers(); document.all.layermanual.style.display = 'block'; CreateManualPage(); var f, fc,s; f = fso.GetFolder(WPIPath() + ".\\themes\\"); fc = new Enumerator(f.SubFolders); s = new String(); for (; !fc.atEnd(); fc.moveNext()) { s = ""; var opt = document.createElement("option"); s += fc.item(); s = s.substr(s.lastIndexOf("\\")+1); opt.value = s; opt.text = s; } } function HideManual() { position="manualwizard.js"; document.location.reload(); } function CreateManualPage() { position="manualwizard.js"; var tf, strfile; var txt=new String(); txt = ""; var line = new String(); line=""; var ex; strFile = WPIPath() + ".\\themes\\" + theme + "\\manual.htm"; try { tf = fso.OpenTextFile(strFile, 1); line = tf.ReadLine(); while (!tf.AtEndOfStream) { txt += line; line = tf.ReadLine(); } } catch (ex) { } finally { tf.Close(); } document.all.layermanual.innerHTML = txt; } function HideLayers() { try { for (var i = 0; i<document.all.layergroup.childNodes.length;i++) { var node = document.all.layergroup.childNodes[i]; if (!node.id || node.id.substr(0,5)!="layer") continue; node.style.display='none'; } } catch (de) {} } Next you save this code to Manual.htm in your theme's folder. (The original Manual.htm won't open in WPI.) <html> <head> <link rel="stylesheet" type="text/css" href="./themes/Glossy/wpi.css" /> <link href="wpi.css" rel="stylesheet" type="text/css"> </head> <body onload="SetScriptWaitTimeout(); startstop(); fillBoxes(); check(load_checks); startstop(); flevInitPersistentLayer('layercfgbtns',0,'','','15','','','15'); setCategoryState();"> <tr> <td colspan="2" bgcolor="#18339f" height="10%"> <table width="98%"> <tr class="txt"> <td colspan="9"> <center> <p><font size="+2">Windows Post-Install Wizard (WPI) Manual</font></p> </center> <center> </center></td> <tr> <td width="1%"> </td> <td width="14%" class="side"><div align="center">Purpose</div></td> <td width="14%" class="side"><div align="center">User manual</div></td> <td width="14%" class="side"><div align="center">Advanced options</div></td> <td width="14%" class="side"><div align="center">Themes</div></td> <td width="14%" class="side"><div align="center">Tools</div></td> <td width="14%" class="side"><div align="center">Reference</div></td> <td width="14%" class="side"><div align="center">Credits</div></td> <td width="1%"></td> </tr> </table> <table width="98%" border="0"> <tr><td height="140"><iframe width="100%" height="100%" src="purpose.htm"></iframe></td></tr> </table></body> </html> I've put this in the seperate theme folders because now, you can have a matching manual, for your theme, I hope I didn't forget anything, but if any problems occur, you can always ask here... The only (crucial) problem is to open the links in WPI, because it doesn't seem to support inline frames...maybe the WPI-men can help me out here? Grtz...


