-
i have merged win xpsp3 & bartpe then i have edited bartpe disk in which i have renamed i386 to bart "i386 is also in xpsp3 so" edit setupldr.bin with hex edit to replace i386 with bart edit textsetup.sif with notepad & change i386 to bart then i extrat boot.img using isobuster & rename it to "bart.dat" similarly extract boot.img from xpsp3 & rename it to "xpsp3.dat" then i extrat files from xpsp3 & bartpe in same folder three files have same name i keep xpsp3 xpsp3 version then i use magic iso to creat multiboot cd with multiboot wizard cd boots well then xpsp3 works well bartpe loads well it shows booting screen then login screen of pe & then login & then suddenly it gives error " lsass.exe" & restart how to overcome this
-
i have merged win xpsp3 & bartpe then i have edited bartpe disk in which i have renamed i386 to bart "i386 is also in xpsp3 so" edit setupldr.bin with hex edit to replace i386 with bart edit textsetup.sif with notepad & change i386 to bart then i extrat boot.img using isobuster & rename it to "bart.dat" similarly extract boot.img from xpsp3 & rename it to "xpsp3.dat" then i extrat files from xpsp3 & bartpe in same folder three files have same name i keep xpsp3 xpsp3 version then i use magic iso to creat multiboot cd with multiboot wizard cd boots well then xpsp3 works well bartpe loads well it shows booting screen then login screen of pe & then login & then suddenly it gives error " lsass.exe" & restart how to overcome this
-
i use g:\cd as my root folder & my file structure is for boot files g:\cd\boot\isolinux g:\cd\boot\bartpe g:\cd\boot\xpsp3 for respective cd content g:\cd\bartpe g:\cd\xpsp3 i use isolinux.cfg as DEFAULT /boot/isolinux/vesamenu.c32 PROMPT 0 TIMEOUT 300 TOTALTIMEOUT 450 #### MENU BACKGROUND /boot/isolinux/splash.png MENU TITLE XPSP3 + BARTPE #### #### The 1st byte of the fgnd color is brightness. #### blue MENU COLOR title 1;36;44 #ff0000ff #00000000 std #### blue MENU COLOR unsel 37;44 #ff0000ff #00000000 std #### white MENU COLOR sel 7;37;40 #c0ffffff #ff000000 std #### red MENU COLOR hotkey 1;37;44 #ffff0000 #00000000 std #### green MENU COLOR hotsel 1;7;37;40 #ff00ff00 #ff000000 all #### LABEL bootc MENU LABEL ^boot from C: MENU DEFAULT KERNEL /boot/isolinux/chain.c32 APPEND hd0 LABEL bartpe MENU LABEL ^BartPE/WinPE KERNEL /boot/bartpe/bSETUPLDR.BIN LABEL xpsp3 MENU LABEL ^Unattended XP SP# Pro Installation KERNEL /boot/xpsp3/xSETUPLDR.BIN & edited SETUPLDR.BIN using hexedit & replace i386 to bartpe/i386 in case of bartpe & replace i386 to xpsp3/i386 in case of xpsp3 & rename as bSETUPLDR.BIN &xSETUPLDR.BIN & place in g:\cd\boot\bartpe g:\cd\boot\xpsp3 resp now to make cd i have used mkisofs.exe of pebuilder & created bat to automate process @ECHO OFF ECHO Starting @ (%TIME%) .... SET _VNBR_=01 SET _ROOT_=G:\cd SET CDTITLE="cd-%_VNBR_%" SET CDFILENAME="%_ROOT_%%CDTITLE%.ISO" C:\pebuilder3110a\mkisofs.exe -N -V %CDTITLE% -b isolinux.bin -d -iso-level 4 -no-emul-boot -boot-load-size 4 -boot-info-table -o "G:\ISO.iso" "G:\cd\boot\isolinux" but all this creat bootable iso of 1.44mb then i use magiciso to add other files from the cd folder & save it the image is bootable but when i try to chk it with vmware it just do nothing no error no message & no progress just processing ** please help me figureout where i have done mistake thanks in adv if u can tell me simply what to do instead of redirecting then i will really appriciate
-
i use g:\cd as my root folder & my file structure is for boot files g:\cd\boot\isolinux g:\cd\boot\bartpe g:\cd\boot\xpsp3 for respective cd content g:\cd\bartpe g:\cd\xpsp3 i use isolinux.cfg as DEFAULT /boot/isolinux/vesamenu.c32 PROMPT 0 TIMEOUT 300 TOTALTIMEOUT 450 #### MENU BACKGROUND /boot/isolinux/splash.png MENU TITLE XPSP3 + BARTPE #### #### The 1st byte of the fgnd color is brightness. #### blue MENU COLOR title 1;36;44 #ff0000ff #00000000 std #### blue MENU COLOR unsel 37;44 #ff0000ff #00000000 std #### white MENU COLOR sel 7;37;40 #c0ffffff #ff000000 std #### red MENU COLOR hotkey 1;37;44 #ffff0000 #00000000 std #### green MENU COLOR hotsel 1;7;37;40 #ff00ff00 #ff000000 all #### LABEL bootc MENU LABEL ^boot from C: MENU DEFAULT KERNEL /boot/isolinux/chain.c32 APPEND hd0 LABEL bartpe MENU LABEL ^BartPE/WinPE KERNEL /boot/bartpe/bSETUPLDR.BIN LABEL xpsp3 MENU LABEL ^Unattended XP SP# Pro Installation KERNEL /boot/xpsp3/xSETUPLDR.BIN & edited SETUPLDR.BIN using hexedit & replace i386 to bartpe/i386 in case of bartpe & replace i386 to xpsp3/i386 in case of xpsp3 & rename as bSETUPLDR.BIN &xSETUPLDR.BIN & place in g:\cd\boot\bartpe g:\cd\boot\xpsp3 resp now to make cd i have used mkisofs.exe of pebuilder & created bat to automate process @ECHO OFF ECHO Starting @ (%TIME%) .... SET _VNBR_=01 SET _ROOT_=G:\cd SET CDTITLE="cd-%_VNBR_%" SET CDFILENAME="%_ROOT_%%CDTITLE%.ISO" C:\pebuilder3110a\mkisofs.exe -N -V %CDTITLE% -b isolinux.bin -d -iso-level 4 -no-emul-boot -boot-load-size 4 -boot-info-table -o "G:\ISO.iso" "G:\cd\boot\isolinux" but all this creat bootable iso of 1.44mb then i use magiciso to add other files from the cd folder & save it the image is bootable but when i try to chk it with vmware it just do nothing no error no message & no progress just processing ** please help me figureout where i have done mistake thanks in adv
-
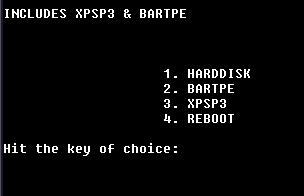
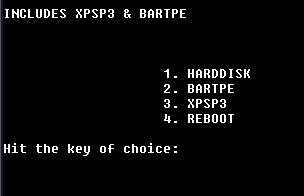
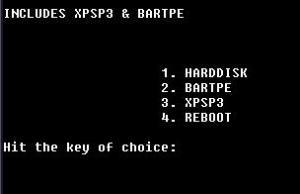
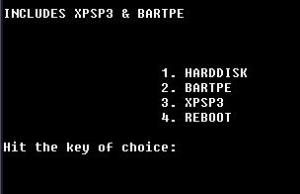
with 4 basic options 1. boot from primary harddisk 2. xp sp3 3. bart pe 4. reboot
-
combine two bootable iso images of xpsp3 & bartpe to single iso