

Asifmute
Content Type
Profiles
Forums
Events
Posts posted by Asifmute
-
-
In windows 10 VHD_XP_Setup browse Windows XP ISO button not working.
Please check screenshot.
 0
0 -
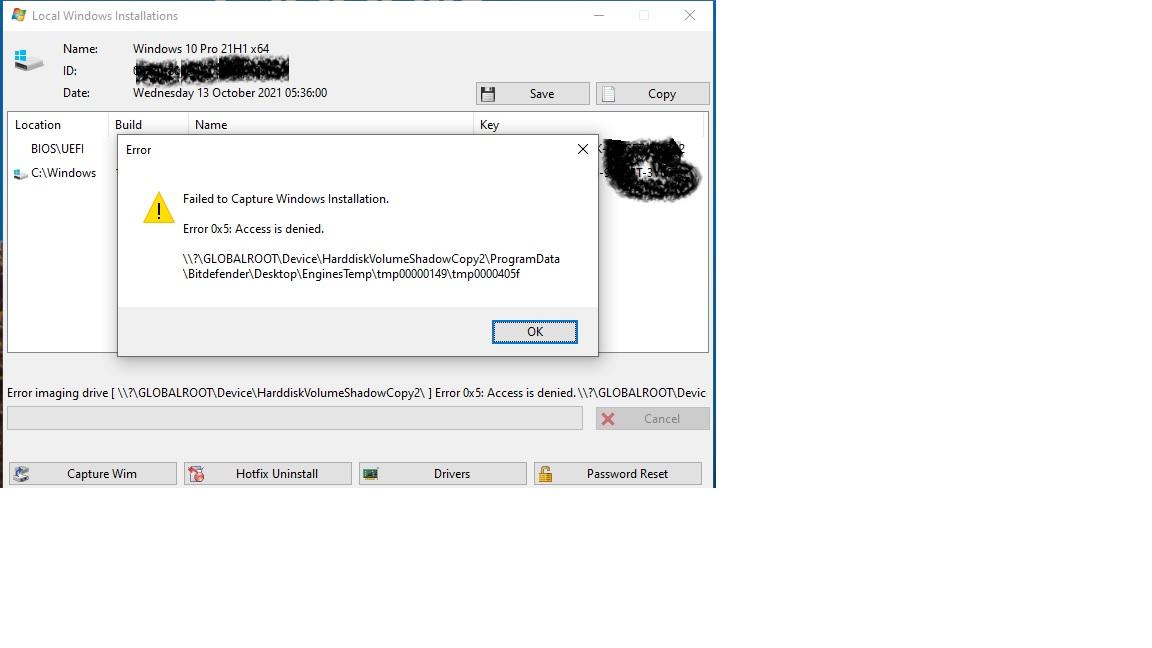
Capture windows installition Failled, for detail check screen shot.
0 -
Add MBR Repair & Backup option, Drive C Formate Only option, Add old system Parition backup option, improve Add Driver,BCD option for dual boot, Add Check ISO/WIN/ESD health option before aplying image.
0 -
May be compability issues...
But your last log files detail show that you are using VMThing app...
Driver problem is not too difficult of your laptops,the problem is SwitchMode of USB driver when plugin to other laptop...
How ever you try best I help best...
I suggest to you Make your own costumize windows 7 ISO,add desire driver of both laptop.
Regard
 0
0 -
OK.
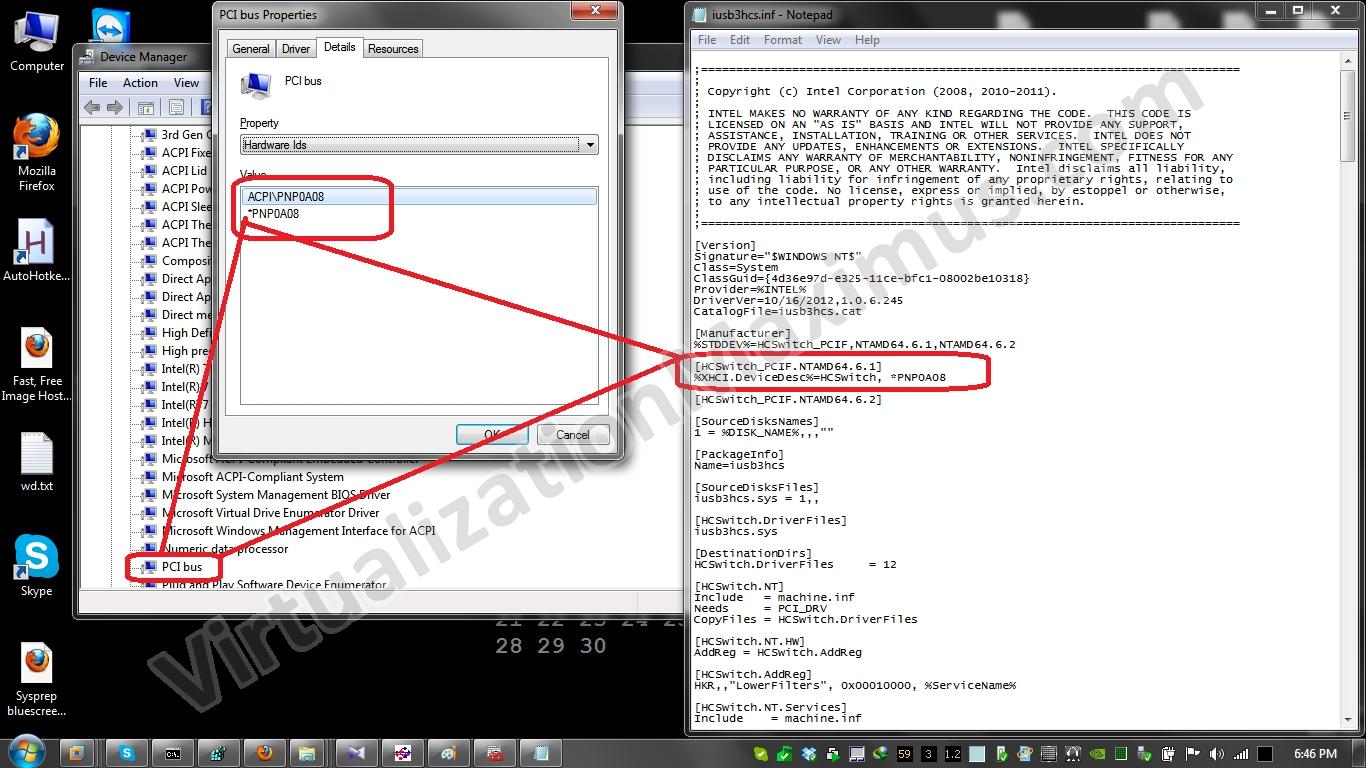
You are using VMware ThinApp, You must use HCSwitch option for installing USB 3.0 driver.
Copy paste the correct chipset driver to the WinNTSetup folder.
The above driver will change the 3.0 usb hub pririority to the auto mode for 1.1, 2.0 to 3.0 during booting.
0 -
Please describe your computer detail,have you enable VT-x/AMD-V and USB 3.0 function from bios setup.
If you have then tell me you are using Virtualbox or VHD from Windows or Window PE.
I'm going to upload the correct chipset driver for your USB 3.0 hub, if you have give me you computer specification.
May be @JFX add 3.0 USB driver and fix this bug in next version.
0 -
It will be work perfectly, If you have place the above file in correct directies.
0 -
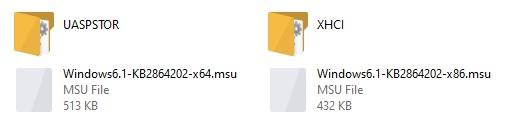
Without Search and effort. Just Download below file, extracted it to the below location.
Or you can add a DOS Batch file to install below file with a one click.
During installition WinNTSetup Programme install below driver automaticly...
C:\Users\User(Name)\WinNTLite (Extracted Path)\WinNTSetup_v4.x.x.x\Tools\Win7USB3
0 -
Then Follow this instruction...
C:\Users\User(Name)\Desire Extracted path\WinNTSetup_v463\Tools\Win7USB3
Try below link for Driver.
Password For RAR:
MDL2021
Link is ...
wait for my share of file, that will help you.
 0
0 -
If you have a little bit experince of NTLite tool, then you can copy USB3 Driver from windows 10 ISO.
Link for NTLite is...
https://www.ntlite.com/download/
This method will be helpful for your desire ISO Driver pack in windows 10.
0 -
Waiting for auto update option, and some more features in RUNDISKSCRIPT option. Or add MiniTool Partition Wizard in TOOLS folder and integarted into Menu Bar.
0 -
Improve DiskPart script,Select partition C and then create Windows RE tools partition, System partition, partition efi.
0 -
Yap!!!
0 -
On 6/10/2021 at 12:04 PM, JFX said:
WinNTSetup is fully compatible with WinPE/WinRE. Just run it once to download needed files and than copy it to your ISO || WIM.
When installing WIN10 with Winntsetup, the EFI part has a red fork (Win10 installing UEFI system installation)
0 -
On 1/31/2011 at 4:49 AM, JFX said:
Features:
- - Install Windows 2k/XP/2003/2008/2012/Vista/7/8.x/10 x86/x64
- - Practically runs even on the most minimalistic WinPE
- - Choose able drive letter for the new Windows installation
- - Install Windows also if nlite/vlite has remove winnt32.exe/setup.exe
- - Integrate Drivers: normal PNP and Textmode Drivers also
- - patch uxtheme to allow unsigned Themes
- - Some tweaks
- - Support "Windows to Go" for Windows 7 and later installs
- - Supports WimBoot option for Windows 8.1 Update 1
- - supports all current WIM files: WIM/SWM (XPRESS / LZX / XPRESS HUFFMAN = Wimboot compression)
- - supports unencrypted ESD files (LZMS compressed WIM)
Not Supported:
- - No Windows embedded version (this includes WinFLP)
-
-
No Installation onto USB disk*New* only Windows 7 and later - - No upgrades of existing installations
As some may know the last version 1.5 had only Support for Win 2000/XP/2003.
Fujianabc present an very easy approach to install Windows 7 NT 6.x fast installer
basically it's simply applying the windows image from install.wim and generating the boot files.
He also discovered that the drive letter of a Windows 7 image can be (opposed to Vista) easily changed.
So I have added that way of installing to WinNTSetup.
For the driver installation:
Every driver added in NT6.x windows will be added to the driver store.
So it's not recommended to add countless driver, but rather more really required ones.
NT5.x massstorage driver integration is possible thanks to Mr dUSHA powerful MSSTMake.exe tool
To the Unattend option:
It's possible to use an unattend.xml to run the Setup unattended.
But as the actual WinPE Setup Phase isn't effective in that way of install, all Winpe related settings inside the unattend.xml
won't be applied.
Ini config file
It's possible to save all GUI-settings to a ini file:
push Ctrl + S to save all settings to an ini.
push Ctrl + L to load all settings from an ini.
A WinNTSetup.ini file in the same dir as the app itself will be loaded automatically at startup.
It also can be selected via command line:
WinNTSetup.exe /cfg:"C:\mysettings.ini"
more command line options- nt6, nt5 or vhd have to be the first parameter all other don't require any order
- does not matters if -paramter or /Parameter
- give paths can be relative (to WinNTSetup_x??.exe)
- if a path includes spaces enclose it with " "- nt6 or nt5 - will let winntsetup know which os to install (nt6: for vista and later, nt5 for XP/2003)
- /source:(path) - defines the installation sources (for nt5 the root of the windows CD, for nt6 the install.wim file)
- /syspart:(driveletter:) - defines the driveletter you want as boot drive
- /tempdrive:(driveletter:) - defines the driveletter you want as installation drive- /unattend:(file) - defines the path of the unattend file (winnt.sif or unattend.xml)
- /drivers:(path) - defines the path to a drivers folder you want to use
- /wimindex:n - defines the edition inside install.wim which should be installed beginning with 1 (like in the combo box Edition)- /setupwait - will push the setup button and show you the proceed page
- /setup - will start the setup
- /reboot - will automaticly reboot 30 seconds after setup finished- /forceunsigned - (only for installing Windows 7) will let the driver integration accept unsigned drives
- /testsigning - will set testsigning flag for the new Windows installation
- /disableuac - will disable User Account Control- /Sysletter:{Letter} - will define the systemdrive letter the new windows installation will have
- /SaveDriveLetters - will save the current driveletter assaignment for the new windows installation
- /Uxtheme - will patch the uxtheme related dll's to enable the use of custom msstyles files
- /nobootsect - will not update BootSector and Master Boot Record- /DisableHiberBoot - disable the fast boot feature of Windows 8, that can cause trouble in multiboot enviroments
- /DisableHibernate - disable the hibernate functions
- /DisableSystemRestore - disable the system restore functions
- /DisablePagefile - disable the virtual memory and the pagefile.sys file
- /DisableSFC - disable the system file protection of windows xp
- /RunAfter:{command} - will run a command before reboot- /OEM:(path) - defines a custom $OEM$ folder
- /DisableVHDChecks - Disables all setup checks for VHD partitions
- /cfg:{inifile} - load settings from ini file
- /lng:nnnn - loading a different language file
- /bcd:{type} - select the firmware type to be set with bcdboot {ALL | BIOS | UEFI}- /wimboot - will not apply the install.wim, but instead create pointer files
- /compact:{type} - uses system comprresion of Windows 10
[xpress4k | xpress8k | xpress16k | lzx}- /wimlib - will use wimlib instead of wimgapi to handle wim files,
requires to have wimlib dll files inside Tools\x??\wimlib- /regtweaks:(path) - let you set a folder with *.reg files that will be merged into the installation
- /noreg - does not make any changes to the registry of the new windows installation
- /ref:{filter} - disables interal search for reference WIMs and uses a custom filter
- /wbc:{wimboot.ini} - use a custom wimbootcompressed.ini for Wimboot
- /timeout:{n} - use a custom timeout for the bootmenu (default = 30)
- vhd-create- /File:{path} - defines the full path for the new VHD file
- /Size:{size} - defines the size in MB or GB (ex. 25600MB or 25GB)
- /Type:{type} - defines the type of VHD: fixed, expandable or fixedfast---- optional ----
- /Label:{Label} - label for the vhd partition
- /Alig:{Alig} - Allignment (32|64|128|256|512|1024|2048) of the partition
- /Allo:{Allo} - Allocation unit (512|1024|2048|4096|8192|16K|32K|64K) of the partition- vhd-attach - attach a VHD to system
/File:{path}- vhd-detach - detach a VHD from system
/File:{path}examples:
- Install Windows7 Ultimate (usually Wimindex 5) to drive C:, using unattend.xml file and define driver to integrate.
Use 😄 as driveletter for the new Win installation, run set_7_usb_boot.cmd before rebooting
WinNTSetup_x86.exe NT6 -source:G:\sources\install.wim -WimIndex:5 -syspart:C: -tempdrive:C: -unattend:"unattend\Win7x86_Ultimate_en.xml"-ForceUnsigned -drivers:"D:\driver_Win7x86" -Sysletter:C -RunAfter:"set_7_usb_boot.cmd C:\windows" -setup -reboot
- Install Windows XP to drive D:, where boot drive is C:, using unattend file [app dir]\unattend\winnt.sif,
integrate drivers [app dir]\XP_drivers, finsih install and reboot. But does not change MBR and BPR
WinNTSetup_x86.exe NT5 -source:E:\XPCD -syspart:C: -tempdrive:D: -unattend:"unattend\winnt.sif" -drivers:"XP_drivers" -setup -reboot -nobootsect
- creating a 25GB fixed VHD file
WinNTSetup_x86.exe vhd-create -File:"C:\my.vhd" -Size:25GB -Type:fixed
-attach vdisk "C:\my.vhd"
WinNTSetup_x86.exe vhd-attach-File:"C:\my.vhd"
-detach vdisk "C:\my.vhd"
WinNTSetup_x86.exe VHD-detach -File:"C:\my.vhd"To install Windows in a VHD file:
- requires Windows 7 as OS and Windows 7 Ultimate, Enterprise or Server 2008 R2 as Source
- create a partitioned VHD and assign a drive letter (push Ctrl + Shift + V to use build in diskpart wrapper for this)
- select the VHD drive as installation drive (make sure you boot drive ist a active primary partition on a physical disk)
If you get an Antivirus warning from your AV software, please report it to them as a false positive and let them check it.
Current Version: 4.6.30 -
Is there will be support for windows 10X, I installed in Windows 10X Dev version, but StartIsBack got crashesh, any support in next version.
0 -
I mean make it like windows ISO, which can bootable.
0 -
Can you Make PE version of this application, which run from ISO file.
0

WinNTSetup v5.3.4
in Install Windows from USB
Posted
Windows XP setup has problem of blue screen. I have configure BIOS SATA to IDE option, but problem still occur.
I used WinNTSetup_v425_WinXP_Supported for XP installition. Any solution.