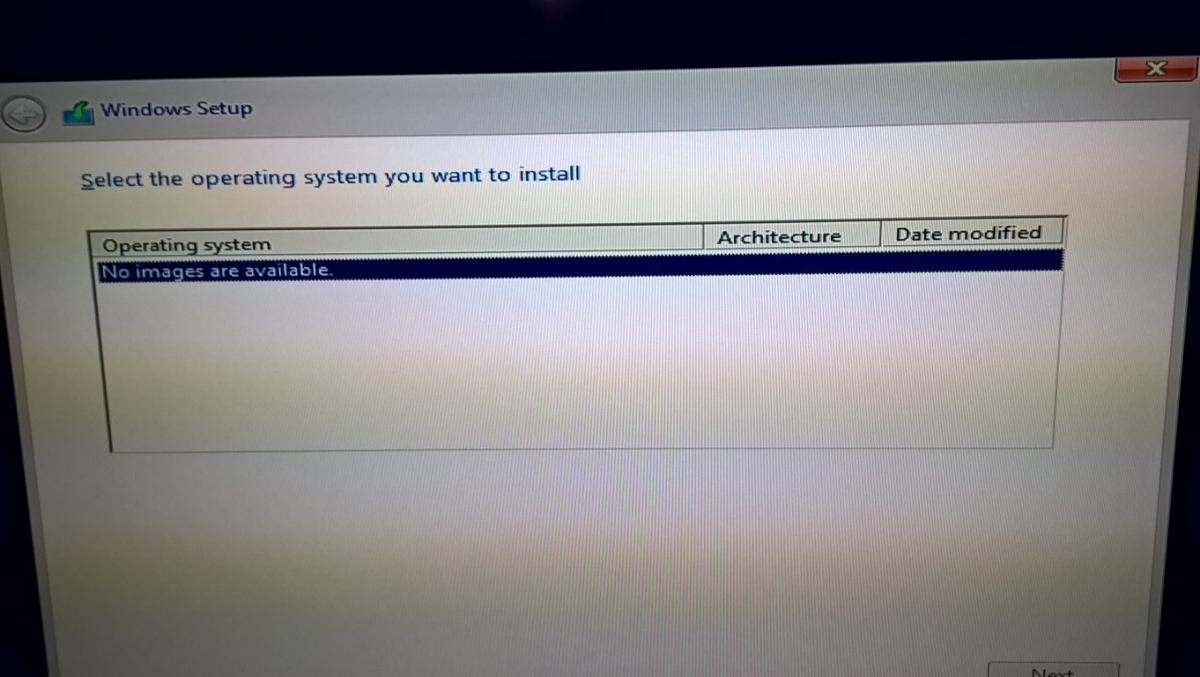
I have problem to install Windows 10 with an unattended xml file. Following error message appear "No images are available." Below the text is the content of my unattended xml file. I have also attached an picture about error message. Can someone help me with this problem? <?xml version="1.0" encoding="utf-8"?>< unattend xmlns="urn:schemas-microsoft-com:unattend"><settings pass="windowsPE"><component name="Microsoft-Windows-International-Core-WinPE" processorArchitecture="amd64" publicKeyToken="31bf3856ad364e35" language="neutral" versionScope="nonSxS" xmlns:wcm="http://schemas.microsoft.com/WMIConfig/2002/State" xmlns:xsi="http://www.w3.org/2001/XMLSchema-instance"><SetupUILanguage><UILanguage>en-GB</UILanguage></SetupUILanguage><InputLocale>fi-FI</InputLocale><SystemLocale>en-GB</SystemLocale><UserLocale>fi-FI</UserLocale><UILanguage>en-GB</UILanguage></component><component name="Microsoft-Windows-Setup" processorArchitecture="amd64" publicKeyToken="31bf3856ad364e35" language="neutral" versionScope="nonSxS" xmlns:wcm="http://schemas.microsoft.com/WMIConfig/2002/State" xmlns:xsi="http://www.w3.org/2001/XMLSchema-instance"><DiskConfiguration><WillShowUI>OnError</WillShowUI><Disk wcm:action="add"><CreatePartitions><CreatePartition wcm:action="add"><Size>350</Size><Type>Primary</Type><Order>1</Order></CreatePartition><CreatePartition wcm:action="add"><Extend>true</Extend><Order>2</Order><Type>Primary</Type></CreatePartition></CreatePartitions><ModifyPartitions><ModifyPartition wcm:action="add"><Order>1</Order><Active>true</Active><Format>NTFS</Format><Label>System</Label><PartitionID>1</PartitionID></ModifyPartition><ModifyPartition wcm:action="add"><Format>NTFS</Format><PartitionID>2</PartitionID><Order>2</Order><Label>Windows</Label></ModifyPartition></ModifyPartitions><DiskID>0</DiskID><WillWipeDisk>true</WillWipeDisk></Disk></DiskConfiguration><ImageInstall><OSImage><InstallTo><DiskID>0</DiskID><PartitionID>2</PartitionID></InstallTo><WillShowUI>OnError</WillShowUI></OSImage></ImageInstall><UserData><ProductKey><WillShowUI>Never</WillShowUI><Key>11111-22222-33333-44444-55555</Key></ProductKey><AcceptEula>true</AcceptEula></UserData></component></settings><settings pass="oobeSystem"><component name="Microsoft-Windows-Shell-Setup" processorArchitecture="amd64" publicKeyToken="31bf3856ad364e35" language="neutral" versionScope="nonSxS" xmlns:wcm="http://schemas.microsoft.com/WMIConfig/2002/State" xmlns:xsi="http://www.w3.org/2001/XMLSchema-instance"><AutoLogon><Password><Value>dABlAHMAdABQAGEAcwBzAHcAbwByAGQA</Value><PlainText>false</PlainText></Password><Username>Admin</Username><Enabled>true</Enabled></AutoLogon><OOBE><HideEULAPage>true</HideEULAPage><HideWirelessSetupInOOBE>true</HideWirelessSetupInOOBE><SkipMachineOOBE>true</SkipMachineOOBE><NetworkLocation>Other</NetworkLocation></OOBE><UserAccounts><LocalAccounts><LocalAccount wcm:action="add"><Password><Value>dABlAHMAdABQAGEAcwBzAHcAbwByAGQA</Value><PlainText>false</PlainText></Password><Name>Admin</Name><Group>Administrators</Group></LocalAccount></LocalAccounts></UserAccounts><TimeZone>(GMT+02:00) Helsinki, Kiev, Riga, Sofia, Tallinn, Vilnius</TimeZone><DisableAutoDaylightTimeSet>false</DisableAutoDaylightTimeSet></component></settings><settings pass="specialize"><component name="Microsoft-Windows-Shell-Setup" processorArchitecture="amd64" publicKeyToken="31bf3856ad364e35" language="neutral" versionScope="nonSxS" xmlns:wcm="http://schemas.microsoft.com/WMIConfig/2002/State" xmlns:xsi="http://www.w3.org/2001/XMLSchema-instance"><ComputerName>Computer</ComputerName><TimeZone>FLE Standard Time</TimeZone></component></settings><cpi:[attachment=40019:Pic.jpg][attachment=40019:Pic.jpg]offlineImage cpi:source="wim:c:/installation/win10/install/sources/install.wim#Windows 10 Pro Technical Preview" xmlns:cpi="urn:schemas-microsoft-com:cpi" />< /unattend>