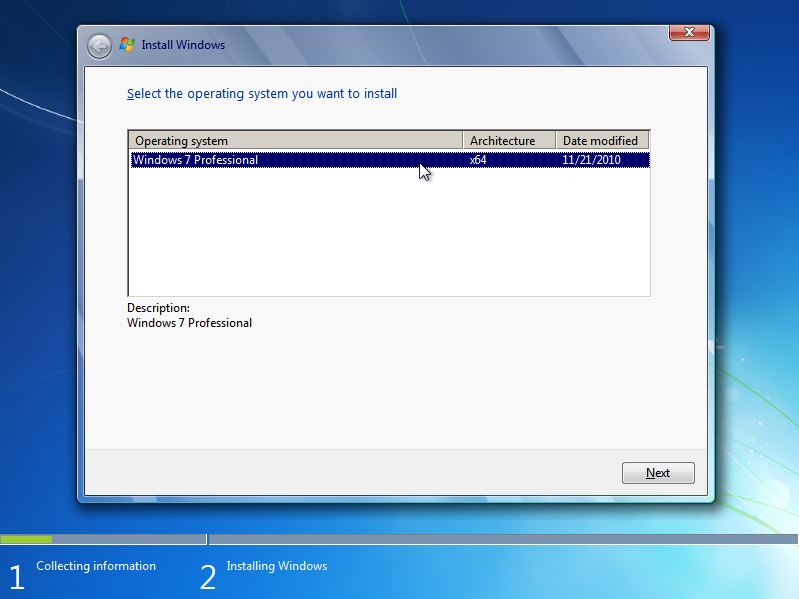
I am attempting to create an image for silent installation of Windows 7 Professional x64. I have created the answer file as instructed from Step-by-Step: Basic Windows Deployment for IT Professionals page. I have placed the Autounattend.xml file in the root directory of the iso installation file. On installation the answer file is being detected but no matter what I try it keeps asking me to choose an operating system. Am I missing something? I am about to tear my hair out. Can anyone please help? <?xml version="1.0" encoding="utf-8"?><unattend xmlns="urn:schemas-microsoft-com:unattend"> <settings pass="windowsPE"> <component name="Microsoft-Windows-International-Core-WinPE" processorArchitecture="amd64" publicKeyToken="31bf3856ad364e35" language="neutral" versionScope="nonSxS" xmlns:wcm="http://schemas.microsoft.com/WMIConfig/2002/State" xmlns:xsi="http://www.w3.org/2001/XMLSchema-instance"> <SetupUILanguage> <UILanguage>en-US</UILanguage> </SetupUILanguage> <InputLocale>en-US</InputLocale> <SystemLocale>en-AU</SystemLocale> <UILanguage>en-US</UILanguage> <UserLocale>en-AU</UserLocale> </component> <component name="Microsoft-Windows-Setup" processorArchitecture="amd64" publicKeyToken="31bf3856ad364e35" language="neutral" versionScope="nonSxS" xmlns:wcm="http://schemas.microsoft.com/WMIConfig/2002/State" xmlns:xsi="http://www.w3.org/2001/XMLSchema-instance"> <DiskConfiguration> <Disk wcm:action="add"> <DiskID>0</DiskID> <WillWipeDisk>true</WillWipeDisk> <CreatePartitions> <CreatePartition wcm:action="add"> <Order>1</Order> <Size>100</Size> <Type>Primary</Type> </CreatePartition> <CreatePartition wcm:action="add"> <Extend>true</Extend> <Order>2</Order> <Type>Primary</Type> </CreatePartition> </CreatePartitions> <ModifyPartitions> <ModifyPartition wcm:action="add"> <Active>true</Active> <Format>NTFS</Format> <Label>System</Label> <Order>1</Order> <PartitionID>1</PartitionID> </ModifyPartition> <ModifyPartition wcm:action="add"> <Format>NTFS</Format> <Order>2</Order> <PartitionID>2</PartitionID> <Letter>C</Letter> </ModifyPartition> </ModifyPartitions> </Disk> <WillShowUI>OnError</WillShowUI> </DiskConfiguration> <ImageInstall> <OSImage> <InstallFrom> <Path>install.wim</Path> <MetaData wcm:action="add"> <Key>/image/index</Key> <Value>1</Value> </MetaData> </InstallFrom> <InstallTo> <DiskID>0</DiskID> <PartitionID>2</PartitionID> </InstallTo> <InstallToAvailablePartition>false</InstallToAvailablePartition> <WillShowUI>OnError</WillShowUI> </OSImage> </ImageInstall> <UserData> <AcceptEula>true</AcceptEula> </UserData> </component> </settings> <settings pass="oobeSystem"> <component name="Microsoft-Windows-Deployment" processorArchitecture="amd64" publicKeyToken="31bf3856ad364e35" language="neutral" versionScope="nonSxS" xmlns:wcm="http://schemas.microsoft.com/WMIConfig/2002/State" xmlns:xsi="http://www.w3.org/2001/XMLSchema-instance"> <Reseal> <Mode>Audit</Mode> </Reseal> </component> <component name="Microsoft-Windows-Shell-Setup" processorArchitecture="amd64" publicKeyToken="31bf3856ad364e35" language="neutral" versionScope="nonSxS" xmlns:wcm="http://schemas.microsoft.com/WMIConfig/2002/State" xmlns:xsi="http://www.w3.org/2001/XMLSchema-instance"> <OOBE> <HideEULAPage>true</HideEULAPage> <ProtectYourPC>1</ProtectYourPC> </OOBE> <TimeZone>AUS Eastern Standard Time</TimeZone> </component> </settings> <cpi:offlineImage cpi:source="wim:c:/windows7professional/sources/install.wim#Windows 7 Professional" xmlns:cpi="urn:schemas-microsoft-com:cpi" /></unattend>