

mg.eggink
Content Type
Profiles
Forums
Events
Posts posted by mg.eggink
-
-
Hi,
I use a USB-stick (Sandisk Cruzer)
Jaclaz is right. Making a bootable USB-stick with "HP Windows Format Utility for USB Drive Key" works
I used version 2.00 and formatted NTFS.
I had no success with FAT32.
Changing BIOS-settings did not solve the asking for "missing" SP3-files
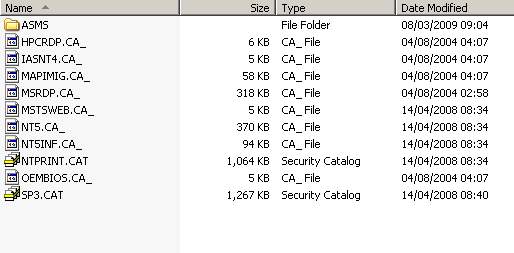
Screenshot shows file names of "missing" files.
After setting BIOS-setting back to HD-boot something strange happened.
I can not install XP now from the same USB-stick!!.
Booting is OK, files are transfered, but at reboot HAL.DLL is missing.
 0
0 -
Hi, nice topic!!
it worked for me with a Nlite-XP with a USB-stick.
Additions:
-- Formated USB to NTFS. Can for example be done with Paragon Partition Manager
Fat32 might also work, will test later
-- bootsect.exe is a Vista-file
-- made a cmd-file with entries
bootsect.exe /nt52 i: (i:=USBdisk)
pause
and used it ;-)
-- Copied complete NLited"-cd to USB
-- Copied SETUPDLR.BIN and NTdetect.com from \i386
-- Renamed SETUPDLR.BIN to ntldr
-- Copied txtsetup.sif from \i386 to \ and deleted txtsetup.sif in \i386
-- In txtsetup.sif renamed all i386 --> $win_nt$.~BT except "Driver cache \i386" and "Architecture i386"
-- In txtsetup.sif added SetupSourceDrive =device\harddisk1\partition1 ( in my case USB is disk1 )
-- renamed \i386 to \ $win_nt$.~BT
-- Booted from USB
Installation went OK, but it asked about ten times for a directory ( I typed d:\$win_nt$.~BT to continue).
All related to files from PS3.
Maybe I have to rename the "Driver cache"-entry also
MGE
0 -
Hi Killerholic,
I finally have a 16Gb Sandisk and managed to install a 200 MB ISO ( XP-lite)
All works fine, 14.7 GB "harddisk" left.
Only difference is that I used a Sandisk Cruzer MICRO
MGE
0 -
Look here: http://www.msfn.org/board/index.php?showtopic=125138
I suppose this also is applicable for Sandisk-sticks.
"I managed to write a 1.5 Gb-ISO to the USB-stick 163/165-type. A Vlited Vista-image with additional
programs added with Magic Iso Maker.
4GB is the maximum possible because it is in CDFS-format"
So the ISO should not exceed 4Gb.
MGE
0 -
Thanx,
this is 1.4.0.2 also:
http://www.verbatim.com/downloads/U3/u3upd...verbatim_us.exe
I believe almost all mentioned here:
http://www.mydigitallife.info/2007/05/24/r...sh-smart-drive/
are 1.4.0.2 although they are named 1.0.5.5
MGE
0 -
Hi,
http://www.u3.com/support/default.aspx
par 7 and 3 may work..
or : http://www.mydigitallife.info/2007/05/24/r...sh-smart-drive/
I saw that the Memorex-site changed, I can not find the Memorex LaunchPad Updater v1.4.0.2 .
MGE
0 -
-
Here is part2: Ufddll3050
0 -
How to create a bootable CDROm partition on UT163/165 USB-sticks
I used an A-Data stick: 2 and 8 GB with UT165 chipset.
This one: http://www.adata-group.com/en/product_show...uctNo=AP08120BU
Others with UT163 or UT165 chipsets can be found here:
http://www.flashboot.ru/index.php?name=iflash
Download UDFUtility from www.biwin.com.cn
->custom support->download->UT165 win98 (!!)-> tool
or from www.ao-lab.com
run Setup.
Choose CD-image program. It is a Cd-writer-icon but is called "Autorun Manager".
The program is not "perfect"
It creates ISO-files but if you want to write a self created (bootable) ISO
this ISO should be in the root of a disk. Otherwise it can not be selected (in XP).
Caution: The write process is (extremely) slow!!
I managed to write a 1.5 Gb-ISO to the USB-stick. A Vlited Vista-image with additional
programs added with Magic Iso Maker.
4GB is the maximum possible because it is in CDFS-format
MGE
PS: Actualy after installation the program files are in : Windows\UfdApp
The files : UCDExec.exe and Ufddll.dll are all you need.
I do not know the function of this program (win98??): UCDExec_o.exe
PS2: File selection is easier with version 3.0.50. With 3.0.50 you can choose an ISO in a subdir
UCDexec from 3.0.50 is attached.
0 -
Jaclaz,
i completely agree on referencing and have references in earlier posts.
However the Vista-method can be found on hundreds of sites.
For example here:
http://www.realtime-vista.com/general/2007...e_to_boot_f.htm
http://windowsitpro.com/article/articleid/...dows-vista.html
http://www.vistaheads.com/forums/microsoft...hijfbeheer.html
https://www.computercare.ca/forum/showthread.php?t=2168
So I do not know who is the original author, sorry
MGE
0 -
dear Jaclaz,
just for the record
Google on "5. select partition 1 6. active 7. format fs=fat32"
and you ill see another 3139 matches...
mge
0 -
Hi mmafterme,
the cdfs-format has a maximum of 4Gb. Lager does not work
Hi Renaud91
if you already have vista installed, making a bootable Vista install-disk is easy.
Found this:
STEP-BY-STEP INSTRUCTIONS
Here's some step-by-step instructions on how we do this,
1. Acquire an ultra-fast USB 2.0 flash drive
2. Format USB Drive
3 Run CMD.EXE and type the following.
Note: This set of commands assumes that the USB flash drive is addressed as "disk 1".
you should double check that by doing a list of the disks (type "list disk") before cleaning it.
If you have multiple hard drives, like an SDFlash drive or a Multibay drive,
you could end up wiping your second drive using this command.
1. diskpart
2. select disk 1
3. clean
4. create partition primary
5. select partition 1
6. active
7. format fs=fat32
8. assign
9. exit
4 Copy Windows Vista's DVD ROM content to the Flash Drive
Simply issue the following command to start copying all the content from the Windows Vista DVD to your newly formatted high speed flash drive.
* xcopy d:\*.* /s/e/f e:\
Boot up the machine, have it boot off the USB drive, and watch how fast the installation completes.
mge
0 -
Use a Sandisk Cruzer with U3 and start reading here:
http://www.msfn.org/board/Install-XP-from-...th-t121502.html
MGE
0 -
Hi, thanks for the feedback Downloader34
I have tested a Vlite Vista-ISO ( 696MB) with modified U3 Launchpad v1.4.0.2 Updater
on a Cruzer 2Gb.
Installing went wthout any problem!!!.
MGE
0 -
Hello,
Renaud: thanx for the additions.
I tested on a Vostro 200 and used the F12-key in pre-boot-time to select the USB-CDROM
I suppose Vista will work with Vlite. Vlite creates a CDROM-iso. But I have not tested it.
Zach_H:
You can easely add other files to the ISO with Nlite or MagicISO ea
After reading the warnings of Jaclaz I would prefer method 2: build your own installer.
MGE
0 -
Hi Floppy,
I am not an expert, but found this:
" The CD-ROM file system (CDRFS) is a read-only local file system implementation under the logical file system (LFS) layer. The CDRFS is stored on CD-ROM media. The DVD-ROM file system (UDFS) is a read-only file system stored on DVD-ROM media."
Maybe that is the reason for your usb-stick boot problem.
With Nlite you can easily create a bootable CDROM ISO
MGE
0 -
Hi Floppy,
you wrote this earlier:
> I tried with iso only 450Mb---> The program finished ok.
> But I could not boot from pen, Message was "NO OPERATING SYSTEM"
Please test this ISO with MagicISO for bootebility.
The DVD might be OK, but you could not write it to the pen.
So that gives no information.
You succeeded to write the smaller ISO. But this one cannot boot from the pen.
So most probably the created ISO itself is not booteble.
That's why I asked to test this ISO for bootability.
MGE
0 -
Dear Floppy,
I understood you question but do not know a program or method to show if the stick is bootable.
Please let me know if your ISO was/is bootable before you wrote it to the Sandisk
by testing it with for instance MagicISO.
MGE
0 -
Hi,
you can check if your ISO is bootable with programs like Magiciso.
Do this check before you write it to the stick.
Magiciso can not recognize the (files on?) theU3-CDROM.
MGE
0 -
Hi,
what operating system is used??.
I think back-up should always work correctly if the pen is recognized.
Looking at the size of you ISO it is not XP.
I have read that the original Sandisk/Memorex program version 1.0.0.8 is not Vista compatible.
That could the reason for this newer version I believe:
Memorex LaunchPad Updater v1.4.0.2 is at http://www.memorex.com/u3/upgrade_vista/ ;-)
You will have to patch it yourself as described earlier in this threat.
MGE
PS I do not know what happens is the CD-iso is bigger than a CD
0 -
Hi,
I tested on a Dell Vostro 200
MGE
0 -
More detailled info:
Installing XP from Sandisk U3 USB-stick the easy way
1) Buy a Sandisk Cruzer with U3 functionality
2) Download Universal_Customizer from here http://www.hak5.org/packages/files/Universal_Customizer.zip
Or CREATE a patched LaunchPad Updater v1.4.0.2 as decribed below.
3) Make a (Nlite slimmed) XP bootable ISO see www.Nliteos.com
Can be slimmed down to the bone. Manual install etc. can be removed.
4) Install Universal_Customizer
5) Delete U3CUSTOM.ISO in ../BIN
Optionaly delete U3CUSTOM-dir, isocreate.cmd in ../BIN and ISOCreate.cmd in root.
6) Copy selfmade ISO in ../BIN directory
Rename the ISO to U3CUSTOM.ISO, it can be any size fitting your USB-stick
7) Run Universal_Customizer.exe , follow instructions, be patient!
8) Boot from USB-CDROM and start installing XP
CREATE YOUR OWN UPDATER
*** For informational purposes only ***
*** Use at your own risk ***
*** I will not be responsible if you damage your drive ***
*** Backup Your Data ***
!!! The original instructions were found at http://usb.smithtech.us/projects/u3updater.php
1. Download the Memorex LaunchPad Updater v1.4.0.2
http://www.memorex.com/u3/upgrade_vista/
2. Download Universal Extractor
http://www.legroom.net/software/uniextract
3. Download Resource Hacker
http://www.angusj.com/resourcehacker/
4. Extract U3 Launchpad v1.4.0.2 Updater.exe to a folder with Universal Extractor
5. Open UpdaterCore.exe from the folder you extracted the LaunchPad Updater to
with Resource Hacker.
6. Expand "String Table". Expand "132". Click "1033". You should see
STRINGTABLE
LANGUAGE LANG_ENGLISH, SUBLANG_ENGLISH_US
{
2096, "Skip"
2097, "Skip All"
2098, "Retry"
2099, "Abort"
2100, "Wrong password"
2101, "%d attempt(s) before device is permanently locked"
2102, "Failed to set password. To try again, please remove your %2 and reinsert it."
2103, "%1 failed to format your %2"
2104, "Backing up your data..."
2105, "Updating the %2 firmware..."
2106, "Restoring your data ..."
2107, "Formatting your %2..."
2108, "Updating your version of the U3 Launchpad..."
2109, "1.0.5.17\n"
2110, "bin\\Launchpad.iso"
2111, "\\\\Launchpad.zip"
}
Change 2109, "1.0.5.17\n" to 2109, "_LP_VERSION_"
and 2110, "bin\\Launchpad.iso" to 2110, "bin\\U3CUSTOM.iso"
Click the Compile Script button
This just allowed you to update the drive over and over. This fools the updater in to thinking the firmware isnt updated
7. Expand "133", Click "1033", you should see
2123, "Memorex Inc."
2124, "Memorex Inc."
2125, "Memorex"
Change the values to:
2123, "*"
2124, "*"
2125, "*"
Click the Compile Script button
8. Expand "BIN", Expand "709", Click on "0", you should see
<vendorId value="2284"/>
<vendorName value="Memorex"/>
<productName value="Mini TravelDrive"/>
<productId value="22"/>
Change the values to:
vendorId value="*"/>
<vendorName value="*"/>
<productName value="*"/>
<productId value="*"/>
Click the Compile Script button
9. Click File and Save
10. Delete Updater.pdb
11. Delete the LaunchPad.iso file in the bin subdirectory and place to one of your own
Rename it to U3CUSTOM.iso
12. Run CoreUpdater.exe to install the U3CUSTOM.iso to your U3 Drive,
follow instructions, be patient!
13. Boot from USB-CDROM and start installing XP
***Again do this at your own risk, I will not be responsible if you fry your drive, but
it worked perfectly for me on a Sandisk micro cruzer 2GB***
0 -
Dear Jaclaz,
I responded to quick.
To the ISO's you are right. The one called U3custom is replaced by the users-self--made-iso,
but to be safe:
The user can remove u3custom.iso before copying his own, but dummy.iso should stay in place for the program to function.
To be more safe he can also completely remove the U3Custom-directory, Isoimage.exe from ../bin and ISOCreate.cmd in the ..dir
And of course :always use a self-prepared ISO.
I have looked a little bit further in the program.
The author is called: Tyrone Davis (U3Hacker) But I cannot find another website, with more commands/instructions.
As far as I can see it is a patched Memorex Launchpad Updater 1.0.0.8
The dummy.iso is in the ../bin from this version also and same size.
Patching is done in the way described here:
http://usb.smithtech.us/projects/u3updater.php
On the "downgrade" I can not comment because I reinstalled from the SandiskU3-website and it worked.
FYI: I used a Sandisk Micro Cruzer 2GB. Fresh out of the box.
But maybe it was in the store for ages ;-)
MGE
0 -
Dear Jaclaz,
i have worked with Universal_Customizer several times.
I have been writing SAFE ISO's to the stick and reinstalled U3. All worked fine.
Just give it a try before scaring poeple with "swichblade"-articles or wathever they are called
MGE
0
Guide - Install WinXP From HDD or USB Drive Or CD
in Install Windows from USB
Posted · Edited by mg.eggink
Hi thestonegroover
I had the same with endless reboot and install.
I use a Dell Vostro. When I select USB-stick as first boot device in Bios Setup (Dell =F2) it reboots and installs over and over.
Choosing the boot-device USB-disk during booting ( Dell= F12) it went Ok and restarted from the original HD.
MGE